


CalreC
Putting Sound in the Picture
89
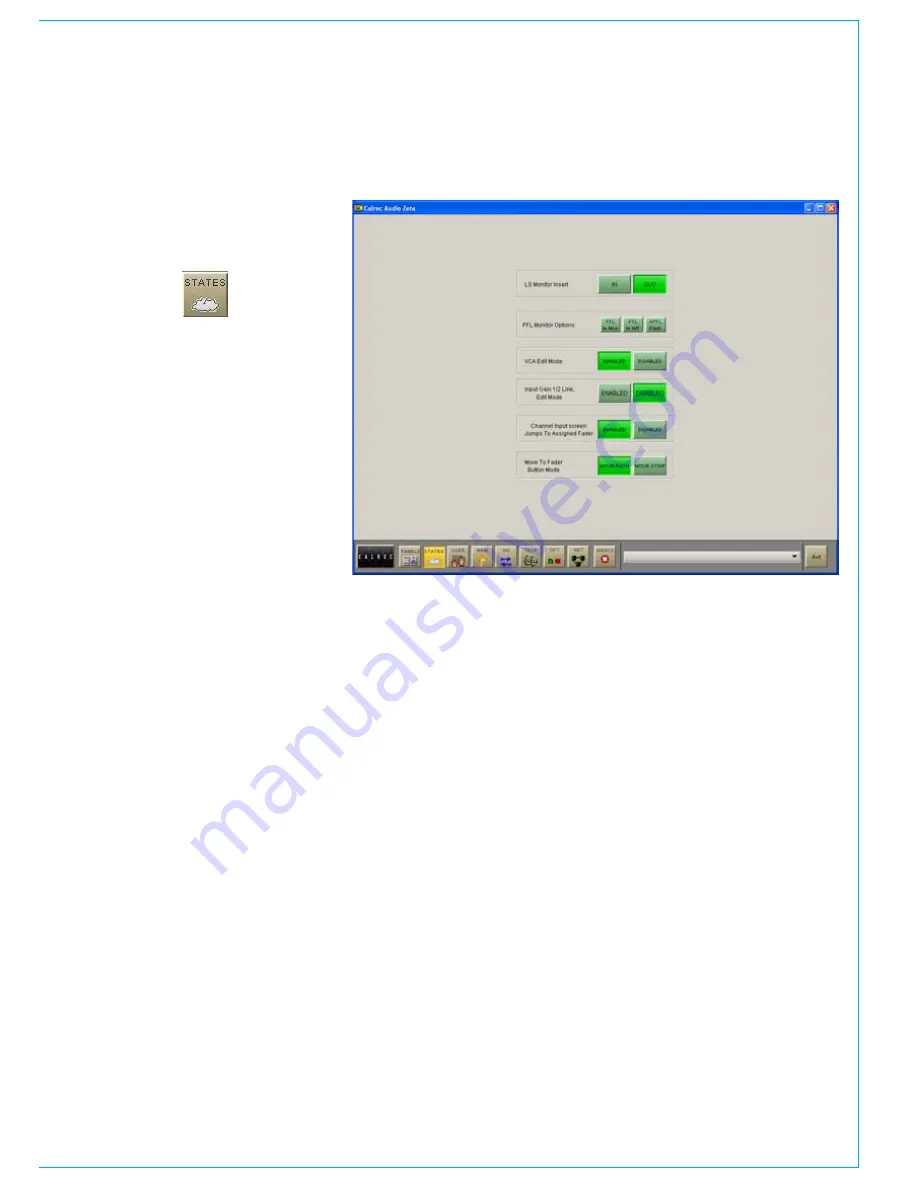
the States Screen allows different
console behaviours to be enabled
and disabled.
LS Monitor Insert
The LS Monitor insert can be switched
in and out using the buttons on this
screen. Return ports for the LS monitor
insert are patched on the Options - MON
TB + Tone - External Inputs screen.
The send ports are patched on the I/O
- Outputs - Mon TB & Osc Screen.
PFL Monitor Options
If PFL TO MON is selected PFL feeds
the control room loudspeaker (CRLS)
outputs (post the surround panning
controls), overriding the LS Selector.
When PFL to MON is not selected, PFL
overrides the Small LS.
Alternatively, there can be a separate
stereo PFL LS output.
An external RTB input can mix with
PFL to the PFL LS output. PFL from
surround mains is a stereo downmix of
the surround signal.
PFL to H/P feeds the PFL signal to the
headphones.
APFL Flash enables or disables the
flashing of the APFL indicator on the
Broadcast Facilities panel.
VCA Group Editing
The editing of VCA groups is enabled
and disabled using the buttons on this
screen. This provides protection against
accidental changes.
StateS
Input 1 and 2 Gain Linking
The gains of inputs 1 and 2 can be linked
such that if either input’s gain is adjusted,
the change in gain is applied to both
inputs. This is done using buttons 1 and 2
in the Input/Output section of the control
surface, but first, this behaviour has to be
enabled and disabled using the buttons
on this screen.
Channel Inputs Screen Scrolling
The I/O - Input - Channel Inputs patching
screen can be set to scroll with the fader
assign button presses. Selecting a fader
assign button causes the screen to jump
to that fader in the patching list.
Move To Fader Button Mode
The Move Path buttons on the control
surface can be set to move the selected
path (A or B) to another fader; or they can
be set to move the entire fader strip (both
paths A and B). In both cases, any Wild
control assignments will also move with
the path.
Summary of Contents for Zeta
Page 7: ...calrec com Putting Sound in the Picture ZETA Overview...
Page 16: ...16 ZETA Digital Broadcast Production Console...
Page 17: ...Fader Area calrec com Putting Sound in the Picture ZETA...
Page 22: ...22 ZETA Digital Broadcast Production Console...
Page 23: ...calrec com Putting Sound in the Picture ZETA Inputs And Outputs...
Page 28: ...28 ZETA Digital Broadcast Production Console...
Page 29: ...calrec com Putting Sound in the Picture ZETA Console Functions...
Page 46: ...46 ZETA Digital Broadcast Production Console...
Page 47: ...calrec com Putting Sound in the Picture ZETA Memory System...
Page 52: ...52 ZETA Digital Broadcast Production Console...
Page 53: ...Metering System calrec com Putting Sound in the Picture ZETA...
Page 60: ...60 ZETA Digital Broadcast Production Console...
Page 61: ...On Screen Patching calrec com Putting Sound in the Picture ZETA...
Page 75: ...Port List Management calrec com Putting Sound in the Picture ZETA...
Page 80: ...80 ZETA Digital Broadcast Production Console...
Page 81: ...Engineering Information calrec com Putting Sound in the Picture ZETA...
Page 99: ...calrec com Putting Sound in the Picture ZETA Hydra Audio Networking...
Page 112: ...112ZETA Digital Broadcast Production Console...
Page 113: ...calrec com Putting Sound in the Picture ZETA Programming Utility...
Page 118: ...118ZETA Digital Broadcast Production Console...
Page 119: ...calrec com Putting Sound in the Picture ZETA Setup Application...
Page 131: ...calrec com Putting Sound in the Picture ZETA Appendix A Offline Editor...
Page 139: ...calrec com Putting Sound in the Picture ZETA Appendix C Version Changes...
Page 143: ...CALREC Putting Sound in the Picture 143 Notes...


