


CalreC
Putting Sound in the Picture
31
Wild Control Assignment
The Wild controls above each fader are
assigned from the User-Chan screen.
All the Assign panel rotary controls
incorporate a switch which is operated by
pushing the control. These switches are
used to assign the assign panel function to
a Wild control as follows:
Select a fader path
•
Select WILD ASSIGN 1 or 2
•
Push one Assign panel rotary control
•
The control is now assigned and changes
will show in the display. The Wild controls
“FLIP” with the fader, providing the same
function for each of the two paths. The
colour of the Wild control display will
show which fader the control is related to:
Green for A, Amber for B.
If the fader is touched instead of pushing a
rotary control, then the fader for the alternate
layer will be assigned to the Wild control.
The gains of the two inputs 1 and 2 can
be assigned separately to Wild controls, by
holding down the required input button on
the Input/Output panel before pushing the
gain adjustment rotary control.
Please note that Auxiliary output controls
cannot be assigned to Wild controls.
CLR will clear the selected Wild control
from its assignment.
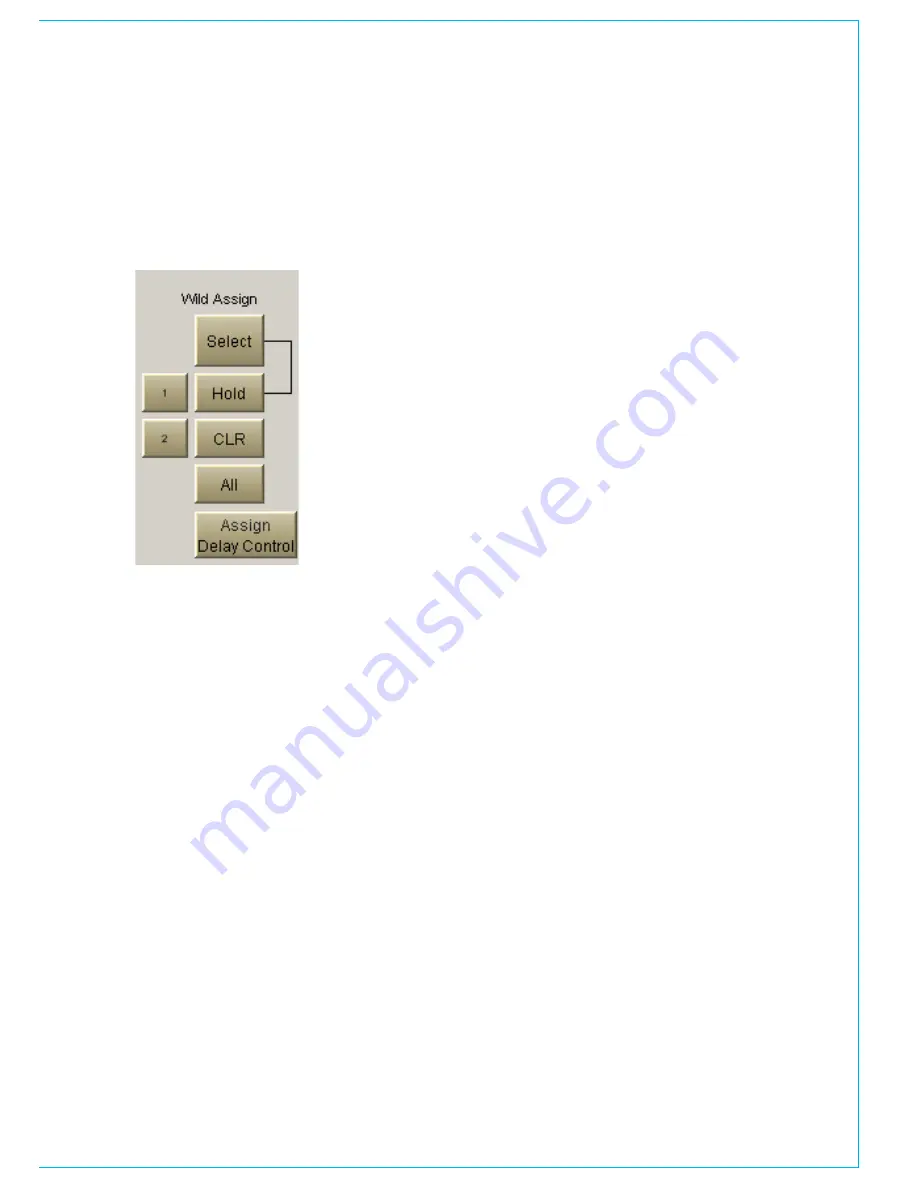
Multiple Wild Control Assignment
It is possible to assign controls to more
than one fader path at a time, either by
selecting individual fader assign buttons
(A or B), or by defining a “block” or
“Region” of faders. The button above
HOLD toggles between SELECT mode
and REGIONS mode.
In SELECT mode, select Wild 1 or 2
on the screen and HOLD. Any number
of fader paths can then be selected
individually (their fader assign buttons
will illuminate). Pushing an Assign Panel
rotary control will then assign that control
to Wild 1 or 2 for all selected fader paths.
In REGIONS mode, select Wild 1 or 2 on
the screen and HOLD. A block or region
of faders can then be defined by pressing
the fader assign buttons of the first and
last fader path in the required region.
Pushing an Assign Panel rotary control
will then assign that control to Wild 1 or 2
for all fader paths in the selected region.
CLR can be used to clear regions of
faders of their wild control assignments.
It is possible to assign the same control
to Wilds 1 and 2 for all fader paths
by selecting ALL before pushing the
required Assign panel rotary control.
If the track output level control is assigned
to a block of wild controls, each fader’s
wild control will have a different numbered
track output level control, beginning with
the track currently selected on the first
fader in the block.
Adjustment of input delay values can also
be done using Wild controls. A screen
button is provided on the User-Chan
screen., with which to assign this function.
Wild Control Push-Switch Option
If a wild control has the Aux Send, Input
Delay or Front Pan controls assigned to it,
the user can control the ON/OFF or IN/
OUT status of these controls using the
Wild control push-switch. This feature is
optional, so it can be enabled or disabled
using the OPTIONS - MISC screen.
Summary of Contents for Zeta
Page 7: ...calrec com Putting Sound in the Picture ZETA Overview...
Page 16: ...16 ZETA Digital Broadcast Production Console...
Page 17: ...Fader Area calrec com Putting Sound in the Picture ZETA...
Page 22: ...22 ZETA Digital Broadcast Production Console...
Page 23: ...calrec com Putting Sound in the Picture ZETA Inputs And Outputs...
Page 28: ...28 ZETA Digital Broadcast Production Console...
Page 29: ...calrec com Putting Sound in the Picture ZETA Console Functions...
Page 46: ...46 ZETA Digital Broadcast Production Console...
Page 47: ...calrec com Putting Sound in the Picture ZETA Memory System...
Page 52: ...52 ZETA Digital Broadcast Production Console...
Page 53: ...Metering System calrec com Putting Sound in the Picture ZETA...
Page 60: ...60 ZETA Digital Broadcast Production Console...
Page 61: ...On Screen Patching calrec com Putting Sound in the Picture ZETA...
Page 75: ...Port List Management calrec com Putting Sound in the Picture ZETA...
Page 80: ...80 ZETA Digital Broadcast Production Console...
Page 81: ...Engineering Information calrec com Putting Sound in the Picture ZETA...
Page 99: ...calrec com Putting Sound in the Picture ZETA Hydra Audio Networking...
Page 112: ...112ZETA Digital Broadcast Production Console...
Page 113: ...calrec com Putting Sound in the Picture ZETA Programming Utility...
Page 118: ...118ZETA Digital Broadcast Production Console...
Page 119: ...calrec com Putting Sound in the Picture ZETA Setup Application...
Page 131: ...calrec com Putting Sound in the Picture ZETA Appendix A Offline Editor...
Page 139: ...calrec com Putting Sound in the Picture ZETA Appendix C Version Changes...
Page 143: ...CALREC Putting Sound in the Picture 143 Notes...


