User and Programming Manual - Rev N
Procedure
1. Make sure the PGUI32 program is closed and no device is
using the com port in use.
2. From the Windows
™
desktop, right click on the “My
Computer” icon which is located in the top left corner of
the screen.
3. From the popup menu, select the “Properties” entry.
4. This brings up the System Properties dialog box
5. From the tabs shown at the top of the dialog box, select
the “Device Manager” tab.
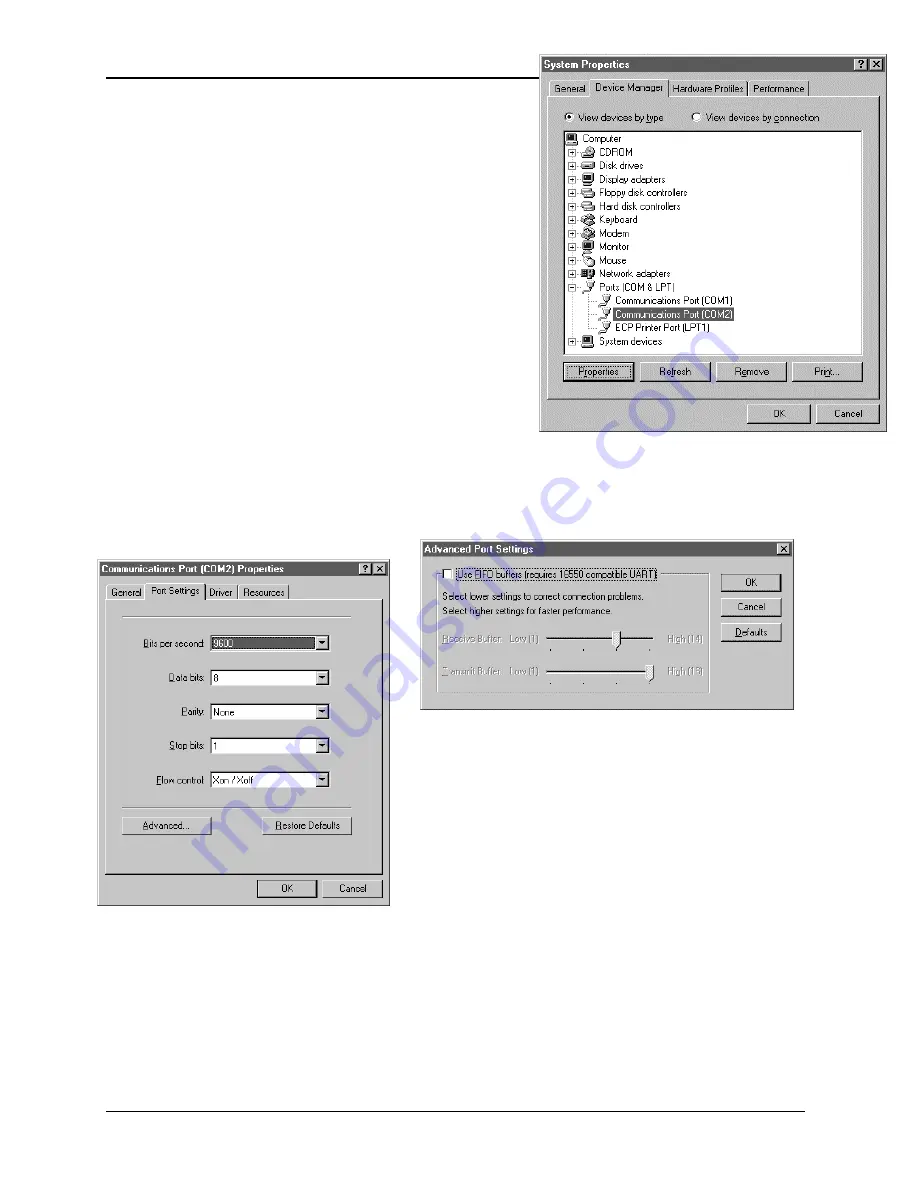
6. The relevant screen is shown in Figure 8-4.
7. Expand the Ports(COM&LPT) tree selection by clicking on
the ‘+’ sign
8. Select the COM port you plan to use to communicate with
the P or RP series power source.
9. With the correct COM port selected, click on the
Properties button at the bottom left of the dialog box.
10. This brings up the settings dialog box for the COM port. In
this example, COM2 is used.
11. From the tabs at the top of the dialog box, select the “Port Settings”
tab.
Figure 8-4: System Properties Dialog Box
12. This should bring up the dialog shown in Figure 8-6.
13. Next, select the Advanced button to bring up the advanced port settings dialog box shown in Figure
Figure 8-6: COM Port Properties Dialog Box
Figure 8-5: Advanced Port Settings Dialog Box
14. At the top of the dialog box, disable the “Use FIFO buffers
(requires 16550 compatible UART)” checkbox. This will
bypass the UART FIFO’s and enable the hardware
handshake to work correctly.
15. Click on the all OK buttons to close all dialog boxes that
remain open.
16. This should enable the PGUI32 to work correctly.
68 April
2007
2001RP
Summary of Contents for 2001RP
Page 33: ...User and Programming Manual Rev N Figure 3 7 Test Setup 2001RP 24 April 2007 2001RP...
Page 47: ......
Page 60: ...User and Programming Manual Rev N Figure 6 3 Internal Adjustments 2001RP April 2007 51...
Page 65: ...User and Programming Manual Rev N Figure 7 1 Assembly Location 56 April 2007 2001RP...
Page 68: ...User and Programming Manual Rev N Figure 7 2 Replaceable Fuse Locations 2001RP April 2007 59...
Page 70: ...User and Programming Manual Rev N Figure 8 1 Rear Panel View 2001RP April 2007 61...
Page 90: ......


