


2-25
Getting Started
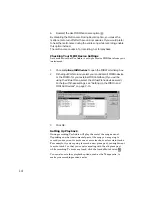
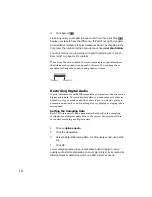
Setting Up an Audio Track
LetÕs set up a track for digital audio.
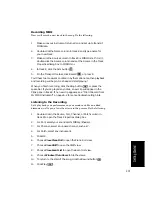
Checking the Input Levels
Before trying to record, you need to check and adjust the audio input
levels. If your audio input is too low, it will be lost in the background
noise. If it is too high, it will overload the input channel and be distorted/
clipped.
Here's how to check the audio input levels:
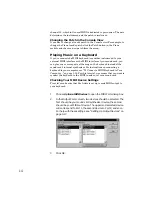
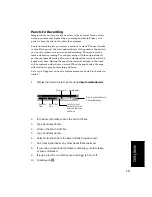
1.
In the Track pane, in the first available empty track, double-click
the Name column and enter a name for your new track.
2.
Double-click in the Source column and set the Source in the Track
Properties dialog box to your sound card’s audio input.
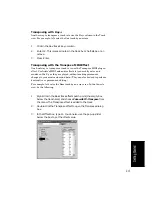
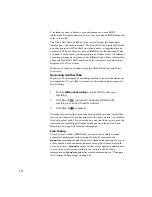
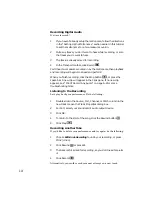
1.
Open the Console view and click the Arm button
in your new
audio track. An audio meter will appear next to the track's
volume fader.
2.
Perform as you would during recording. Watch the meters
respond to the sounds you produce.
3.
If the meters never come even close to the maximum, increase
the input level using the Windows mixer or your sound card’s
software mixer.
4.
If the meters even occasionally reach the maximum, decrease the
input level using the Windows mixer or your sound card’s
software mixer.
The idea is to try to get the input level to rise as high as possible, but
without ever reaching the maximum. That way, you get the strongest
possible signal without distortion.
If you don't see any movement of the audio meters, you may have an
audio input problem. Refer to “I Can’t Record Any Audio” on page A-4
for troubleshooting hints.
Summary of Contents for PRO AUDIO
Page 1: ...Cakewalk ProAudio User s Guide...
Page 16: ...xvi...
Page 38: ...1 20...
Page 182: ...5 34...
Page 240: ...6 58...
Page 334: ...8 48...
Page 484: ...15 16...
Page 492: ...16 8...
Page 500: ...A 8...
Page 518: ...B 18...
Page 540: ...D 6...
Page 548: ...E 8...