


ATTACHING THE EMBROIDERY FRAME
58
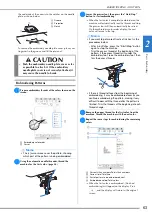
a
Press
(Presser foot lifter button) to raise the
presser foot.
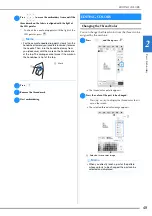
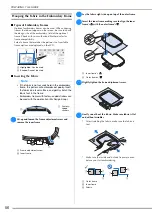
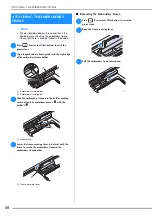
b
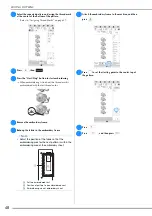
Align the embroidery frame guide with the right edge
of the embroidery frame holder.
1
Embroidery frame holder
2
Embroidery frame guide
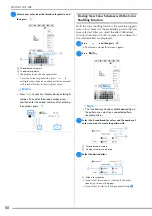
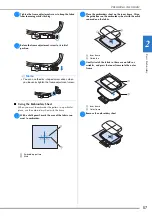
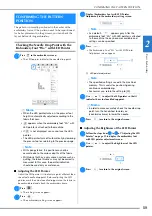
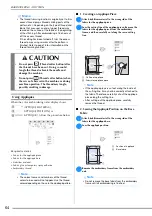
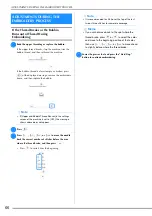
c
Slide the embroidery frame into the holder, making
sure to align the embroidery frame’s
with the
holder’s .
1
Arrow mark
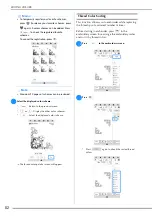
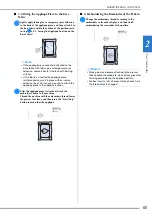
d
Lower the frame-securing lever to be level with the
frame to secure the embroidery frame in the
embroidery frame holder.
1
Frame-securing lever
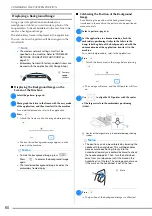
■
Removing the Embroidery Frame
a
Press
(Presser foot lifter button) to raise the
presser foot.
b
Raise the frame-securing lever.
c
Pull the embroidery frame toward you.
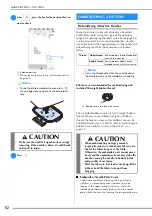
ATTACHING THE EMBROIDERY
FRAME
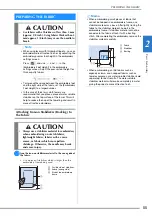
Note
• Wind embroidery bobbin thread and insert the
bobbin before attaching the embroidery frame.
Check that there is enough thread in the bobbin.
Summary of Contents for 882-W80
Page 2: ......
Page 10: ...CONTENTS 8 ...
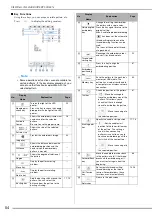
Page 34: ...CHANGING THE NEEDLE 32 ...
Page 35: ...Chapter 2 Basic Embroidery ...
Page 70: ...ADJUSTMENTS DURING THE EMBROIDERY PROCESS 68 ...
Page 71: ...Chapter 3 Advanced Embroidery ...
Page 86: ...EMBROIDERY APPLICATIONS 84 ...
Page 87: ...Chapter 4 My Design Center ...
Page 106: ...STIPPLING 104 ...
Page 107: ...Chapter 5 Appendix ...
Page 123: ......


