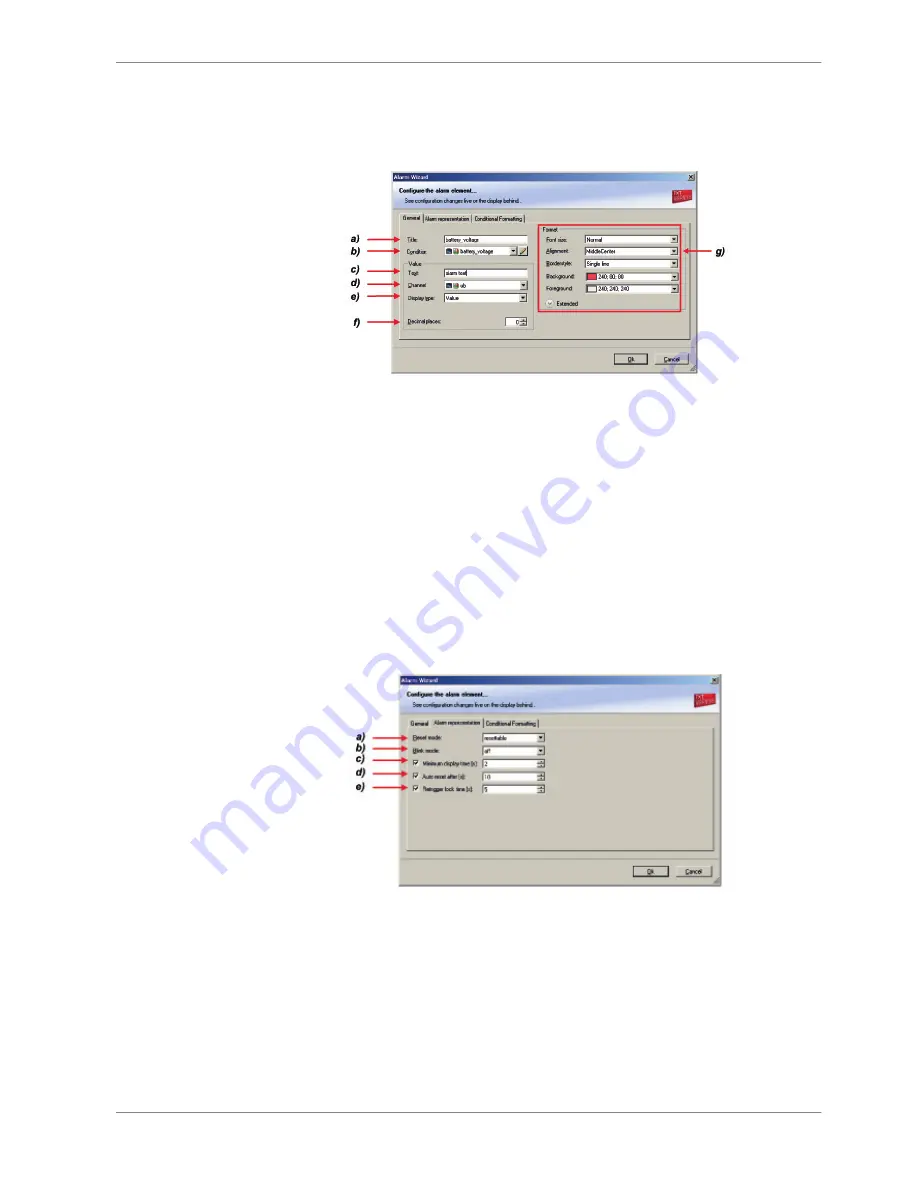
Configuring an ‘Alarm’ (text) display element
1. Double‐click on the ‘Alarm’ display element. The Alarm Wizard window
opens.
a) Enter the title displayed on top of the ‘Alarm’ display element.
b) Choose the condition when the alarm will be activated:
• Create a condition using the Condition Creator. For more information see chapter ‘Creating a
new condition channel’.
• Choose an existing condition
The Alarm is displayed if function is ‘TRUE’, i.e. result of the calculation is >0.
c) Enter the alarm message displayed in the middle of the ‘Alarm’ display element. Enter the variable
<channel value> to display the value of the measurement channel.
d) Choose the measurement channel.
e) Choose the type of input data:
• Value
• Gear
• Time (in different formats)
f) Enter the number of decimal places of the measurement channel.
g) Choose the font size, alignment, borderstyle, background and foreground color of the ‘Alarm’ display
element.
2. Switch to the tab ‘Alarm representation’.
a) Choose if the alarm can be reset or not.
b) Choose if the alarm blinks slowly, fast or does not blink.
c) Enter the minimum time the Alarm display element is displayed if an alarm is triggered.
d) Enter the time until the Alarm resets automatically after the minimum display time entered in c
(only possible if Alarm is resettable).
e) Enter the time until the Alarm can appear again after a reset.
3. Click ‘OK’ when done.
4. Copy alarm to all display pages by clicking ‘Move to’ ‐> ‘All Pages’.
Display Configuration | 8
Bosch Motorsport
DDU 8 Manual
39 / 160


