


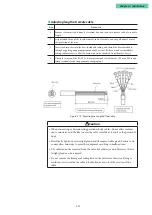

2-12
■
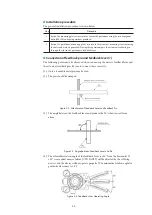
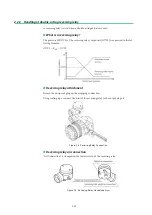
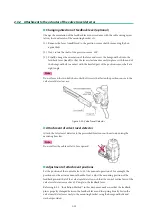
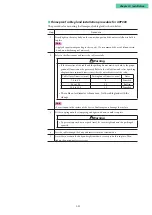
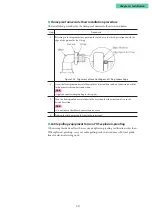
Piping procedure
The procedure for installing the air piping by which the device drives the actuator is
shown below.
Step
Procedure
1
Remove the dustproof plug on the air piping connection.
2
Connect the pipe joint to the connection.
Note
• As much as possible use sealing tape rather than solid or liquid sealant.
• Make sure that the sealing tape does not enter the pipes.
• If liquid sealant is used, make sure that it does not drip down into the interior.
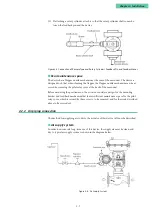
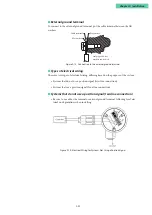
3
Connect the supply pipes and output pipes to the respective joints, taking into
consideration the care and handling of the pipes.
Note
• If a reversing relay is used, connection of the actuator to output connection OUT1 or
OUT2 is determined by valve action. Check valve action before connecting the pipes.
• Flush the pipes sufficiently before connecting them, checking for burrs and other
problems.
• Make sure that the output air piping is only as long as necessary.
4
When all piping has been completed, confirm that there are no air leaks.
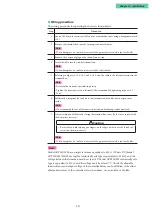
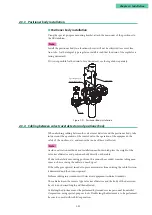
2.2.4 Electrical Wiring Connection
The electrical wiring methods for the signal input from the controller and the output
signal to the receiver will now be described.
Warning
•
Be sure to perform piping work with the power supply turned off.
•
Be sure to follow local electrical work guidelines when performing installation work.
•
When using an explosion-proof device in a hazardous area, be sure to install pipes
in accordance with Chapter 6, “Cautions Regarding Explosion-Proof Models.”
•
Be sure to attach blind caps to and completely close off conduit connections that are
not being used.
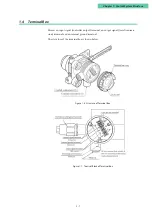
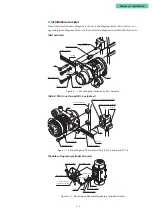
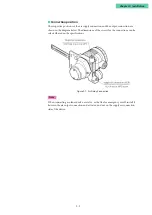
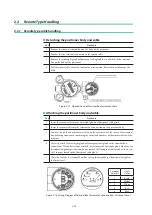
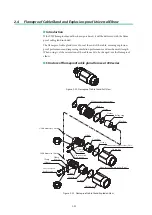
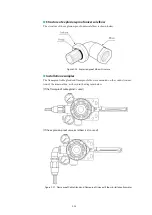
■
Connection position
The terminal block of the terminal box is shown in the diagram below.
Figure 2-12. Terminal Block of Terminal Box
Summary of Contents for AVP200
Page 30: ......
Page 66: ...2 28...
Page 80: ...4 4 Menu Tree...
Page 120: ...5 16...
Page 128: ...6 8 For models those date of manufacture are before September 2017...
Page 130: ...6 10 For models those date of manufacture are before September 2017...
Page 132: ...6 12 For models those date of manufacture are before September 2017...
Page 136: ...6 16 For models those date of manufacture are after October 2017...
Page 138: ...6 18 For models those date of manufacture are after October 2017...
Page 184: ...Appendix A Specifications A 25...
Page 185: ......
Page 188: ......
Page 190: ......


