AWS Storage Gateway User Guide
Using Your Tape Gateway
•
Disabling a Tape Drive in Backup Exec (p. 122)
Configuring Storage in Backup Exec
After you have connected the virtual tape library (VTL) devices to the Windows client, you configure
Backup Exec storage to recognize your devices. For information about how to connect VTL devices to the
Connecting Your VTL Devices (p. 84)
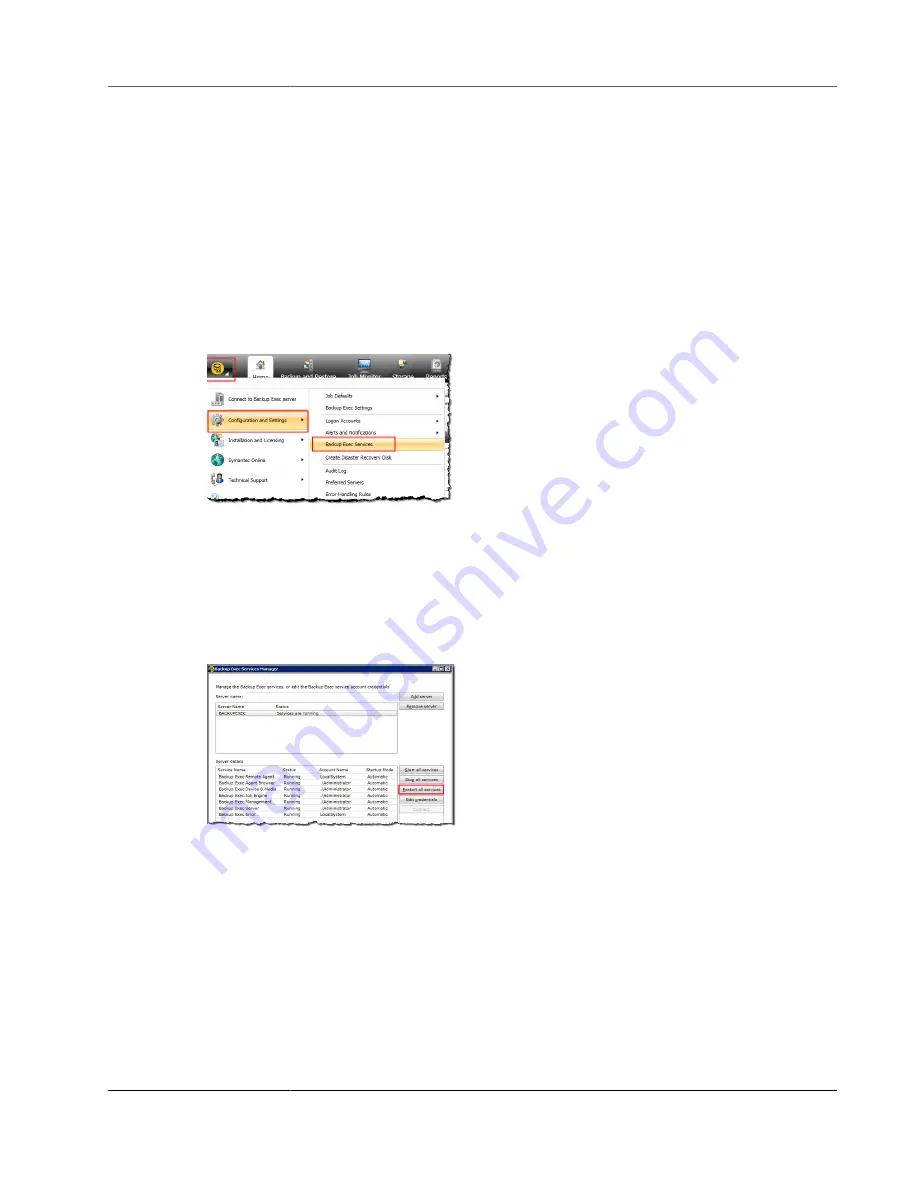
To configure storage
1. Start the Backup Exec software, and then choose the yellow icon in top-left corner on the toolbar.
2. Choose
Configuration and Settings
, and then choose
Backup Exec Services
to open the Backup
Exec Service Manager.
3. Choose
Restart All Services
. Backup Exec then recognizes the VTL devices (that is, the medium
changer and tape drives). The restart process might take a few minutes.
Note
Tape Gateway provides 10 tape drives. However, your Backup Exec license agreement might
require your backup application to work with fewer than 10 tape drives. In that case, you
must disable tape drives in the Backup Exec robotic library to leave only the number of tape
drives allowed by your license agreement enabled. For instructions, see
.
4. After the restart is completed, close the Backup Exec Service Manager.
Importing a Tape in Backup Exec
You are now ready to import a tape from your gateway into a slot.
1. Choose the
Storage
tab, and then expand the
Robotic library
tree to display the VTL devices.
Important
Veritas Backup Exec software requires the Tape Gateway medium changer type. If the
medium changer type listed under
Robotic library
is not Tape Gateway, you must change
it before you configure storage in the backup application. For information about how to
select a different medium changer type, see
Selecting a Medium Changer After Gateway
API Version 2013-06-30
119


