


57
Name
Function
(6) Preview
Switch to Preview/Advanced mode.
(7) Playback
Switch to Playback mode. This allows you to view the recorded video file.
(8) Status bar
Display the recorded date, time and play speed.
(9) Camera ID
Show the number of cameras that are being viewed. When you are in
single screen mode, click the camera ID number to switch and view other
camera.
(10) Output
Save the segmented file in *.mpg, *.avi, or *.dvr format (see also
Chapter
3.7
).
(11) Segment
Keep a portion of the recorded video you want (see also
Chapter 3.7
).
(12) Snapshot
Capture and save the screen shot either in *.jpg or *.bmp format.
(13) Full screen
View in Playback-compact mode. To return, press the right button of the
mouse or ESC on the keyboard.
When you switch to full screen in multiple-screen mode,
Left
click to
toggle to only display one of the video in the multiple-screen mode or all.
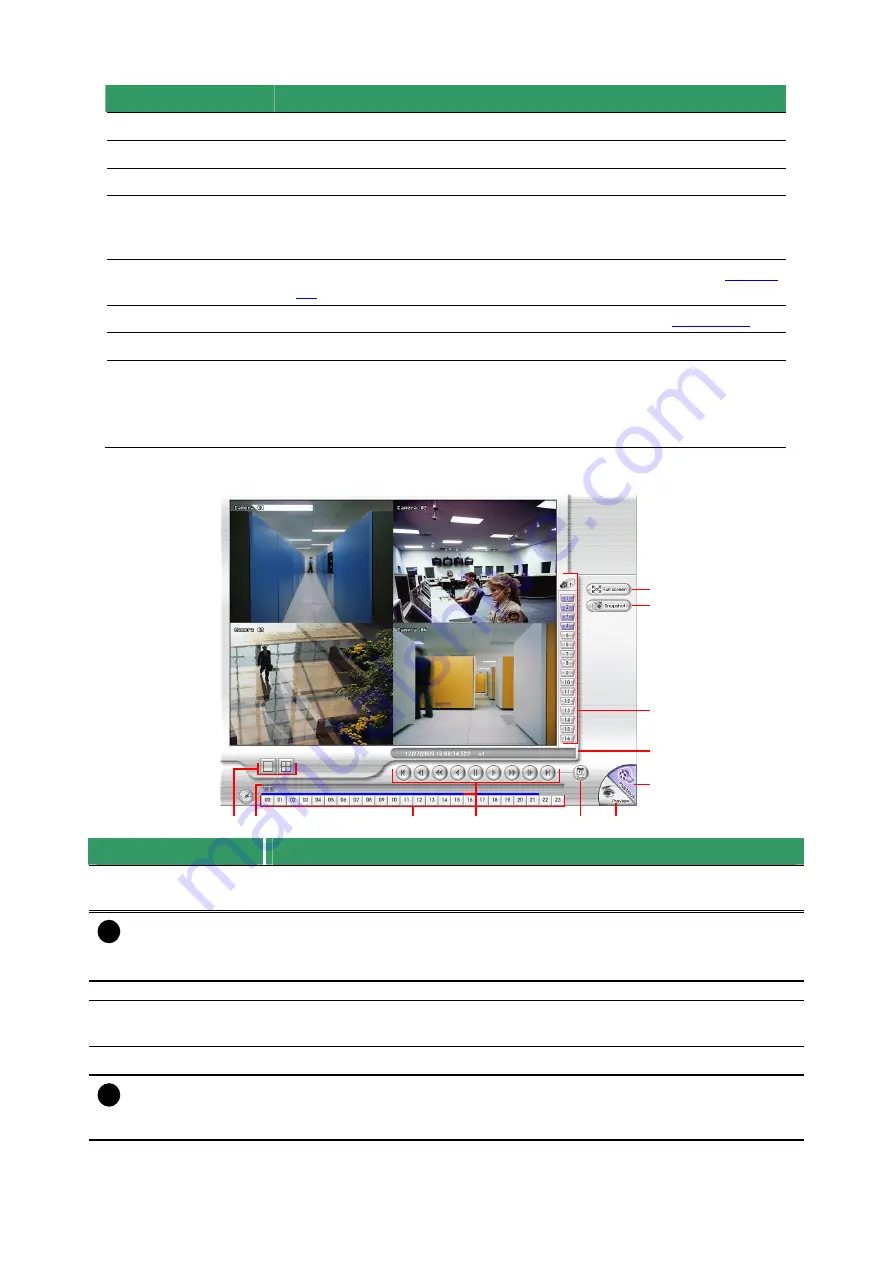
7.4.2 Familiarizing the RealTime Playback Buttons
(2)
(4)
(3)
(5)
(6)
(9)
(8)
(7)
(10)
(11)
(1)
Name
Function
(1) Split Screen Mode
Select from two (2) different split screen type to playback the recorded video
file of all the camera, or one camera.
i
-
If there are only 4 cameras, you won’t be able to switch to 9, 16, and 13 split screen mode.
-
To zoom in an area on the screen,
Right
click and
Drag
a square on the area you want to
enlarge.
(2) Progress bar
Show the progress of the file being played. You may move the bar to seek at
any location of the track.
(3) Hour Buttons
Select and click to playback the recorded video file on the specific time frame.
i
The Hour buttons represent the time in 24-hour clock. The blue bar on top of the hour button
indicates that there is a recorded video file on that period of time. While the red bar indicates that
you are currently viewing the recorded video file.


