


24
broadcast to Internet. Enter the IP address of the remote station.
(6) Map to Channel:
Select to which camera number to display the transaction
text
(7) Text Filter
:
Enter the word you want to be removed
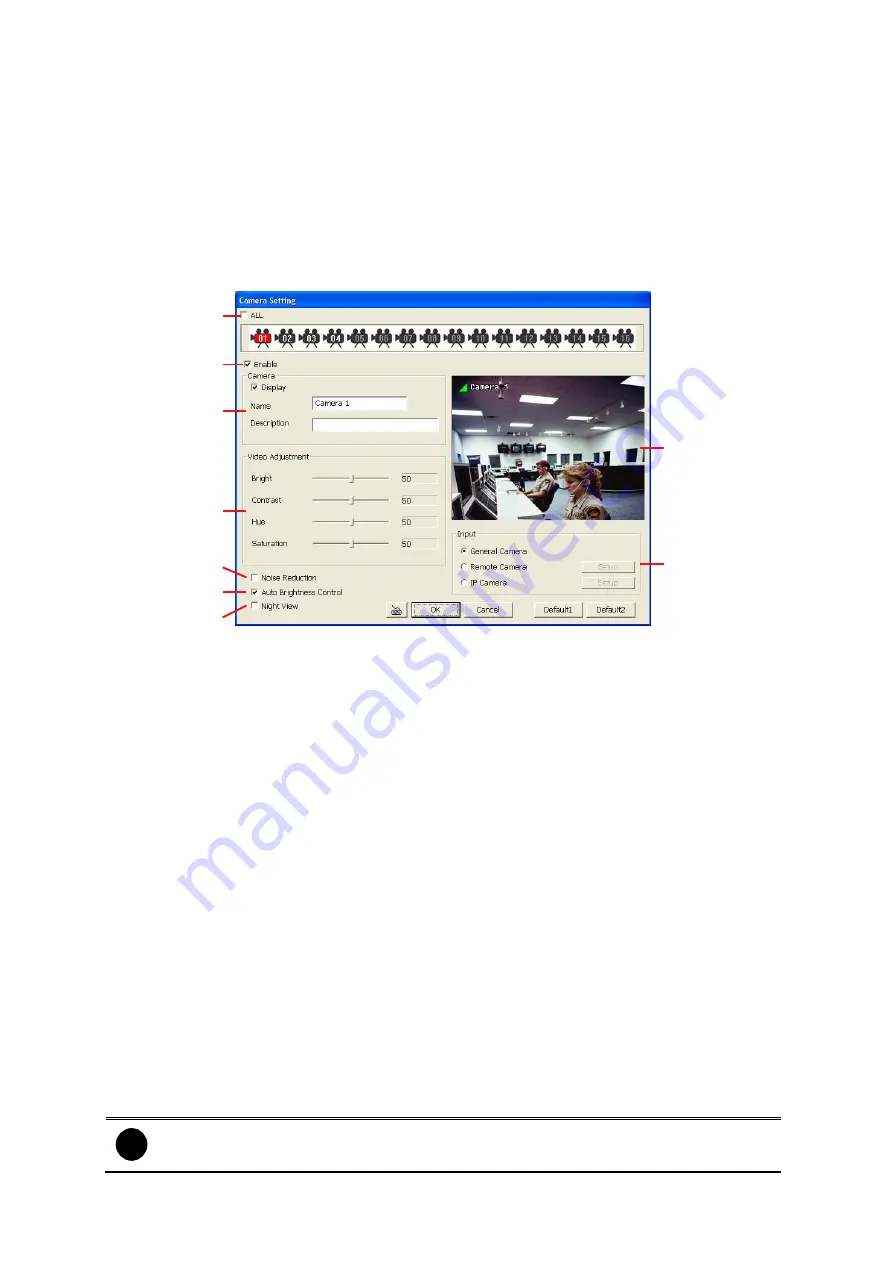
4.2 Camera Setting
In the Camera Setting dialog box, click
OK
to accept the new settings, click
Cancel
to
exit without saving, and click
Default1/ Default2
to revert back to original factory
setting.
(8)
(9)
(1)
(2)
(3)
(4)
(5)
(6)
(7)
(1) Camera Icons
Select the camera number you want to adjust the video setting. To select all the
cameras, enable the
ALL
check box. To select more than one camera,
Right click
on
the camera icon. To select one camera only,
Left click
on the camera icon. The
camera icon turns red when it is selected.
(2) Enable
Set to enable/disable the selected camera. When there is no video source on the
camera, we suggest disabling it so that the system won’t detect it as video loss error.
(3) Camera
-
Display
Enable/disable to show the video. Even if the video of the selected camera is
hidden you can still record the video and preview it in playback mode
-
Name
Change the camera name
-
Description
Add a short comment
(4) Video Adjustment
Adjust the Brightness, Contrast, Hue and Saturation of the selected camera.
(5) Noise Reduction
Reduce undesirable video signal and improve the quality of the video.
i
Noise Reduction uses lots of CPU resource. Please use this feature only if it
is really necessary.


