


31
4. Click on the blocks to set the schedule (see also
Chapter 4.5.1
). Or click All to
select all. To store the setting, click Save. To remove the settings, click Clear.
5. To end Schedule Setting, click OK to exit and accept the setting and Cancel to
exit without saving the setting.
4.5.1 Set schedule at specific portion of time
1.
Right click
the colored blocks.
2. In the Select time dialog box, click to enable or disable the portion you want to
set.
3. Click
OK
to accept the setting and
Cancel
to exit without saving the setting.
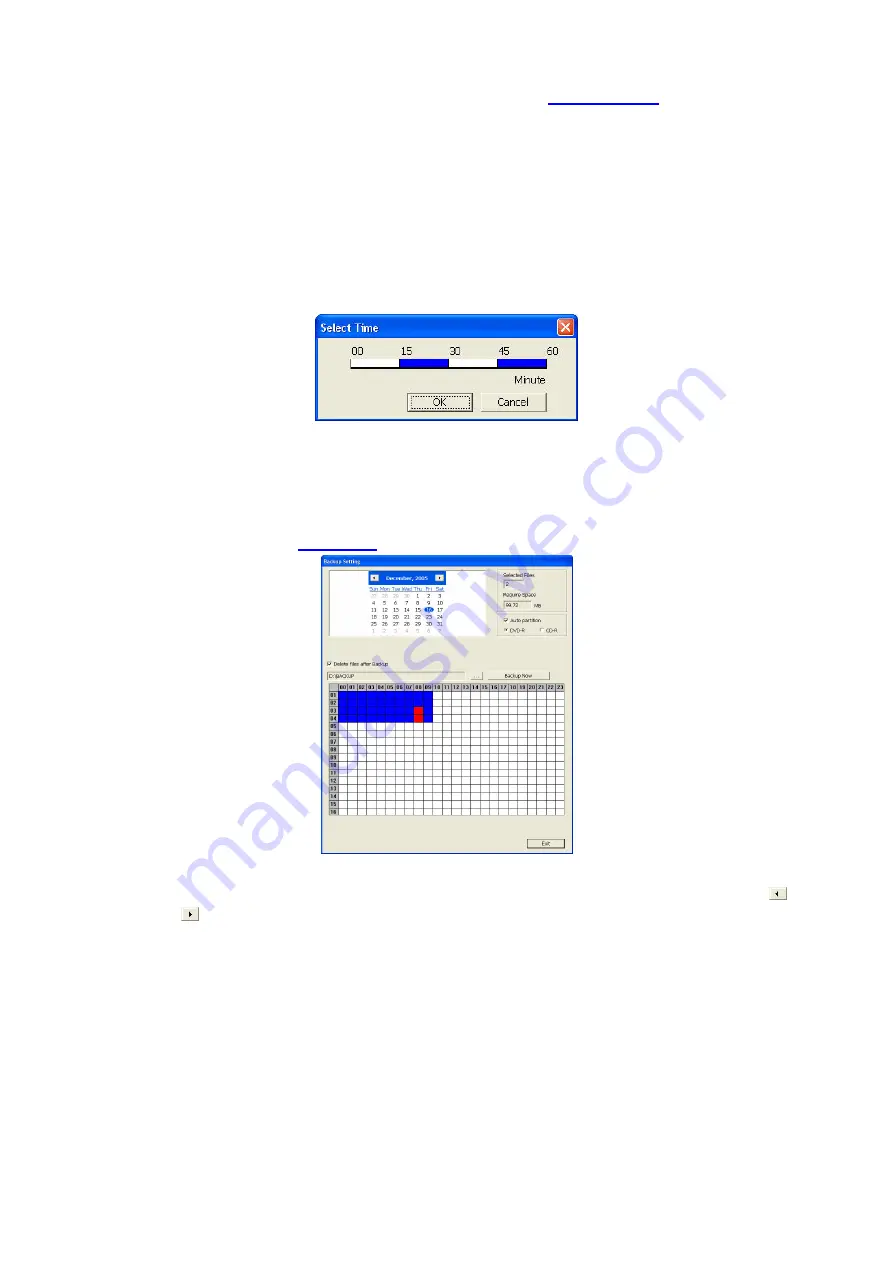
4.6 Backup Setting
In the Backup Setting dialog box, the number from 00 to 23 represent the time in
24-hour clock. The numbers from 01 to 16 represent the camera number. When you
back up the file, you may find QLogViewer and Player application included in the
backup folder (see also
Chapter 5
).
To Backup file:
1. Select the date of the recorded file in the calendar you want to backup. Use
and
buttons to shift the calendar to the left or right.
2. In the table below, click on the blue block to select the recorded file. The blue
block turns red when it is selected. The block that appears in white doesn’t have
data. If you want to set the specific time, right-click on the selected block. Then,
set the time to start and end.
3. Check the information beside the calendar.
Selected Files
: Show the number of files selected.
Require Space
: Show the total size of the selected file.
4. Enable Auto partition and select to divide the file size into DVD-R or CD-R.
SA DVR automatically backup and divide the file sizes to facilitate burning into
DVD or CD disc.


