


37
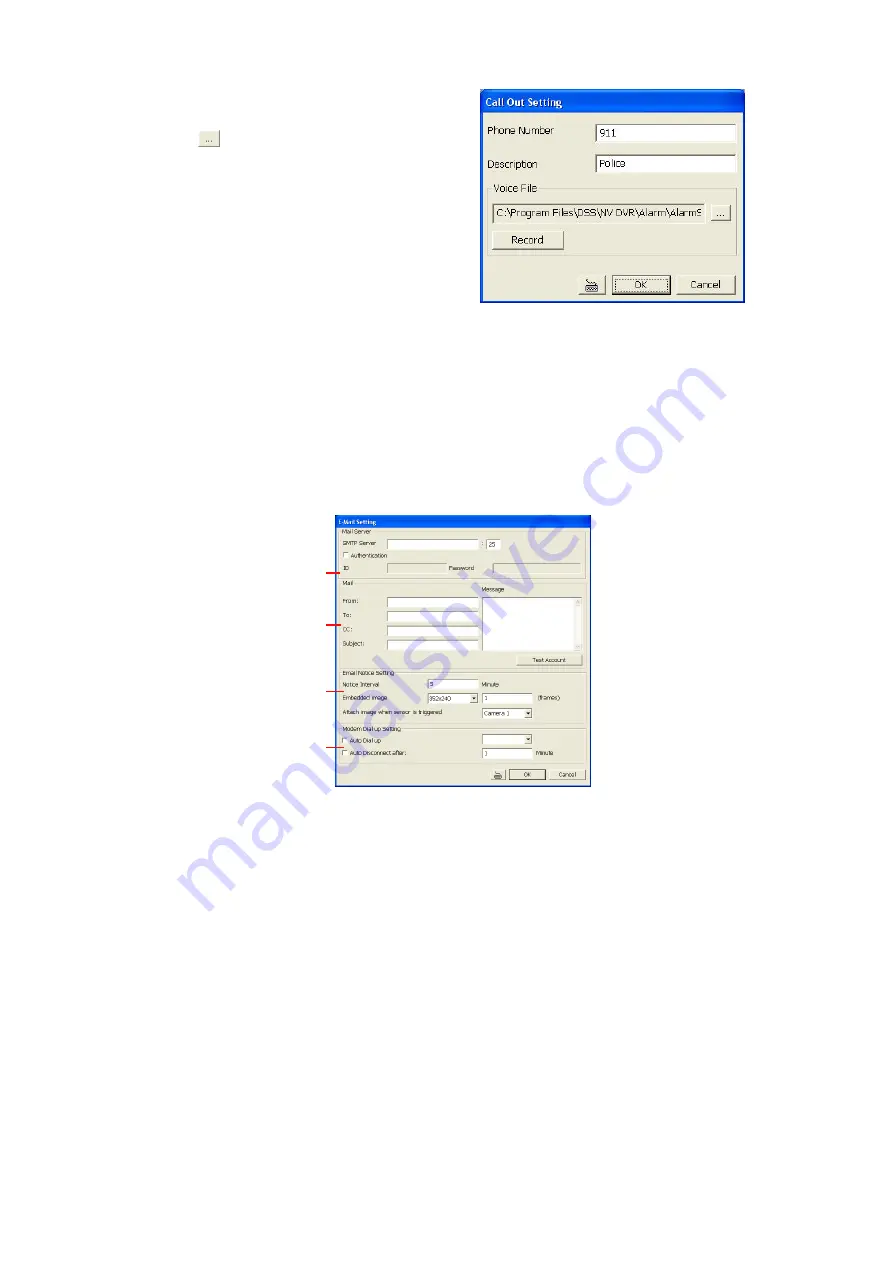
3. In the Call Out Setting, enter the
phone number and description.
Click
to select existing sound
recorded massager and
Record
to
make a new voice message.
4. When the Sound Recorder
appears, use the record control
panel to record, stop, play, rewind
and forward. If you want to
5. the existing file, click
File > Save As
…, enter filename and click
Save
. Make
sure you have microphone connected to your PC.
6. The supported audio system is only 8KHz and 16Bit mono.
7. Click
OK
to exit and accept the setting and
Cancel
to exit without saving the
setting.
4.9.4 To Setup Send E-mail Setting:
Beside the Send Email check box, click
Detail
. In the E-mail Setting dialog box, click
OK
to exit and save the setting and
Cancel
to exit without saving the setting.
(1)
(2)
(3)
(4)
(1) Mail Server
Enter the SMTP Server and port. If your e-mail system requires user identification,
enable
Authentication
check box and enter User ID and Password.
(2) Mail
To check if it is working, click
Test Account
button.
From:
Enter the sender e-mail address.
To and CC:
Enter the recipient email address and separate it with comma or a
semicolon (;).
Subject:
Enter the message title.
Message:
Type the message.
(3) Email Notice Setting
Notice Interval
Set the period of time before it sends another e-mail notice.
Embedded image
Select the image size and set the number of frames.
Attach image when sensor is triggered
When the sensor is triggered, the system
will capture the image and send the image to the certain e-mail address with the alarm
message.


