F06E/F06S
F06E/F06S
8-6
8-6
REMARQUE
- La quantité d'huile à utiliser est
indiquée dans le plan d'entretien
(chapitre 10).
- Quelques minutes plus tard, lor-
sque le niveau d'huile a baissé,
faire l'appoint jusqu'à ce que le
niveau prescrit soit atteint et
reste constant.
(6) Revisser le bouchon avec un
nouveau joint.
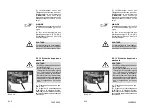
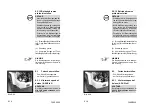
8.2.6.3Essieu avant
(1) Prévoir un collecteur d'huile
suffisamment grand.
(2) Dévisser le bouchon
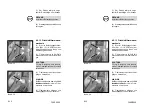
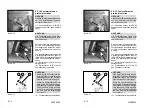
d'obturation du pont (8-11/1 et
8-11/2) et laisser s'écouler l'huile.
ATTENTION
Evacuer proprement l'huile usagée.
(3) Revisser le bouchon (8-11/1).
(4) Verser l'huile dans le trou du
bouchon (8-11/2) jusqu'à ce que
l'huile atteigne l'orifice.
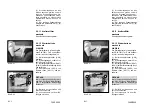
REMARQUE
- La soupape de purge de l'essieu
(8-12/flèche) doit être parfaite-
ment propre.
- La quantité d'huile à utiliser est
indiquée dans le plan d'entretien
(chapitre 10).
- Quelques minutes plus tard, le
niveau d'huile commence à
baisser. Faire l'appoint d'huile
jusqu'à ce que le niveau prescrit
soit atteint et reste constant.
(5) Revisser le bouchon (8-11/2).
REMARQUE
- La quantité d'huile à utiliser est
indiquée dans le plan d'entretien
(chapitre 10).
- Quelques minutes plus tard, lor-
sque le niveau d'huile a baissé,
faire l'appoint jusqu'à ce que le
niveau prescrit soit atteint et
reste constant.
(6) Revisser le bouchon avec un
nouveau joint.
8.2.6.3Essieu avant
(1) Prévoir un collecteur d'huile
suffisamment grand.
(2) Dévisser le bouchon
d'obturation du pont (8-11/1 et
8-11/2) et laisser s'écouler l'huile.
ATTENTION
Evacuer proprement l'huile usagée.
(3) Revisser le bouchon (8-11/1).
(4) Verser l'huile dans le trou du
bouchon (8-11/2) jusqu'à ce que
l'huile atteigne l'orifice.
REMARQUE
- La soupape de purge de l'essieu
(8-12/flèche) doit être parfaite-
ment propre.
- La quantité d'huile à utiliser est
indiquée dans le plan d'entretien
(chapitre 10).
- Quelques minutes plus tard, le
niveau d'huile commence à
baisser. Faire l'appoint d'huile
jusqu'à ce que le niveau prescrit
soit atteint et reste constant.
(5) Revisser le bouchon (8-11/2).
NOTE
- Information about the quantity of
oil is in the maintenance plan
(chapter 10).
- After a few minutes, when the oil
level has lowered, top up the oil
until the oil level reaches the
marked level and remains stable.
(6) Use a new gasket when re-
placing the plug.
8.2.6.3Front axle
(1) Place a sufficiently large oil
drain pan underneath the axle.
(2) Unscrew the plugs from the
axle arch (8-11/1 and 8-11/2) and
drain the oil.
CAUTION
Waste oil must be disposed of in such
a way that it will not cause pollution!
(3) Replace the plug (8-11/1).
(4) Fill in oil via the plug bore
(8-11/2) until the oil level reaches
the opening.
NOTE
- The axle ventilation valve (8-12/
arrow) must be kept free of dirt.
- Information about the quantity of
oil is in the maintenance plan
(chapter 10).
- After a few minutes, when the oil
level has lowered, top up the oil
until the oil level reaches the
marked level and remains stable.
(5) Replace the plug (8-11/2).
NOTE
- Information about the quantity of
oil is in the maintenance plan
(chapter 10).
- After a few minutes, when the oil
level has lowered, top up the oil
until the oil level reaches the
marked level and remains stable.
(6) Use a new gasket when re-
placing the plug.
8.2.6.3Front axle
(1) Place a sufficiently large oil
drain pan underneath the axle.
(2) Unscrew the plugs from the
axle arch (8-11/1 and 8-11/2) and
drain the oil.
CAUTION
Waste oil must be disposed of in such
a way that it will not cause pollution!
(3) Replace the plug (8-11/1).
(4) Fill in oil via the plug bore
(8-11/2) until the oil level reaches
the opening.
NOTE
- The axle ventilation valve (8-12/
arrow) must be kept free of dirt.
- Information about the quantity of
oil is in the maintenance plan
(chapter 10).
- After a few minutes, when the oil
level has lowered, top up the oil
until the oil level reaches the
marked level and remains stable.
(5) Replace the plug (8-11/2).
Summary of Contents for AF 60e
Page 61: ...F06E F06S F06E F06S Beschilderung Beschilderung Signalisation Signalisation Signs Signs ...
Page 89: ...F06E F06S F06E F06S Beschreibung Beschreibung Description Description Description Description ...
Page 161: ...F06E F06S F06E F06S Wartung Wartung Entretien Entretien Maintenance Maintenance ...
Page 196: ...F06E F06S F06E F06S Störung Ursache und Abhilfe Störung Ursache und Abhilfe ...
Page 200: ...F06E F06S F06E F06S Dérangements causes et remèdes Dérangements causes et remèdes ...
Page 204: ...F06E F06S F06E F06S Malfunctions causes and remedies Malfunctions causes and remedies ...
Page 213: ...Anhang Anhang Appendice Appendice Appendices Appendices ...
Page 214: ......
Page 215: ......
Page 226: ......
Page 227: ......
Page 228: ......
Page 231: ...F06E F06S F06E F06S B B ...
Page 232: ...F06E F06S F06E F06S C C ...
Page 233: ...F06E F06S F06E F06S D D ...
Page 234: ...F06E F06S F06E F06S E E ...
Page 235: ...F06E F06S F06E F06S F F ...


