F06E/F06S
F06E/F06S
8-4
8-4
8.2.4 Contrôle du niveau
Réservoir d'huile hydr.
(1) Placer la machine à
l'horizontale.
(2) Amener la flèche porte-godet
dans la position inférieure et incliner
le dispositif de changement rapide.
(3) Ouvrir le capot du moteur.
(4) Contrôler le niveau d'huile
dans le verre-regard.
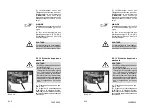
REMARQUE
Le niveau d'huile doit être visible
dans le tiers sup. du verre-regard
(8-5/flèche). Faire l'appoint d'huile
hydraulique à l'aide des tubulures
de remplissage (8-14/flèche).
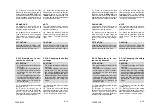
8.2.5 Vidange moteur
(1) Placer un collecteur d'huile
suffisamment grand au-dessous.
(2) Dévisser le capot de la vis de
purge du moteur (8-6/flèche).
(3) Visser la tubulure avec le
tuyau du compartiment à outils
(4-1/12) sur la vis de purged'huile.
(4) Retirer le capot du tuyau.
(5) Autre marche à suivre, voir
manuel du moteur.
8.2.6
Vidange essieux
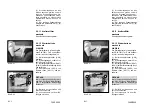
8.2.6.1 Essieu arrière
(1) Prévoir un collecteur d'huile
suffisamment grand.
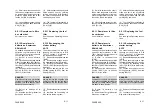
(2) Dévisser le bouchon du pont
(8-7/flèche) et de l'engrenage
distributeur (8-8/1 et 8-8/2) et laisser
s'écouler l'huile.
ATTENTION
Evacuer proprement l'huile usagée.
8.2.4 Checking the oil level
in the hydraulic oil reservoir
(1) Park the loader in a level po-
sition.
(2) Place the bucket arm in its
lowest position and tip the quick-
change device.
(3) Open the motor cover.
(4) Check the oil level in the sight
gauge.
NOTE
The oil level must be visible in the
sight gauge (8-5/arrow). If neces-
sary, fill oil into the filler neck (8-14/
arrow).
8.2.5 Changing the engine oil
(1) Place a sufficiently large oil drain
pan underneath the motor oil sump.
(2) Unscrew the cover for access to
the oil drain on the motor (8-6/arrow).
(3) Screw the drainage nozzle with
the hose from the tool box (4-1/12) to
the oil drain.
(4) Remove the cover cap from the
hose.
(5) Further procedures can be
found in the Engine Operating Manu-
al.
8.2.6
Changing the oil in the axles
8.2.6.1 Rear axle
(1) Place a sufficiently large oil
drain pan underneath the axle.
(2) Unscrew the plug from the axle
arch (8-7/arrow) and the distribution
gear (8-8/1 and 8-8/2) and let the oil
drain out.
CAUTION
Waste oil must be disposed of in such
a way that it will not cause pollution!
Summary of Contents for AF 60e
Page 61: ...F06E F06S F06E F06S Beschilderung Beschilderung Signalisation Signalisation Signs Signs ...
Page 89: ...F06E F06S F06E F06S Beschreibung Beschreibung Description Description Description Description ...
Page 161: ...F06E F06S F06E F06S Wartung Wartung Entretien Entretien Maintenance Maintenance ...
Page 196: ...F06E F06S F06E F06S Störung Ursache und Abhilfe Störung Ursache und Abhilfe ...
Page 200: ...F06E F06S F06E F06S Dérangements causes et remèdes Dérangements causes et remèdes ...
Page 204: ...F06E F06S F06E F06S Malfunctions causes and remedies Malfunctions causes and remedies ...
Page 213: ...Anhang Anhang Appendice Appendice Appendices Appendices ...
Page 214: ......
Page 215: ......
Page 226: ......
Page 227: ......
Page 228: ......
Page 231: ...F06E F06S F06E F06S B B ...
Page 232: ...F06E F06S F06E F06S C C ...
Page 233: ...F06E F06S F06E F06S D D ...
Page 234: ...F06E F06S F06E F06S E E ...
Page 235: ...F06E F06S F06E F06S F F ...


