


9
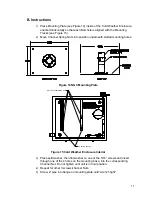
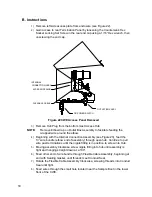
B. Instructions
1)
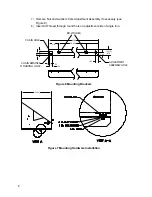
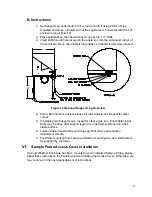
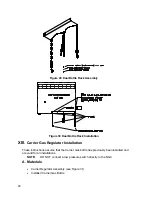
Set Support Leg underneath front or rear (or both if using 2 kits) of pipe
mounted enclosure, oriented so that the Leg Brace is horizontal with front of
enclosure (see Figure 12).
2)
Place split washer, then flat washer on one of the 1 ¼” Bolts.
3)
Insert Bolt through hole located in the angle iron into the outermost corner of
the enclosure. Move channel Nut into position so that Bolt will screw into Nut.
(31.00)
22.75
TO
37.00
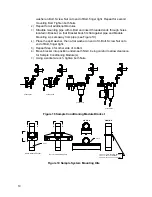
Figure 12 Optional Support Leg Overview
4)
Screw Bolt into Nut, but leave loose for later adjustment. Repeat for other
corner.
5)
If installing two Support Legs, repeat for other angle iron. Final tightening of
Bolts may be done after support leg(s) are in desired positioned on a flat
stable surface.
6)
Loosen Adjustment Handle and drop Leg Foot down and retighten
Adjustment Handle.
7)
Foot Plate mounting holes are pre-drilled for mounting to a pad. Hardware to
be supplied by customer.
VI.
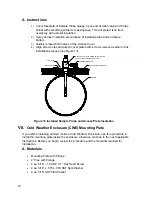
Sample Probe Access Cover Installation
If a Cold Weather Enclosure has been mounted over an installed Sample Probe, please
follow these instructions for insulating and re-installing the Access Cover. Otherwise, you
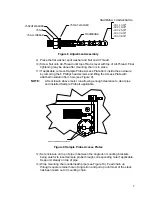
may continue to the next applicable set of instructions.


