Acquire Screen and Controls
2660021169012 Rev. A 2017-12
CIRRUS HD-OCT User Manual
6-26
For Optic Disc Cube 200x200 scans, it is not necessary to precisely center the optic disc in
the scan image because the analysis algorithm can correctly place the Calculation Circle
around the optic disc even when it is not well centered. Though it is sufficient to keep the
optic disc within the outer dashed circle, it is best to center the scan on the optic disc as
well as possible. The
En Face
scan image overlay that shows the area scanned. This is the
captured Live OCT fundus image
NOTE: For ONH Angiography scan, it is different than the Optic Disc Scan, in that for ONH
angiography, you need to click and drag the scan pattern to be centered over the
optic nerve.
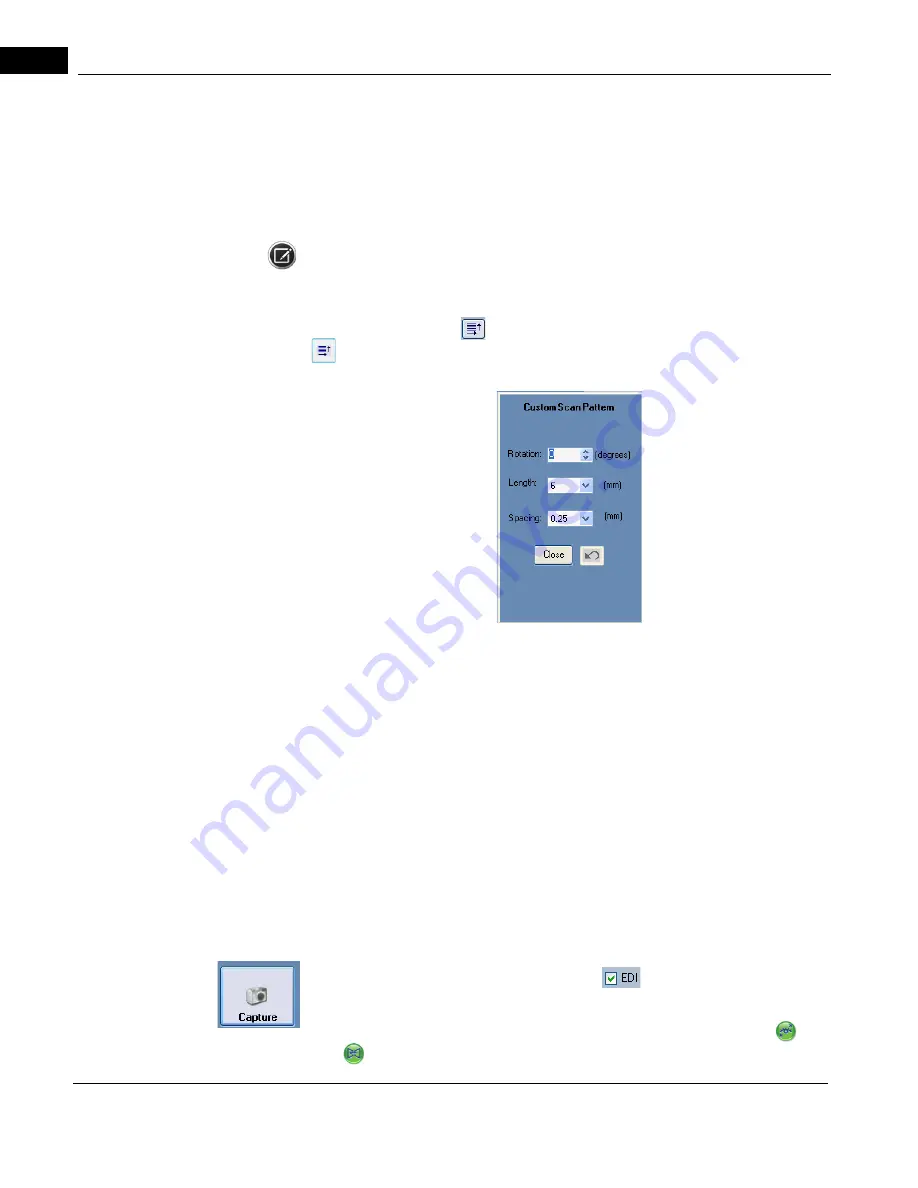
Adjust Rotation and Size
allows you to rotate the angle of the scan and its length.
opens the Custom Scan Pattern dialog shown below, and allows you to specify a non–
standard scan pattern.
• For Rotation, click the up arrow (for counterclockwise rotation) or down arrow (for
clockwise rotation) or enter a value to adjust the angle in the ranges of 0 to 360
degrees. Values entered from 91 to 269 are automatically transposed 180 degrees to
correspond with scan direction. The default 0 degree position is horizontal.
• For Length, depending on the scan, you can select 3, 6, or 9 mm.
• For line Spacing, depending on the scan, you can select between 0.00 and 1.25 mm
in increments of 0.025 mm.
Enhanced Depth Imaging (EDI) is an optional mode for single and multi–line raster scans
that improves visibility of structures at the bottom of B-scans. The signal to noise ratio in
OCT scans varies across the axial range. The default CIRRUS setup is such that the best
signal is obtained at the top portion of the scan. Enhanced Depth Imaging allows you to
change the acquisition settings for the raster scans so that the best signal to noise ratio is
obtained at the bottom of the B-scan. This allows you to obtain an HD image that is
optimized in the region that is of interest for a particular scan. To switch between EDI and
standard scanning mode, select the EDI checkbox
below the fundus image.
• Capture starts the scan.
• FastTrac Retinal Tracking, is started and controlled by the 2 outer buttons (
) and
(
) just under Capture. (Green icons are on and gray icons are off.) The FastTrac
Содержание CIRRUS HD-OCT 500
Страница 1: ...2660021156446 B2660021156446 B CIRRUS HD OCT User Manual Models 500 5000 ...
Страница 32: ...User Documentation 2660021169012 Rev A 2017 12 CIRRUS HD OCT User Manual 2 6 ...
Страница 44: ...Software 2660021169012 Rev A 2017 12 CIRRUS HD OCT User Manual 3 12 ...
Страница 58: ...User Login Logout 2660021169012 Rev A 2017 12 CIRRUS HD OCT User Manual 4 14 ...
Страница 72: ...Patient Preparation 2660021169012 Rev A 2017 12 CIRRUS HD OCT User Manual 5 14 ...
Страница 110: ...Tracking and Repeat Scans 2660021169012 Rev A 2017 12 CIRRUS HD OCT User Manual 6 38 ...
Страница 122: ...Criteria for Image Acceptance 2660021169012 Rev A 2017 12 CIRRUS HD OCT User Manual 7 12 ...
Страница 222: ...Overview 2660021169012 Rev A 2017 12 CIRRUS HD OCT User Manual 9 28 ...
Страница 256: ...Log Files 2660021169012 Rev A 2017 12 CIRRUS HD OCT User Manual 11 18 ...
Страница 272: ...Electrical Physical and Environmental 2660021169012 Rev A 2017 12 CIRRUS HD OCT User Manual 13 4 ...
Страница 292: ...Appendix 2660021169012 Rev A 2017 12 CIRRUS HD OCT User Manual A 18 cáÖìêÉ JV kçêã íáîÉ a í aÉí áäë oÉéçêí ...
Страница 308: ...Appendix 2660021169012 Rev A 2017 12 CIRRUS HD OCT User Manual A 34 ...
Страница 350: ...CIRRUS HD OCT User Manual 2660021169012 Rev A 2017 12 I 8 ...
Страница 351: ...CIRRUS HD OCT User Manual 2660021169012 Rev A 2017 12 ...


