A
ht
1
o
peration Guide
A-17
4
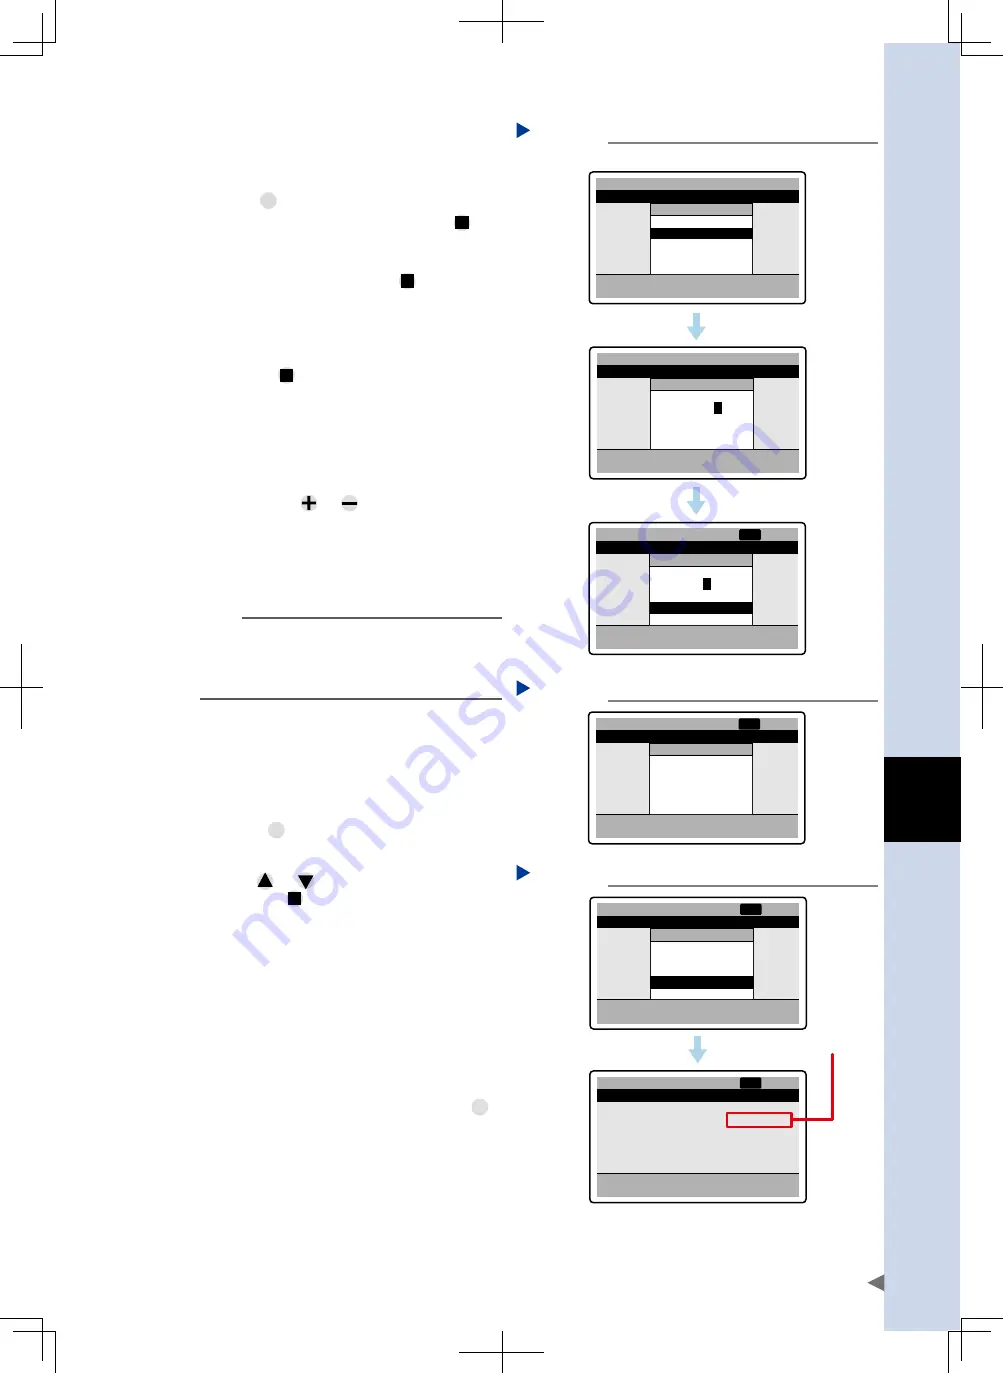
Specify the speed to move the
robot.
Specify the speed as described below, on
the "Function" menu that appears when you
press
FUNC
.
1. Select "Change speed" and press
.
The edit cursor then appears on the
speed value.
2. Set the speed and press
.
To set the speed, use the same
procedure as for setting a point number.
The cursor then moves to "Yes" under the
"Change OK?" message.
3. Press
to enable the setting.
The speed you set is then displayed as
"S=** %" in the status area.
-
mm
%
%
%
%
RUN:Teaching, -/+:JOG
Current pos.
50.00 mm
P 1
1. Run
2. Position
3. Speed
4. Accel.
5. Decel.
6. Push
ABS
100.00
100
100
100
100
Point teaching S=100%
[01]
Function
Select number
Change speed
Point list
-
mm
%
%
%
%
RUN:Teaching, -/+:JOG
Current pos.
50.00 mm
P 1
1. Run type゚
2. Position
3. Speed
4. Accel.
5. Dece
6. Push
ABS
100.00
100
100
100
100
Point teaching S=100%
[01]
Change speed
Speed
S = 10
0
%
Change OK?
Yes
No
-
mm
%
%
%
%
RUN:Teaching, -/+:JOG
Current pos.
50.00 mm
P 1
1. Run
2. Positi
3. Speed
4. Accel.
5. Decel.
6. Push
ABS
100.00
100
100
100
100
Point teaching S=100%
Change speed
Speed
S =
8
0 %
Change OK?
Yes
No
NRM
[01]
Specifying movement speed
Step 4
1.
2.
3.
24A11-M0-00
5
Press the jog keys to move the
robot to the teaching position.
Pressing the
or
key moves the robot
in the direction of the sign. The robot keeps
moving as long as the jog key is pressed and
the message "Running…" will appear during
movement.
-
mm
%
%
%
%
RUN:Teaching, -/+:JOG
Current pos.
100.00 mm
P 1
1. Run
2. Position
3. Speed
4. Accel.
5. Decel
6. Push
ABS
100.00
100
100
100
100
Point teaching S=80%
Jog
Running…
NRM
[01]
Running screen
Step 5
24A12-M0-00
TIP
Pressing the jog key once moves the robot in
inching mode. (Initial setting is 1.00mm, which can
be changed as needed by using the "Inching
width" (K11) parameter.
6
When the robot reaches the
teaching position, release the jog
key to stop the robot.
The message "Running…" no longer appears
when the robot is stopped.
7
Press
RUN
to teach the position.
A confirmation message then appears
asking whether to teach the current position.
Press
or
to select "Yes" or "No", and
then press
.
Selecting "Yes" sets the current robot position
in "Position" for point data. Selecting "No"
cancels the current position setting and
returns to the previous screen.
-
mm
%
%
%
%
RUN:Teaching, -/+:JOG
Current pos.
128.00 mm
P 1
1. Run type
2. Position
3. Speed
4. Accel.
5. Decel.
6. Push
ABS
100.00
100
100
100
100
Point teaching S=100%
Teaching
Teach
Current Pos.?
Yes
No
NRM
[01]
-
mm
%
%
%
%
RUN:Teaching, -/+:JOG
Current pos.
128.00 mm
P 1
1. Run type
2. Position
3. Speed
4. Accel.
5. Decel.
6. Push
ABS
128.00
100
100
100
100
Point teaching S=80%
NRM
[01]
Current robot position is
entered here.
Teaching current position
Step 7
24A13-M0-00
8
Perform teaching for other point
data.
Specify the desired point number and
repeat the above procedure.
9
After teaching the positions, press
CLR
.
This returns to the "Point" menu screen.
Содержание TS-S
Страница 2: ......
Страница 12: ......
Страница 14: ......
Страница 28: ......
Страница 70: ......
Страница 72: ......
Страница 92: ......
Страница 164: ......
Страница 172: ......
Страница 174: ......
Страница 230: ......
Страница 232: ......
Страница 254: ......
Страница 274: ......
Страница 276: ......
Страница 285: ......


