background image

1-36

Getting Started

Software Installation Procedure

In Windows 95/98, Windows 2000, or Windows NT 4.0

1

Make sure the Xerox WorkCentre 490cx is connected to your computer.

2

Power off the WorkCentre 490cx by unplugging it from the wall outlet.

3

Turn on your PC and start Windows.

4

Power on the Workcentre 490cx by plugging it into a grounded wall 
outlet.

5

Insert the supplied CD into your computer’s CD ROM drive.

The Xerox WorkCentre 490cx installation program will begin.

If the program does not start: 

a)

From the Start menu, select Run (Windows 95/98, Windows 2000, 
and NT 4.0).

Содержание WorkCentre 490cx

Страница 1: ...The Document Company XEROX WorkCentre 490cx Color All in One User Guide ...

Страница 2: ...generated from the software programs which are displayed on the screen such as icons screen displays looks etc Xerox and all Xerox products mentioned in this publication are registered trademarks of the Xerox Corporation Windows TM is a trademark of Microsoft Corporation Product names and trademarks of other companies are also acknowledged Changes are periodically made to this document Changes tec...

Страница 3: ...1 21 Loading Envelopes 1 25 Using the Manual Paper Feeder 1 27 Paper Guidelines 1 30 Paper Selection 1 31 Paper Types 1 31 Guidelines for Special Paper and other Media 1 33 Installing Software 1 35 System Requirements 1 35 Overview of WorkCentre 490cx Drivers 1 36 Software Included With the WorkCentre 490cx 1 36 Software Installation Procedure 1 37 In Windows 95 98 Windows 2000 or Windows NT 4 0 1...

Страница 4: ...er 3 6 Sending a Fax Using Group Dialing Multi Address Transmission 3 7 Sending a Fax After Talking 3 8 Canceling a Transmission 3 10 Confirming a Transmission 3 10 Memory Transmission Broadcasting 3 12 Delayed Transmission 3 14 Adding Documents To a Standby Operation 3 17 Canceling a Standby Operation 3 19 Speed Dialing 3 19 Storing a Number for Speed Dialing 3 19 Dialing a Speed Dial Number 3 20...

Страница 5: ...es with LaserFAX Lite 3 46 Fax Conversion Dialog Advanced Features 3 51 Cover Sheet Options 3 52 The Send Options Button 3 53 The Attach Button 3 54 The Keep Button 3 56 LaserFAX Application Features 3 58 LaserFAX Application Toolbar Features 3 59 The LaserFAX Phonebook 3 62 Adding Entries to the Phonebook 3 62 Troubleshooting LaserFAX 3 63 4 Receiving a Fax 4 1 Options for Receiving a Fax Using t...

Страница 6: ...canning 6 1 Overview 6 1 The WorkCentre 490cx TWAIN Scanner Program 6 2 Starting the WorkCentre 490cx TWAIN Scanner Application 6 3 The WorkCentre 490cx TWAIN Scanner Window 6 7 WorkCentre 490cx TWAIN Scanner Help 6 7 Scanner Control Tabs 6 8 The Basic Tab 6 8 The Image Quality Tab 6 15 The Filters Tab 6 16 Preview Window 6 17 7 Troubleshooting 7 1 Clearing Jams 7 2 Document Jams While Sending a F...

Страница 7: ...endix 9 1 Specifications 9 1 FCC Regulations 9 4 Send Header Requirements 9 4 Data Coupler Information 9 4 Radio Frequency Emissions 9 8 Canadian Certification 9 9 Safety and Legal Requirements for Xerox Europe 9 11 The Electricity at Work Regulation in England and Wales UK ONLY 9 16 Electricity at Work Regulations 9 16 European Product Marking Requirements 9 21 Certification to 1999 5 EC Radio Eq...

Страница 8: ...viii ...

Страница 9: ...ns carefully before operating the WorkCentre 490cx and refer to them as needed to ensure the continued safe operation of your WorkCentre Follow all warnings and instructions marked on or supplied with the product Symbols Used Caution Warning Unplug the WorkCentre 490cx from the wall outlet before cleaning Always use materials specifically designated for this product Use of other materials may resu...

Страница 10: ...the machine This product is equipped with a grounding type plug The plug will fit only into a grounded power outlet This is a safety feature To avoid risk of electric shock contact your electrician to replace the receptacle if you are unable to insert the plug into the outlet Never use an adapter to connect the WorkCentre to a power source receptacle that lacks a ground connection terminal The Wor...

Страница 11: ...never be located near or over a radiator or heat register The WorkCentre 490cx should not be placed in a built in installation unless proper ventilation is provided Never push objects of any kind into the slots of the WorkCentre 490cx as they may touch dangerous voltage points or short out parts which could result in a fire or electric shock Never spill liquid of any kind on the WorkCentre 490cx N...

Страница 12: ...not harmful they may cause an annoying afterimage Always keep the document cover closed during operation and storage If you need additional safety information concerning the WorkCentre or Xerox supplied materials you may call Xerox at 1 800 TEAM XRX 1 832 6979 from within the United Sates From outside the United Sates please contact your local Xerox Helpline ...

Страница 13: ...ing Installer Software and Online User Guide 2 May vary according to country CD ROMs 1 Replacement ADF Rubber Pads Telephone line cord 2 Document exit tray Power cord 2 Document Input tray Handset 2 WorkCentre Ink Cartridges WC490cx Install Guide WC490cx Quick Reference Guide PC cable ...

Страница 14: ...countries a handset is provided Your machine may look slightly different than the illustration with the handset mounted on the left side of the machine Paper Feeder Extension Tray Paper Exit Tray Automatic Paper Feeder Automatic Document Feeder Document Input Tray Document Guide Control Panel Envelope Guide Paper Guide Document Exit Tray Front View ...

Страница 15: ... Rear View LINE Connection PC Parallel Cable Connector Power Cord Connector USB Cable Connector Handset Connector not available in all countries EXT Connection Black Ink Cartridge Control Panel Cover Inside Color Ink Cartridge ...

Страница 16: ... Leave enough space to allow for easy paper loading paper unloading and opening of the front cover Do not place your machine In direct sunlight Near heat sources or air conditioners In dusty or dirty environments Setting Up Your Machine Document Input Tray Insert the two tabs on the tray into the slots as shown Fold out the extension tray if necessary ...

Страница 17: ...ide the Paper Exit Tray out from the base of the machine If desired fold out the extension tray Document Exit Tray Insert the two tabs on the document exit tray into the slots on the front of your machine Fold out the extension tray if necessary ...

Страница 18: ...ne accessories to the WorkCentre 490cx Refer to Telephone Connectivity Guidelines on page 9 23 for more details Plug one end of the telephone line cord into the TEL LINE jack and the other end into a standard phone wall jack To a standard telephone wall jack will vary according to country ...

Страница 19: ... is equipped with a parallel interface port for use with IBM PCs and compatible computers Using the supplied Centronics parallel cable connect your WorkCentre 490cx to a computer that supports bi directional communications IEEE standard 1284 Note If using another parallel cable ensure that it is bi directional and meets IEEE standard 1284 specifications and is not longer than twelve feet To a tele...

Страница 20: ... the power outlet 1 Plug the parallel cable into the connector on the back of the WorkCentre 490cx Swing the metal clips of the connector inward until they lock firmly inside the notches on the parallel cable connector 2 Connect the other end of the cable to the parallel port on your computer Refer to your computer documentation for assistance with this procedure Close Cable Connector Locking Clip...

Страница 21: ... computer and the 490cx must be powered on before connecting the USB cable to the computer To connect the WorkCentre 490cx to a computer using the USB cable follow the steps below 1 Turn on the computer and the 490cx and allow them to power up 2 Plug the rectangle end of the USB cable into the connector on the back of the WorkCentre 490cx 3 Connect the other end of the USB cable to one of the USB ...

Страница 22: ...here is NO On Off switch for the WorkCentre 490cx When the AC power cord is plugged in the machine is fully energized 1 Plug one end of the AC power cord into the back of the machine and the other end into a grounded AC power outlet To AC outlet ...

Страница 23: ...tic test POWERING UP PLEASE WAIT appears on the LCD display If you are setting up the machine for the first time or if the machine has not been operated for an extended period of time SET DATE AND TIME and PRESS START will appear on the LCD display SET DATE AND TIME PRESS START ...

Страница 24: ...the Start button to confirm your settings The WorkCentre 490cx returns to standby mode If there are no ink cartridges installed ALL CART EMPTY appears in the top line of the display Note If you do not set the date and time after a short period of time the machine will automatically accept whatever date and time are displayed on power up It will then go into standby mode Note To power off the machi...

Страница 25: ...e installed and to gauge ink cartridge utilization There are two methods of entering this information You may enter the required information directly via the WorkCentre 490cx control panel or you can update Ink Cartridge information using the WorkCentre 490cx Printer Driver Software and a PC The procedures in this section cover Ink Cartridge Installation without using the WorkCentre 490cx Printer ...

Страница 26: ...l cover by pulling up on the Control Panel The Cartridge Compartment Cover is now accessible 2 Open the Cartridge Compartment Cover by lifting up on the recessed handle The Cartridge Carrier Assembly moves to the center of the machine Control Panel Cartridge Compartment Cover ...

Страница 27: ...kaging Hold the cartridge by the top only Note Avoid touching the electrical contacts on the cartridge 4 Carefully remove the sealing tape by pulling straight out on the tab located at the end of the Ink Cartridge Note Ensure that there are no pieces of tape remaining on the cartridge ...

Страница 28: ...Ink Cartridge holder is located on the right side of the Cartridge Carrier Assembly and can be identified by a black key tab 6 Slide the Black Ink Cartridge down into the holder and push it in the direction of the arrow until it clicks into place Black Cartridge Holder Color Cartridge Holder ...

Страница 29: ...the cartridge by the black areas or colored top only Note Avoid touching the electrical contacts on the back of the cartridge 8 Carefully remove the sealing tape by pulling straight out on the tab located on the end of the Ink Cartridge Note Avoid touching the electrical contacts on the cartridge ...

Страница 30: ...key tab 10 Slide the Color Ink Cartridge down into the holder and push it in the direction of the arrow until it clicks into place 11 Close the Cartridge Compartment Cover CARTRIDGE CHANGED appears in the display 12 Press the Down or Up button until BOTH appears in the display 13 Press the Start Button LEFT CARTRIDGE appears in the top line of the LCD display Black Photo Cartridge Holder Color Car...

Страница 31: ...isplay 17 Press the Start button to confirm your choice The Cartridge Carrier Assembly moves back to the docking position 18 A Cartridge Alignment Test print is printed out This will ensure that your WorkCentre 490cx generates the best possible prints Refer to Arrange Alignment on page 1 48 CAUTION Do not power off the machine until the Cartridge Carrier Assembly has moved back into the docking po...

Страница 32: ...aximum of 100 sheets of 20 lb plain paper or 10 envelopes or other print media Depending upon media thickness maximum capacity may be reduced Note If you experience problems feeding paper place the media into the Manual Paper Feeder one sheet at a time 1 Pull the Extension Tray on the Automatic Paper Feeder all the way up 2 Prepare the print material for loading For paper and envelopes flex paper ...

Страница 33: ...der For transparencies be sure to use transparency stock approved for use with inkjet printers Refer to the packaging for the transparency stock to determine the print side Hold the transparencies by the edges and avoid touching the print side Be careful not to scratch or leave fingerprints on the print side Fan the stack of transparencies to prevent feeding failures ...

Страница 34: ...Automatic Paper Feeder Do not exceed the rated capacity Do not mix different types of print media Refer to the following instructions for loading each type of print material a Load paper or transparencies with the print side facing you b Load letterhead paper with the design side face up The top edge of the sheet with the logo should enter the printer first ...

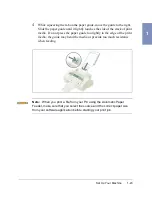
Страница 35: ...stack of print media Do not press the paper guide too tightly to the edge of the print media the guide may bend the media or provide too much resistance when feeding Note When you print a file from your PC using the Automatic Paper Feeder make sure that you select the source and the correct paper size from your software application before starting your print job ...

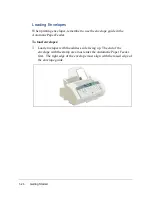
Страница 36: ...envelope guide in the Automatic Paper Feeder To load envelopes 1 Load envelopes with the address side facing up The end of the envelope with the stamp area must enter the Automatic Paper Feeder first The right edge of the envelope must align with the raised edge of the envelope guide ...

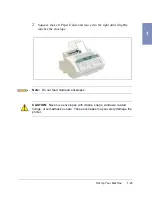
Страница 37: ...aper Guide and move it to the right until it lightly touches the envelope Note Do not feed stamped envelopes CAUTION Never use envelopes with clasps snaps windows coated linings or self adhesive seals These envelopes may severely damage the printer ...

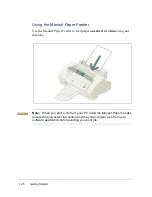
Страница 38: ...nual Paper Feeder to feed paper one sheet at a time into your machine Note When you print a file from your PC using the Manual Paper Feeder ensure that you select the source and the correct paper size from your software application before starting your print job ...

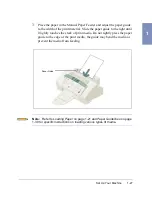
Страница 39: ...er guide to the right until it lightly touches the stack of print media Do not tightly press the paper guide to the edge of the print media the guide may bend the media or prevent the media from feeding Note Refer to Loading Paper on page 1 21 and Paper Guidelines on page 1 30 for specific instructions on loading various types of media Paper Guide ...

Страница 40: ...Started 2 Ensure that the media is fed into the machine as far as it will go 3 Press the Start button to start manual feeding of the media If you have more than one page to print press the Start button for each page ...

Страница 41: ...the floor Do not place heavy objects on top of the paper whether it is packaged or unpackaged Keep it away from moisture or other conditions that can cause it to wrinkle or curl During storage moisture proof wrap any plastic container or bag should be used to prevent dust and moisture from contaminating your paper Always use paper and other media that conform with those listed under Specifications...

Страница 42: ...uantity Paper Types Plain Paper The machine supports paper sizes of letter legal and A4 in portrait orientation You can use regular copier paper cotton bond papers and typical letterhead Always use paper without curls folds staples or damaged edges Inkjet Paper This paper has been developed specifically for printing with inkjet printers It will produce high quality documents which will compare fav...

Страница 43: ...kjet T shirt transfers to create and personalize T shirts sweatshirts aprons tablecloths napkins tote bags and anything else your imagination allows Use on any cotton or cotton poly blend fabric Your image is printed in mirror image so when you iron it onto the T shirt the image is viewed correctly Greeting Card Stock Get the most out of card making software with Greeting Cards These cards give yo...

Страница 44: ...ted side with a sheet of plain not coated paper before storing it this is recommended even if you place the sheets in a clear file or plastic holder Do not leave the film in the paper tray for long periods of time Dust and dirt may accumulate on the film resulting in spotty printing To avoid smudging caused by fingerprints handle transparency film and coated paper carefully To avoid fading do not ...

Страница 45: ...er stock may curl slightly due to the large amount of ink If you need to print dense graphics try printing on heavier stock Do not use thicker paper than meets the specifications for this machine Printing with a paper that is thick enough to come in contact with the print head nozzles may damage the cartridge ...

Страница 46: ...e personal computer with a Pentium 100MHz or faster processor Windows operating environment Windows 95 Windows 98 Windows 2000 and Windows NT 4 0 At least 10MB of free hard disk space 24MB or more RAM 10MB minimum hard disk space required for driver installation only If installing the additional software packages included on the CD ROM an additional 70MB free hard disk space is required 70MB Pagis...

Страница 47: ...our computer to properly communicate with the WorkCentre 490cx for printing and scanning operations All of the necessary drivers are contained on the CD included with your WorkCentre 490cx Software Included With the WorkCentre 490cx For your convenience in addition to the driver files the scanning program Pagis Pro 2 0 a suite of scanning applications is also included on the CD ROM ...

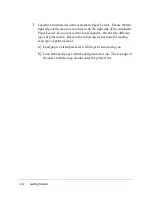
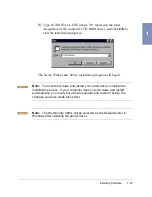
Страница 48: ...e WorkCentre 490cx by unplugging it from the wall outlet 3 Turn on your PC and start Windows 4 Power on the Workcentre 490cx by plugging it into a grounded wall outlet 5 Insert the supplied CD into your computer s CD ROM drive The Xerox WorkCentre 490cx installation program will begin If the program does not start a From the Start menu select Run Windows 95 98 Windows 2000 and NT 4 0 ...

Страница 49: ... 490cx installation program will begin Note You must shut down and restart your computer to complete the installation process If your computer does not shut down and restart automatically you must shut it down manually and restart it before the changes you have made take effect Note The WorkCentre 490cx will be selected as the Default printer in Windows after installing the printer driver ...

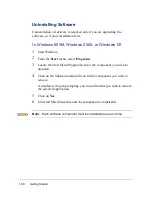
Страница 50: ...om the Start menu select Programs 3 Locate the Start Menu Program Item for the component you wish to uninstall 4 Click on the Submenu uninstall icon for the component you wish to remove A window will open prompting you to confirm that you wish to remove the selected application 5 Click on Yes 6 Uninstall Shield launches and the component is uninstalled Note Each software component must be uninstal...

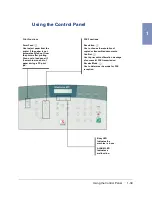
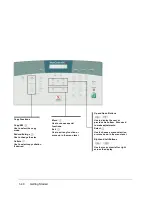
Страница 51: ...e printer if the paper is not automatically fed out from the printer after printing Also use to load paper if the machine runs out of paper during a PC print job FAX Functions Resolution Use to choose the resolution of copied or transmitted documents Confirm Use to print out confirmation message of successful FAX transmission Receive Mode Use to determine the mode for FAX reception ...

Страница 52: ...splay the next or previous menu item Also used to make adjustments Select Use to choose a menu selection or move down in the menu level Right and Left Buttons Use to move cursor left or right across the display Copy Functions Copy BW Use to select the copy mode Reduce Enlarge Use to change the size Collate Use to select copy collation if desired ...

Страница 53: ...2 digit number Redial Pause Use to redial the last phone number called You can also use it to add a pause when storing a number in memory On Hook Dial Use to adjust the volume of the internal speaker and for on hook dialing LCD Display The display shows the current status of your machine and guides you through various tasks using a menu system for each operation ...

Страница 54: ...Use to stop an operation of any kind Start Use to start a job Also use to activate the selection shown on the LCD display Number Keypad Use to dial numbers manually or to enter letters and numbers for various programming functions Lighten Darken Use to change the contrast of the copied or transmitted documents ...

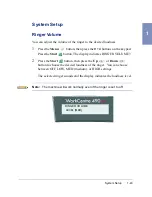
Страница 55: ...s the Start button The display indicates RINGER VOLUME 2 Press the Start button then press the Up or Down button to choose the desired loudness of the ringer You can choose between OFF LOW MED medium or HIGH settings The selected ringer sounds and the display indicates the loudness level Note The machine will work normally even if the ringer is set to off RINGER VOLUME LEVEL MED ...

Страница 56: ...ntrast can be set to their most frequently used modes Whenever a document is sent or copied the home contrast and resolution mode will be activated unless otherwise changed by using the Resolution or Contrast button on the control panel 1 Press the Menu button then press the 0 4 buttons on the keypad Then press the Start button The display indicates RINGER VOLUME 2 Press the Up or Down button unti...

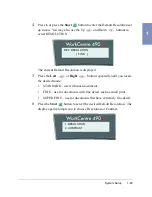
Страница 57: ...d 5 Press the Left or Right button repeatedly until you locate the desired mode STANDARD use with most documents FINE use for documents with fine detail such as small print SUPER FINE use for documents that have extremely fine detail 6 Press the Start button to select the desired Default Resolution The display again prompts you to choose Resolution or Contrast DEF RESOLUTION FINE 1 RESOLUTION 2 CO...

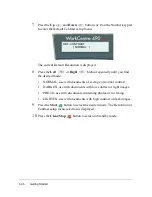
Страница 58: ...red mode NORMAL use with documents of average or normal contrast DARKEN use with documents with low contrast or light images PHOTO use with documents containing photos or for faxing LIGHTEN use with documents with high contrast or dark images 9 Press the Start button to select the desired mode The Resolution or Contrast setup menu selection is displayed 10 Press the Clear Stop button to return to ...

Страница 59: ...splay indicates SELF TEST 2 Press the Down button ARRANGE ALIGNMENT appears in the display 3 Press the Start button PRINTING appears on the LCD display The WorkCentre 490cx prints out a Cartridge Alignment pattern sheet consisting of a series of six test patterns The patterns are designated A B C D E and F Each pattern is made up of a series of lines which are individually numbered By selecting th...

Страница 60: ... The flashing number on the left side of the display indicates the line from print pattern A that is currently selected as optimal 4 Using the Number Keypad enter the number of the line which appears the straightest from pattern A 5 Press the Up and Down button to confirm your selection The LCD panel updates and the setup screen for the Alignment B test pattern is displayed 6 Repeat steps 4 and 5 ...

Страница 61: ...tart button The display indicates SELF TEST 2 Press the Up button twice CLEAN HEAD appears in the LCD display 3 Press the Start button PRINTING appears on the LCD display The WorkCentre 490cx prints a head cleaning test pattern Note the series of diagonal lines across the top and bottom of the test pattern Breaks within a line of the same color indicate a clogged nozzle Try running the Clean Head ...

Страница 62: ... Menu button then press the 0 4 buttons on the keypad Then press the Start button The display indicates RINGER VOLUME 2 Press the Up or Down buttons until SELECT LANGUAGE and ITEM 1 2 appear in the LCD display Then press the Start button 3 Press the Up or Down buttons to scroll through the language options A flashing cursor will indicate the currently selected language 4 Press the Start button to ...

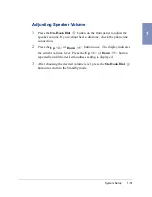
Страница 63: ...you cannot hear a dial tone check the phone line connection 2 Press the Up or Down button once The display indicates the current volume level Press the Up or Down button repeatedly until the desired loudness setting is displayed 3 After choosing the desired volume level press the On Hook Dial button to return to the Standby mode ...

Страница 64: ...splay The display prompts you to select either a 12 hour or 24 hour Clock Mode 3 Press 1 to select a 12 hour Clock Mode or Press 2 to select a 24 hour Clock Mode Setting the Date and Time The current date and time are shown in the display when the machine is on and ready for use Standby mode The date and time are printed on all faxes you send 1 Press the Menu button then press the 0 3 buttons on t...

Страница 65: ...sh to change After entering the date the flashing cursor will move into the first digit of the time 3 Using the number keypad enter the current time Remember to enter the time according to the current Clock Mode setting 12 or 24 hour format Refer to the previous section CLOCK MODE for details 10 27 1998 04 06 PM 27 10 1998 04 06 PM MMDDYYYY DDMMYYYY Date and Time format determined by country locat...

Страница 66: ...the System ID Your Number and Name In some countries you are required by law to indicate your fax number on any fax you send The System ID containing your telephone number and name will be printed at the top of each page sent from your machine 1 Press the Menu button then press the 0 2 buttons on the keypad Then press the Start button SYSTEM NUMBER appears in the LCD display A flashing cursor in t...

Страница 67: ... can enter a space by pressing the Right button two times If an incorrect number is entered press the Left or Right button to move the cursor under the incorrect digit then enter the correct number 3 Press the Start button when the correct number is displayed The display prompts you to enter your ID name ...

Страница 68: ... to enter the same letter or number in succession for example SS AA 777 enter one digit then move the cursor by pressing the Right button and enter the next digit Use the Right button to insert a space in the name Pressing the Right button two times moves the cursor two positions to the right creating a space For additional details on how to use the number keypad to enter alphanumeric characters s...

Страница 69: ...ly printed after every 40 transmissions or receptions Schedule Information List Schedule Job The Schedule Information List provides information about documents currently stored for Delayed Transmission Priority Transmission Memory Transmission Continuous Polling and TX Polling The list shows the starting time type of operation etc Telephone Number List Phone Book This Telephone Numbers List indica...

Страница 70: ...ing the remote site fax number a sample of the transmitted text the number of pages faxed the communication mode and the communication results You can set up your machine to print a TX Confirm report Automatically after each transmission ON Automatically only if an error occurs during transmission ERR The machine can be set to print no report at all OFF You can print this report manually whenever ...

Страница 71: ... Press the Reports button 2 Press the Up or Down button to until the desired report or list is displayed Press the Start button The selected report or list will be printed out Note To obtain a Message Confirmation Report press the Confirm button ...

Страница 72: ...of ink or paper has a paper jam or is printing a file sent from a PC Multi Communication Report This report is printed automatically after sending to or receiving from more than one location and provides detailed information about the operation Power Failure Report This report is printed out automatically if the memory has not been backed up when power is restored following a power failure This re...

Страница 73: ...ation on printing the list see To Print Reports Lists on page 1 60 Setting an Option 1 Press the Menu button 2 Press the 0 1 buttons on the keypad Then press the Start button The display shows the first option menu 3 Scroll through the options by pressing the Down or Up buttons repeatedly 4 When the option you want appears in the display enter the number for the desired setting Or You can use the ...

Страница 74: ...de Selectable Options These instructions assume you ve followed the steps listed in the previous procedure Setting an Option and the machine is prompting you to change one of the options listed below All of these options are menu settings accessed by the System Data Press the Menu button press the 0 1 buttons on the keypad Then press the Start button PAPER SIZE Select the paper size you will be pr...

Страница 75: ...ff OFF Press 3 to print only when an error occurs and the transmission was not successful ERR AUTO JOURNAL The journal is a report providing detailed information about the previous 40 communication operations including times and dates Press 1 to print the journal automatically after every 40 transmissions or receptions ON Press 2 to disable automatic printing of the Journal OFF You can still print...

Страница 76: ...c keypad DIAL MODE Select the type of dial system your fax machine is connected to Press 1 if the fax machine is connected to a tone Touch Tone dial line Press 2 if the fax machine is connected to a pulse Rotary dial line Note Pulse Rotary dialing is not available in all countries ECM MODE Error Correction Mode This mode compensates for poor line quality and ensures accurate error free communicati...

Страница 77: ...t on a single page If the fax machine cannot reduce the data to fit into one page with this feature enabled the data is divided and printed in actual size on two or more sheets There are two RX Reduction modes available On and Vertical Only Press 1 to turn the RX reduction feature on Note that this feature does not apply to the copy mode This will reduce incoming pages equally along each axis in o...

Страница 78: ... any excess image at the bottom of the page to fit into the recording paper size If the received page is outside the margin you set it will be printed on two sheets of paper at the actual size If the data is within the margin and the Auto Reduction feature is turned ON it will be reduced to fit into the appropriate size paper Discard does not take place If the Auto Reduction feature is turned OFF ...

Страница 79: ...ne rings before answering an incoming call If you are using your machine as both a telephone and a fax machine it is recommended that you set the ring count to at least 4 to allow you time to answer a call Enter the ring count by selecting a number from 1 through 7 on the number keypad SEND FROM MEMORY With this feature enabled all transmission documents are automatically scanned into memory and i...

Страница 80: ...bling the Continuous Polling Report every time continuous polling ends a multi communication report will be printed The report will contain the results for each registered station Press 1 to turn this feature on Press 2 to turn this feature off FAXPRINT QUALITY This feature determines the print quality for incoming faxes The two choices available are Letter Quality LQ and Draft Letter Quality Faxp...

Страница 81: ...ones for many different clients They need to know which number someone is calling on to properly answer the phone Using the Distinctive Ring Pattern Detection feature your fax machine can learn the ring pattern you designate to be answered as a fax Unless you change it this ringing pattern will continue to be recognized and answered as a fax call All other ringing patterns will be forwarded to the...

Страница 82: ...isplayed Press 1 to turn DRPD on Press 2 to turn DRPD off If you press 1 to set up the Distinctive Ring Pattern Detection the LCD displays WAITING RING Call your DR fax number from another telephone It is not necessary to place the call from a fax machine When your machine begins to ring do not answer the call The machine requires several rings to learn the pattern When the machine completes learn...

Страница 83: ...ny previously set reception mode Note DRPD must be set up again if you re assign your fax number or connect the machine to another telephone line After DRPD has been set up call your fax number again to verify that the machine answers with a fax tone then have a call placed to a different number assigned to that same line to be sure the call is not answered by the 490cx ...

Страница 84: ...1 72 Getting Started ...

Страница 85: ...djustable Contrast Using the Lighten Darken button the contrast setting can be changed to obtain the best copy quality for documents containing faint markings dark images photographs or other halftone images Multiple copies 1 to 99 copies of the document can be made Enlarge Reduce Using the Enlarge Reduce menu you can reduce or enlarge the size of a copied image from 25 to 200 in increments of 1 ...

Страница 86: ... COLLATE is set to OFF To make a single copy 1 Adjust the document guides to match the width of the document 2 Slide the document face down into the Automatic Document Feeder until it is grasped and pulled into the machine The DOCUMENT READY prompt is displayed on the LCD display Note Up to 30 pages may be inserted in the Automatic Document Feeder at one time 3 Press the Copy BW button until the d...

Страница 87: ... Adjust the document guides to match the width of the document 2 Slide the document face down into the Automatic Document Feeder until it is grasped and pulled into the machine The DOCUMENT READY prompt is displayed on the LCD display Note Up to 30 pages may be inserted in the Automatic Document Feeder at one time 3 Press the Copy BW button until the desired Copy Mode is displayed You may choose C...

Страница 88: ...n collation on again 5 For Normal collation press 1 To reverse the copy from the order of the original document press 2 For more information on collation refer to Collating and Sorting on page 2 7 6 Using the keypad enter the desired number of copies Note Do not enter more than two digits 1 99 or the machine will only accept the last two digits or it will attempt to place a phone call to the digit...

Страница 89: ...nt inserted in the Automatic Document Feeder press the Lighten Darken button The current Contrast setting is displayed on the LCD display 2 To change the Contrast continue to press the Lighten Darken button The setting will change each time you press the button You may choose NORMAL DARKEN LIGHTEN or FAX PHOTO Note After releasing the button the machine will switch to the mode currently displayed ...

Страница 90: ... the right corner of the bottom line shows the current image percentage To reduce or enlarge the image size enter the percent value 25 to 200 using the keypad Note After releasing the button the machine will switch to the mode currently displayed It is not necessary to press any other buttons to complete this action 3 Press the Down button to confirm your setting Return to the procedure that was b...

Страница 91: ... on before copying Otherwise the copies will be uncollated To Collate and Sort copies 1 With the document inserted in the Automatic Document Feeder press the Collate button The LCD display shows the COPY COLLATE options 2 Selecting 1 ON will collate your copies There are two collation modes NOR Normal and REV Reverse COPY COLLATE 1 ON 2 OFF COPY PRINT ORDER 1 NOR 2 REV ...

Страница 92: ...ecting NOR will make copies in reverse order of the original document The machine will make one copy of page 3 page 2 and page 1 reverse order then make a second copy of page 3 page 2 and page 1 until all copies have been made 3 Selecting 2 OFF will make the requested number of copies of page 1 completely then page 2 then page 3 etc These copy sets will all be stacked atop of one another in the Pa...

Страница 93: ...he WorkCentre you re using better paper you ll get a higher quality print You can configure the WorkCentre for the following paper types Plain Premium Glossy Transparency To change the media type 1 Press the Menu button 2 Press the Up button until Menu 13 displays in the LCD display 3 Press the Start button to display the Paper Type menu 4 Press Up button or Down button until the number correspond...

Страница 94: ...2 10 Making a Copy ...

Страница 95: ...with the WorkCentre 490cx in one of two ways By placing the document in the Automatic Document Feeder and entering the information required for faxing at the WorkCentre 490cx Control Panel This is called Manual Faxing For information and instructions for Manual Faxing refer to Manual Faxing on page 3 3 ...

Страница 96: ...the document directly from your computer workstation using LaserFAX Lite a software application included with your WorkCentre This is called PC Faxing For information and instructions for PC Faxing refer to PC Faxing on page 3 44 ...

Страница 97: ...rd letter legal or A4 size paper Follow these guidelines to prepare your documents Do not attempt to feed the following types of documents into the machine carbon paper or carbon backed paper coated paper onion skin or thin paper wrinkled or creased paper curled or rolled paper torn paper Note If your document falls into any of the above categories make a copy of the document on a platen glass cop...

Страница 98: ...cuments containing different sizes or weights of paper Sending a Fax Manually 1 Adjust the document guides to match the width of the document 2 Slide the document face down into the Automatic Document Feeder until it is grasped and pulled into the machine The display alternately reads DOCUMENT READY and shows the remaining memory capacity Up to 30 sheets may be inserted at a time Document Guides ...

Страница 99: ... Resolution on page 3 25 and Contrast on page 3 27 4 Using the Number keypad enter the number of the fax machine to which you wish to send the document If you make a mistake while entering a number move the cursor under the incorrect digit by using the Left or Right buttons and correct the number You may also delete incorrect numbers by pressing the Clear Stop button Note A phone number must be fo...

Страница 100: ...ed dial location number For information on storing numbers in memory see Speed Dialing on page 3 19 4 Press the Start button to dial the number The machine will scan the document and dial the number automatically When the remote fax machine answers the document will be transmitted automatically Note You can store Speed Dial numbers so you can dial your most frequently used numbers with a two digit...

Страница 101: ...To send a fax using the Group Dialing feature 1 Adjust the document guides to match the width of the document 2 Slide the document face down into the Automatic Document Feeder until it is grasped and pulled into the machine 3 Follow the procedure for the desired operation see Memory Transmission Broadcasting on page 3 12 or Delayed Transmission on page 3 14 4 When you come to the step where the di...

Страница 102: ...mory and subsequently dial each of the numbers included in the group Sending a Fax After Talking If you have a phone connected to the EXT jack on the side of the machine you can send a fax after speaking with a person at the remote site 1 Adjust the document guides to match the width of the document 2 Slide the document face down into the Automatic Document Feeder until it is grasped and pulled in...

Страница 103: ...eps 5 to 7 occur in the proper order 5 When finished talking instruct the person at the remote location to start their fax machine They can then hang up The remote fax machine will send the initial fax tones 6 Wait until you hear the fax tone from the remote fax machine 7 Press the Start button on the WorkCentre 490cx The machine begins to transmit 8 Replace the handset ...

Страница 104: ...lear Stop button again to cancel the transmission Confirming a Transmission A Message Confirmation report shows whether the transmission was successful and how many pages were sent When the last page of your document has been sent successfully the machine beeps and returns to Standby mode To print a Message Confirmation report 1 Press the Confirm button in the Fax Column on the Control Panel 2 The...

Страница 105: ... in the display a Press 1 to print a confirmation report automatically each time you send a fax ON Or b Press 2 to turn this feature off OFF Or c Press 3 to print only when an error occurs and the transmission was not successful ERR If an error occurred during your fax transmission an error message appears in the display If you receive an error message press the Clear Stop button to clear the mess...

Страница 106: ...er sending the documents are automatically erased from memory 1 Adjust the document guides to match the width of the document 2 Slide the document face down into the Automatic Document Feeder until it is grasped and pulled into the machine If necessary adjust the resolution and contrast For details see Resolution on page 3 25 and Contrast on page 3 27 3 Press the Menu button then press 0 7 buttons...

Страница 107: ...e document to more than one location press the 1 button and enter another fax number using the numeric keypad or two digit Speed Dial number The number appears in the display Repeat Step 6 until you have entered the last fax number Press the 2 button after entering the last fax number 7 The document is scanned into memory The display shows the remaining memory capacity and the number of pages The ...

Страница 108: ... Resolution on page 3 25 and Contrast on page 3 27 2 Press the Menu button then press the 0 6 buttons on the keypad Then press the Start button 3 Enter the telephone number of the remote machine up to 46 digits There are two methods available to do this Direct entry of the telephone number using the numeric keypad Group and Speed number dialing using the numeric keypad see Speed Dialing on page 3 ...

Страница 109: ...ntil you have entered the last fax number Press the 2 button after entering the last fax number Note Only a single Group dial number from the speed dial list may be used in a Delayed Transmission Operation 6 The display prompts you to enter a name for the transmission If you want to assign a name to the transmission to check the status later enter it using the Number keypad If not proceed to Step ...

Страница 110: ...l be sent at that time on the following day Note Remember to enter the time in either twelve or twenty four hour clock mode format depending upon which mode you enabled For more information see Selectable Options on page 1 62 8 After entering the time press the Start button 9 The machine scans the document into memory returns to Standby mode and displays a reminder that a Delayed Transmission is s...

Страница 111: ...in the Automatic Document Feeder If necessary adjust the resolution and contrast For details see Resolution on page 3 25 and Contrast on page 3 27 2 Press the Menu button then press the 1 0 buttons on the keypad Then press the Start button 3 The LCD display prompts you to select ADD or CANCEL Note that 1 ADD is already selected in the LCD display OPERATION 1 ADD 2 CANCEL ...

Страница 112: ... 5 Press the Up or Down buttons repeatedly until you find the operation you want to add documents to then press the Start button 6 The machine automatically adds the new documents to the pages already in memory displays the number of total pages and added pages then returns to Standby mode 09 00 AM DELAY TX FAX1 ...

Страница 113: ...Start button to cancel the job Speed Dialing With the Speed Dial Key and the Ten Key Pad you can store up to 50 numbers in two digit Speed Dial locations 01 50 Storing a Number for Speed Dialing 1 Press and hold the Speed Dial button for 2 seconds 2 Enter a two digit location number 01 through 50 to which you want to store a number then press the Start button If a number is already stored in the l...

Страница 114: ...e 3 29 Or If you don t want to assign a name skip this step 5 Press the Start button when the name appears correctly or without entering a name 6 To store more telephone numbers repeat steps 2 through 5 Or To return to Standby mode press the Clear Stop button Dialing a Speed Dial Number 1 Press the Speed Dial button then enter the two digit number assigned to the number you wish to call 2 Press th...

Страница 115: ...ine will dial the next stored number and after dialing all of the stored numbers will automatically redial any number previously busy Before you can use this feature you must store Group numbers into speed dial locations Note Group Dial numbers are assigned to speed dial locations up to 20 can be supported A Group number can not include other Group numbers Storing Speed Dial Numbers for Group Dial...

Страница 116: ...m your choice 3 Press 1 to confirm your selection or 2 to cancel it and choose a different Group Dial location The display prompts you to enter a Speed Dial number which you wish to include in the group 4 Enter the two digit Speed Dial location to which the fax number you wish to include in the group is stored GROUP NO S02 1 YES 2 NO ENTER SPEED DIAL ...

Страница 117: ...mbers you want to include in the group The display asks you to enter a name 7 To assign a name to the Group enter the desired name Or If you don t want to assign a name skip this step 8 Press the Start button The display prompts you to assign another group dial number If you want to store another group dial number repeat steps 2 through 8 Or To return to Standby mode press the Clear Stop button ...

Страница 118: ...r good quality transmission that you fax documents that were printed with a typewriter felt tip pen black ink or laser printer The paper should be white or very light The document should be of normal weight do not use cardboard Blue lines on a ruled pad will not fax well When sending typical text based documents you should not need to adjust the resolution and the contrast However if you send docu...

Страница 119: ...rpness and clarity By pressing the Resolution button repeatedly after loading a document you can choose between STANDARD 1FINE or SUPER FINE modes Resolution cannot be changed during a job The document types recommended for these settings are described in the table on the next page 1 Fine is factory set ...

Страница 120: ...ax machine does not support Super Fine Resolution the WorkCentre 490cx will transmit using the highest resolution mode supported by the remote fax machine Mode Recommended for Standard Documents with normal sized characters Fine Documents containing small characters or thin lines or for sending documents printed with a dot matrix printer Super Fine Documents containing extremely fine detail SUPER ...

Страница 121: ... document is sent or copied unless you change the setting for an individual operation The machine will automatically revert to default settings after the operation is completed For details on how to set the default resolution and contrast see Default Settings on page 1 44 Mode Recommended for Normal Faxing most documents Darken Documents containing light print or faint pencil markings Lighten Docu...

Страница 122: ... your machine you enter your name or your company s name and telephone number When setting up Speed Dial numbers you will also need to enter telephone numbers and names When prompting you to enter a name the LCD display will appear as shown below You can then use the procedures described below to enter up to 20 letters and special characters numbers or spaces NAME ...

Страница 123: ...n repeatedly until the correct letter appears in the display For example to enter the letter O press the 6 key labeled MNO Each time you press the 6 key the display shows a different letter first M the N and O and finally 6 You can enter special characters space plus sign etc in the name by using the 0 key See Keypad Character Assignments on page 3 31 ...

Страница 124: ...ter locate the Number keypad button labeled with the letter you want Press the button repeatedly until the letter appears in the display If the next letter is printed on the same Number keypad button move the cursor by pressing the Right button then press the Number keypad button labeled with the letter you want NAME O ...

Страница 125: ... enter press the Number keypad button repeatedly until the letter you wish to enter appears in the display Select additional letters in the same way 3 When you finish entering letters press the Start button Keypad Character Assignments Key Assigned numbers letters or characters 1 1 2 A B C 2 3 D E F 3 4 G H I 4 5 J K L 5 6 M N O 6 7 P Q R S 7 8 T U V 8 9 W X Y Z 9 0 0 NAME OP ...

Страница 126: ...one before dialing an outside number In such cases you must insert a pause in the telephone number You can insert a pause in the telephone number when you are setting up a Speed Dial number or when you dial a number without lifting the handset To insert a pause press the Redial Pause button at the appropriate place while entering the telephone number A P will appear in the display at the correspon...

Страница 127: ...y To search through Redial memory 1 Press and hold the Redial Pause button for 2 seconds The Redial memory in your machine retains the last 10 numbers called If you have dialed the same number multiple times the machine does not count the duplicates 2 Press the Up or Down buttons to search through memory until you find the number you want 3 When the number you want appears in the display press the...

Страница 128: ...ne fails to connect it returns to Standby mode 1 While the machine is waiting to redial the LCD display shows RETRY REDIAL 2 If you want to redial the number immediately press the Start button To stop redialing press the Clear Stop button You can select the number of retries and the retry interval between each redial attempt See User Options System Data on page 1 61 Job Status Job Status displays ...

Страница 129: ... This will also bypass memory send and send the documents directly from the ADF Searching for a Number in Memory There are two ways to search for a number in memory You can either scan from A to Z sequentially or you can enter the first letter of the name associated with the number Searching Sequentially through Memory 1 Press the Speed Dial button then press the Up or Down buttons to move through...

Страница 130: ...mence dialing If a document is loaded transmission will begin when the remote fax machine answers Searching by the First Letter 1 Press the Speed Dial button then Up or Down button then press the button labeled with the letter you want to search for A name beginning with the letter appears in the display For example if you want to find the name MOBILE press the 6 button which is labeled with the l...

Страница 131: ...f the call The machine returns to the pulse mode after you complete the call Priority Transmission When priority transmission is enabled a high priority document can be transmitted ahead of previously scheduled operations A priority transmission interrupts a broadcast operation between stations for example when transmission to station A ends but before transmission to station B begins The priority...

Страница 132: ... available in a Priority Transmission 4 The display prompts you to enter a name for the transmission To assign a name to the transmission enter it using the Number keypad and press the Start button Or If you do not want to assign the transmission a name press the Start button to skip over this step For details on how to enter letters using the Number keypad see Entering Alphanumeric Characters on ...

Страница 133: ...erates the call Note The remote machine must also support Polling to use this feature Being Polled By a Remote Machine POLL TX You can program your fax machine to send documents when polled by a remote fax machine It is possible to assign a Poll Code to prevent unauthorized polling of your fax machine When you secure your machine using a Poll Code only those who know the code can poll your machine...

Страница 134: ...Continuous Polling For continuous polling refer to page 4 9 3 Press the Start button to confirm SEND The display prompts you to enter a 4 digit poll code Note If there is a document in memory to be polled a FUNCTION FULL SETTING is displayed Note The poll code is preset to 0000 at the factory This setting represents no poll code required for the remote 4 If you want to use a poll code enter a 4 di...

Страница 135: ...want one you may enter 0000 and then press the Start button The machine stores the document in memory The display shows a count of the number of pages being stored in memory and the remaining memory capacity 6 The machine returns to Standby mode and displays a reminder that a Polling Transmission POLL TX is set The machine automatically switches to FAX mode automatic receiving when configured to b...

Страница 136: ...nal documents face down into the Automatic Document Feeder 2 Press the Menu button then press the 1 0 buttons on the keypad Then press the Start button The LCD display prompts you to select 1 ADD or 2 CANCEL 3 Press 1 The setup POLL CODE information for the job stored into memory is displayed 4 Press the Start button The machine scans the new documents into memory and returns to Standby mode ...

Страница 137: ...lled follow the procedure below 1 Press the Menu button 2 Press the 1 0 buttons on the keypad Then press the Start button The LCD display prompts you to select 1 ADD or 2 CANCEL 3 Press 2 The setup information for the entered polling job is displayed Press the Start button The job is erased from memory and the machine returns to Standby mode ...

Страница 138: ...aserFAX Lite software is an application that is used to enable PC Faxing using the WorkCentre 490cx If selected during the installation of the other software components for the WorkCentre 490cx the LaserFAX Lite application is installed automatically After it is installed LaserFAX becomes a selection among the printing devices for your computer workstation When you send a fax directly from your PC...

Страница 139: ...on using either the supplied IEEE 1284 parallel cable or a USB cable and a phone line has also been connected to the Tel Line input on the back of the WorkCentre 490cx The system requirements and procedures for installing LaserFAX Lite software are contained in Installing Software on page 1 34 Refer to that section if LaserFAX Lite is not already installed on your computer workstation ...

Страница 140: ...s The actual steps you perform may be slightly different depending on the Windows version and application you are faxing from Additional detail for some of the dialogs is available later in this section of the User Guide You are also encouraged to refer to the on line help for the LaserFAX application 1 Open a word processing application on the computer workstation 2 Create or open the document to...

Страница 141: ...dy defined entries in the Phonebook you can type a key name assigned to a Phonebook entry and LaserFAX Lite will look up the associated fax number Note For information on the LaserFAX phonebook refer to The LaserFAX Phonebook on page 3 62 You can also select the Help button and review the on line help topics for this feature 8 Optional Enter a description of the fax job While this is an optional s...

Страница 142: ... information on the Cover sheet Note If a new cover sheet is selected the dialog will expand to include areas for you to enter the name of the recipient the subject of the fax and a short message a If prompted select Yes to define the cover sheet fields b Double click each user defined field name and type the desired information in the field c Click OK If the Save settings on exit option is select...

Страница 143: ...ox 12 Optional Select other features available under the Advanced button selection For more information on this features see Fax Conversion Dialog Advanced Features on page 3 51 13 To fax the document click the OK button This will result in the job being displayed in the All jobs pending list in the LaserFAX application ...

Страница 144: ...plication At that time it will be displayed in the Jobs completed list Note The features of the LaserFAX application are briefly described under LaserFAX Application Features on page 3 58 For more detailed information on the features of the LaserFAX application refer to the on line help system in the LaserFAX application ...

Страница 145: ...is an Advanced button that can be selected which makes available several other features for the fax job When the Advanced button is selected the dialog below is displayed Note that the Fax Conversion screen now contains additional fields for the Cover sheet and three new buttons Send options Attach and Keep ...

Страница 146: ...t In this field the recipient of the fax is entered Subject The subject of the fax is entered here Message The message to be conveyed on the cover sheet is entered here Restore last cover sheet When selected this feature will restore the last cover sheet for the fax job Always Expand When this feature is selected the expanded cover sheet dialog seen in the diagram above is displayed by default whe...

Страница 147: ...e A signature may be up to 20 digits long and may be sent and received with the fax Note that it is not possible to transmit a signature if you also wish to perform a turnaround poll in the same transmission Fax ID This is the identification you send to the remote fax system If you do not enter a value here the default ID will be the fax number you entered when installing LaserFAX For additional i...

Страница 148: ...xes can be attached to the current job When the Attach button is selected the following dialog is displayed The features of this dialog are as follows The Fax button displays the list of fax files to choose from The arrow keys are used to change the order of the attachments The Edit button is used to change the displayed path to the attached file The Delete button is used to delete the attachment ...

Страница 149: ... OK You can select several faxes at once by holding down the CTRL key and clicking on the faxes that you wish to attach 3 When all files are attached to the fax job select OK to fax the job and its attachments Note For more information on the Attach feature refer to on line help within the LaserFAX Lite 3 5 application ...

Страница 150: ...3 56 Sending a Fax The Keep Button The Keep button will allow you to keep a copy of the fax on the workstation hard disk When the Keep button is pressed the following dialog is displayed ...

Страница 151: ...he description and enter a filename The default file type will be FAX 2 Optional Select Attach to existing file to attach the fax to the end of an existing fax document 3 Optional Click on the Always show file list if you would like this list displayed whenever you use the Files button in the LaserFAX application 4 After making settings on this dialog select OK to return to the Advanced dialog ...

Страница 152: ...serFAX application are briefly described For additional information on the functions and features of the LaserFAX application refer to the on line help system for LaserFAX The LaserFAX application is displayed when a fax is sent from the WorkCentre 490cx The following window is displayed ...

Страница 153: ... The Print Button This will print the current fax or list Use Printer setup from the File menu to select the default printer or fax machine to be used The Information Button This will show more details of a job in the All Jobs pending Jobs completed Fax files etc lists You can also use this button to see information about users or devices From the details screen displayed on your screen you will b...

Страница 154: ...ld Button This will stop the current job in progress or place a pending job into Hold status A held job can be released with the Go button The Waste Button This will delete an entry from a list For lists of completed transmissions or receptions it will provide the option to archive the lists to a file before deleting them The Keep Button This will keep a permanent copy of a fax file The kept file ...

Страница 155: ...ng an external fax machine with LaserFAX you can use this to scan documents into your PC The QuickFax Button This allows you to send a fax without using any other program See the QuickFAX screen and on line Help for more details The Phonebook Button This will display the phonebook After opening the phonebook you may add a new entry or select an existing number from it ...

Страница 156: ...book menu item or click on the Phonebook icon in the toolbar to view your entries Adding Entries to the Phonebook Display the phonebook and click on the Add button or press the INS Insert key on your keyboard to add a new entry You must specify a unique key name which can then be typed for LaserFAX to look up the fax number in your phonebook The phonebook provides the ability to add a description ...

Страница 157: ...he WorkCentre 490cx is connected and plugged in The parallel interface cable is properly connected and is not longer than 6 feet No error message is displayed on the WorkCentre 490cx If an error message is displayed check the Troubleshooting section of this manual to diagnose the problem ...

Страница 158: ...3 64 Sending a Fax ...

Страница 159: ...es are stored in memory if they are received when out of paper or ink during a jam or when printing from a PC or when printing Reports When used in this manner the WorkCentre 490cx is receiving faxes as a Stand Alone fax machine There are four distinct ways to configure the WorkCentre 490cx as a Stand Alone fax machine Refer to Reception Modes on page 4 3 For information and instructions for opera...

Страница 160: ...a Fax By receiving faxes directly to your computer workstation using LaserFAX Lite software This is called PC Fax Reception For information and instructions for PC Fax Reception refer to PC Fax Reception on page 4 16 ...

Страница 161: ...NS FAX mode you attach an answering machine to the EXT jack on your fax machine If the WorkCentre 490cx senses a fax tone it automatically switches to fax reception mode However if a fax is not sensed the WorkCentre 490cx routes the call to the answering machine and the caller can leave a voice message DRPD Distinctive Ring is a telephone company service which enables the use of a single telephone...

Страница 162: ...on page 4 9 If you seldom use the fax line for phone conversations set the WorkCentre 490cx to FAX mode In this mode the WorkCentre 490cx answers incoming calls and receives faxes automatically Note During PC file printing an incoming fax will be received and stored in memory The memory is also used for PC file printing If you are printing a large PC file it is recommended that you stop PC file pr...

Страница 163: ...tem displayed Press the Start button 2 Use the Up or Down button to set the desired loudness 3 Press the Clear Stop button twice to accept and exit Receiving Automatically in FAX Mode 1 Press the Receive Mode button until the display indicates FAX 2 When a fax call comes in the machine answers on the designated ring and receives the fax automatically Note To change the number of rings before the m...

Страница 164: ...s you to receive a fax press the Start button on the machine You may also press the characters 9 star nine star on the either phone to initiate reception Note The characters 9 star nine star are preset at the factory as the default remote receive start code for machines operated with a telephone connected to the EXT jack The asterisks in the code are fixed characters but the number can be changed ...

Страница 165: ...ated Note If you set your machine to ANS FAX mode and your answering machine is switched off or no answering machine is connected to the WorkCentre 490cx the machine will automatically go into fax receive mode after six rings If your answering machine has a user selectable ring counter set it to answer incoming calls after one ring Otherwise set the machine rings at least one ring higher than the ...

Страница 166: ...ocument is copying A document is printing Out of ink After receiving documents the machine displays MEMORY RECEIVED and the cause When the condition is cleared for example by loading new paper or clearing a jam the machine will automatically print the fax stored in memory If you clear the problem while the machine is receiving documents into memory it will print the stored document immediately upo...

Страница 167: ...nswer telephones for many different clients and need to know which number is being called by the ringing pattern of the phone Using the Distinctive Ring Pattern Detection feature DRPD this machine learns the ring pattern you designate to answer the fax Unless changed this ringing pattern will continue to be recognized and answered as a fax call and all other ringing patterns will be forwarded to t...

Страница 168: ...he document In other words it polls the machine holding the original document Polling Remote Machines CONT POLL You can set up the machine to automatically receive documents from unattended remote fax machines The machine can be set up to receive the fax now or at a later time This feature permits unattended polling in off peak hours when telephone rates are lower Note The remote machine must also...

Страница 169: ...ter the number of the remote fax machine 4 Enter the telephone number of the remote machine There are two methods available to do this Direct entry of the telephone number using the number keypad Speed Number dialing using the number keypad see Speed Dialing on page 3 19 including group dial locations Press the Start button SELECT POLLING 1 SEND 2 CONT ANOTHER FAX NO 1 YES 2 NO ...

Страница 170: ...ter another fax number using the number keypad or two digit Speed Dial number The number appears in the display b Press the Start button Repeat Step 6 to receive documents from other locations Or c If you have entered the last fax number that you want to receive from press the 2 button The display asks you to enter a 4 digit poll code POLL CODE 0000 ...

Страница 171: ... with a poll code or does not have this feature press the Start button to accept 0000 which represents no code The display prompts for the time range during which the machine will call and poll the remote machine s Enter the time duration for polling 7 Press the Start button Note If you set a time earlier than the current time your machine calls the number at that time on the following day START E...

Страница 172: ... for the Interval Time time between calls of the continuous polling For example to set your machine to poll the remote machine at 30 minute intervals enter 0030 9 Enter the interval time for polling 10 Press the Start button INTERVAL TIME HH MM ...

Страница 173: ...n time reception display and continuous poll scheduled time display 12 After Continuous Polling ends a multi communication report will be printed to show the result if the report is enabled This report feature is enabled through the User Options READY 03 00 PM JAN 15 1999 100 Poll Schedule Time READY 03 00 PM CONT POLL 04 40P ...

Страница 174: ...ly to a computer workstation connected to the WorkCentre 490cx Using this method a fax is received to the PC without printing it This process is controlled by a PC Faxing application called LaserFAX Lite Version 3 5 What is LaserFAX Lite LaserFAX Lite software is an application that is used to enable PC Faxing using the WorkCentre 490cx If selected during the installation of the other software com...

Страница 175: ...rkstation using either the supplied IEEE 1284 parallel cable or a USB cable and a phone line has also been connected to the Tel Line input on the left side of the WorkCentre 490cx The system requirements and procedures for installing LaserFAX Lite software are contained in Chapter 1 Getting Started Refer to this chapter if LaserFAX Lite is not already installed on your computer workstation ...

Страница 176: ...having them print on the WorkCentre 490cx To do this perform the following steps 1 In the Xerox WorkCentre 490cxFAX program group select LaserFAX Lite Config The dialog shown below will be displayed 2 On this dialog select the Edit Device button This will cause the Edit Device Details dialog to be displayed An example of this dialog is shown on the next page ...

Страница 177: ...k on the entry to view it You can then decide whether to keep it delete it print it or send it to another recipient For a brief overview of LaserFAX Lite application features refer to LaserFAX Application Features on page 3 58 Note If the WorkCentre 490cx is not connected to the PC or LaserFAX Lite is not running or the Receive to PC option is not selected faxes will be printed on the WorkCentre 4...

Страница 178: ...e Display Device information menu 2 Double click WorkCentre 490cx and de select the Receive faxes to PC option 3 Click OK 4 Repeat this process to re enable Receive Faxes to PC later Troubleshooting LaserFAX Lite When LaserFAX Lite does not activate ensure that The WorkCentre 490cx is connected and plugged in The parallel interface cable or USB cable is properly connected and is not longer than 6 ...

Страница 179: ... to your software application s documentation for the exact printing procedure The following steps describe the typical process to print from a Windows environment 1 Make sure that your machine is properly connected to the computer 2 Verify that you have installed the print driver software for your machine See Installing Software on page 1 34 3 Start the program you are using to create the documen...

Страница 180: ...parameters click on OK to start the print job Printer Settings You can use your machine on a Pentium CPU and above versions of an IBM computer with all your Windows 95 98 Windows 2000 or Windows NT 4 0 applications Be sure to set the WorkCentre 490cx as the default printer for all your Windows operations Most Windows software applications allow you to make changes to the printer settings This incl...

Страница 181: ...operating system For Windows 95 98 refer to Windows 95 98 Printer Settings on page 5 4 For Windows NT 4 0 refer to Windows NT 4 0 Printer Settings on page 5 9 Note All screen captures for the following section were taken from within the Windows 98 environment The illustrations may vary on different operating systems and print drivers ...

Страница 182: ... the Settings Printers folder then select Properties from the File menu This method will provide access to the General Details and Sharing tabs as well as the Page Main and Advanced tabs Or Select the Xerox WorkCentre 490cx printer from the Settings Printers folder click the right mouse button then select Properties from the drop down list This method will provide access to the General Details and...

Страница 183: ...uide for details Details tab for viewing and changing port and timeout parameters See your Windows 95 98 User Guide for details Color Management tab for adding and removing color profiles associated with your printer This tab is not shown in Windows 95 only in Windows 98 Sharing tab for configuring printer accessibility over a network Page tab for paper sources and sizes number of copies and orien...

Страница 184: ...tings for the printer Settings made when the printer properties are accessed through an application File menu and Print or Print Setup will remain active until the application you are printing from is closed The Page tab allows you to specify media size media source number of copies page collation sequence of pages and page orientation ...

Страница 185: ...1 8 x 9 1 2 in Legal 8 5 x 14 in Envelope DL 110 x 220 mm B5 JIS 182 x 257 mm Envelope C5 162 x 229 mm Executive 7 25 x 10 5 in Envelope C6 114 x 162 mm A5 148 x 210 mm Envelope B5 176 x 250 mm A6 Card Stock 105 x 148 mm also Coated Glossy Iron On Greeting card Envelope 7 3 4 3 88 x 7 5 in Index Card 3 x 5 in Baronial 4 38 x 5 63 in Postcard 4 x 6 in also Glossy Hagaki 100 x 148 mm Envelope 6 3 4 ...

Страница 186: ... The Main tab allows you to specify the document type media type and print quality Advanced Tab Note If this tab is accessed through the Printers folder any changes made to settings will become the default settings for the printer Settings made when the printer properties are accessed through an application File menu and Print or Print Setup will remain active until the application you are printin...

Страница 187: ...the Print command from within any Windows application Then press the Properties button This provides access to the Page Setup Advanced and Cartridges tabs Or Select the Xerox WorkCentre 490cx printer from the Settings Printers folder click the right mouse button then select Document Defaults from the drop down list This provides access to the Page Setup Advanced and Cartridges tabs Page Setup Tab ...

Страница 188: ...gs which govern the appearance and printing of your document Note When Paper Size is selected the second window which opens includes the Custom Paper Size button Cartridges Tab The Cartridges tab provides you with options for changing cleaning and aligning print cartridges and for printing test pages ...

Страница 189: ...of your machine If selected in the Options Tab the control program is displayed during a print operation Note The WorkCentre Control Program is not included with Windows NT 4 0 The Control Program includes five tabs Status Displays the printer status ink levels and print job status Options Includes setup options Cartridges Installs cleans or aligns the cartridge DOS Printing Includes settings for ...

Страница 190: ...ox WC490cx from the list 3 Select the Xerox WC490cx Control Program 4 The Xerox WorkCentre 490cx Control Program window opens Xerox WorkCentre 490cx Control Program Window When the Xerox WorkCentre 490cx Control Program on LPT1 window opens click the appropriate tab for the options you want to display On the appropriate tab specify your changes ...

Страница 191: ...time and any alert messages Using the Options Tab This tab allows you to specify the Control Program setup options such as Running Minimized and Closing Status at End of Job Note If a Xerox printer or another printer is connected to the same port on your computer through a switch box or other device check Disable Xerox WC490cx DOS Printing and restart Windows before switching from one printer to t...

Страница 192: ...ude Installation of the Black and Color Cartridge Cleaning Print Nozzles and Aligning Cartridges Using the DOS Printing tab Use the DOS Printing tab to change print settings for DOS applications that run from the DOS prompt in Microsoft Windows Using the About Tab The About tab gives the Software version number and Copyright information for the Control Program ...

Страница 193: ...canner Program includes drivers which may be used with any TWAIN compliant application software The scanner program software will operate the WorkCentre 490cx scanner The TWAIN standard is an image data transfer protocol developed to allow one software package to use many devices Some examples of TWAIN compliant devices are flat bed scanners drum scanners digital cameras and video frame grabbers ...

Страница 194: ...applications consult your on line help or visit the Pagis website at http www pagis com The WorkCentre 490cx TWAIN Scanner Program The WorkCentre 490cx TWAIN Scanner Program provides an impressive array of scanning controls and previewing options Monitor rendering capabilities Descreen Flip and rotate Inversion of images A variety of blur sharpen edge enhancement filters Control brightness and con...

Страница 195: ...his array of image previewing and scanning functions you can see the results of the changes you made to an image before you save the images you create Note Your WorkCentre 490cx can scan in black white grayscale and color Starting the WorkCentre 490cx TWAIN Scanner Application Note To install the WorkCentre 490cx TWAIN Scanner application refer to Installing Software in the Getting Started section...

Страница 196: ...ayed when you choose the WorkCentre 490cx to scan documents or photographs from the TWAIN compliant image editing application To start the WorkCentre 490cx TWAIN Scanner application Note To start the WorkCentre 490cx TWAIN Scanner application from TextBridge Pro refer to Starting the WorkCentre 490cx TWAIN Scanner Application from TextBridge Pro on page 6 5 1 Plug in the WorkCentre 490cx and switc...

Страница 197: ...adjusting the settings in the Scan window you can perform a preliminary preview scan of the image before performing a final scan To launch a preview scan a Load the document to be scanned in the Automatic Document Feeder b Click the Prescan button The WorkCentre 490cx scans the image and a preview appears in the WorkCentre 490cx TWAIN Scanner window 8 Adjust the scan options as desired before init...

Страница 198: ...page type and select Scanner as the Page Source Click OK 5 The WorkCentre 490cx TWAIN Scanner application is displayed Select the appropriate scan options for the document or photograph to be scanned After adjusting the settings in the Scan window you can perform a preliminary preview scan of the image before performing a final scan To launch a preview scan a Load the document to be scanned in the...

Страница 199: ...anner Window is used to view and modify the scanned image Using the features of this window various image processing options can be applied to the scanned image WorkCentre 490cx TWAIN Scanner Help You can refer to the WorkCentre 490cx TWAIN Scanner application on line help for assistance To access on line help move the cursor over the feature of the window that help is desired for A yellow popup d...

Страница 200: ...e The Basic Tab The Image Quality Tab The Filters Tab The About Tab indicates the version of the WorkCentre 490cx TWAIN Scanning application The Basic Tab The features of the Basic Tab are described in this section All of the features of this tab are available when the Image type selection is True Color 256 Colors or Gray 256 Scales Refer to the table below which indicates the tab features that ar...

Страница 201: ...ion or mixing of light of different colors For example mixing equal proportions of fully saturated red green and blue light produces white light Excellent color details can be obtained using this scan mode but be aware that True Color images require considerable disk space to save them For instance an A4 size 8 5 x 11 300 dpi True Color image may require 24 megabytes of storage space uncompressed ...

Страница 202: ...colors Gray 256 Scales Images scanned in Gray 256 Scales mode are scanned in 256 shades of gray If high quality copies of photographs or other continuous tone originals are desired Gray 256 Shades mode is the best choice Gray 256 Scales provides accurate representation of black and white and intermediate gray shades between black and white for each individual pixel It actually provides 256 shades ...

Страница 203: ...l can be represented by 1 bit For this reason the file size is much smaller than that of a document scanned in the Gray 256 Scales mode which uses 8 bits to define 256 shades of gray Lineart B W Lineart B W mode is generally the best choice for printed text or pen and ink drawings Like the Halftone B W image type this image type defines the state of each pixel in the image with one bit that is eit...

Страница 204: ...iner the image detail and the bigger the image file size is Increasing the resolution will result in corresponding increases in image detail and image file size See the examples of images at 75 and 300 dpi You can select any one of the resolution settings shown on the Resolution menu or specify your own resolution by selecting the Custom option which invokes the Custom Resolution dialog box 75 dpi...

Страница 205: ...ed image for screen display only scale the image down to increase processing speed and decrease the file size Fixed scaling options are displayed as percentages of reduction or enlargement Image width and height are scaled proportionally when fixed scaling factors are used To scale to a size other than the fixed sizes select the Custom option in the Scaling menu The Custom Scaling dialog box will ...

Страница 206: ...y linked you need only enter one value either a Height or Width value The other value will be computed and the image will resize proportionately Note You can also change Height and Width values by directly adjusting the selection frame Note Output image file size is proportional to both Height and Width If both Height and Width values are doubled then the image area and image file size will increa...

Страница 207: ... are available for the Lineart B W and Halftone B W Image Type selections True Color RGB and 256 Colors Gray 256 Scales Lineart B W Halftone B W Color Channel Selection All channels Available Gray Channel Only Gray Channel Only Gray Channel Only Highlight Control Available Available Available Available Shadow Control Available Available Not Available Not Available Midtone Control Available Availab...

Страница 208: ...ype Refer to the table below which indicates the tab features that are available for the Lineart B W and Halftone B W Image Type selections True Color RGB and 256 Colors Gray 256 Scales Lineart B W Halftone B W Sharpness Control Available Available Not Available Not Available Rotate Control Available Available Not Available Not Available Flip Image Control Available Available Not Available Not Ava...

Страница 209: ...Overview 6 17 6 Preview Window After adjusting the settings in the Scanner Control window choose any one of the tools in the Preview Window to further enhance the image ...

Страница 210: ...6 18 Scanning ...

Страница 211: ...cribes Troubleshooting for the following areas Clearing Jams LCD Display Error Messages Fax Problems Printer Problems Print Quality Problems Scanning Problems Refer to the specific subsection for a description of the problem and associated solutions ...

Страница 212: ...While Sending a Fax If a document jams while you are sending it DOCUMENT JAM appears in the display CAUTION Do not pull the document out of the slot or you may damage your machine 1 Open the control panel by pulling lightly on the Control Panel cover ...

Страница 213: ... place Paper Jams While the Machine is Printing If paper jams occur an error message appears in the display Follow the steps below to clear jam To avoid tearing paper pull the jammed paper out gently and slowly If Jammed in the Paper Feed Area at the Rear of the Machine 1 Remove the stack of paper if necessary ...

Страница 214: ...pulling it straight up as shown in the diagram below 3 After you remove the jammed paper reload the stack of paper back into the Automatic Paper Feeder with the print side facing you Before loading ensure the edges of the stack of paper are even and straight ...

Страница 215: ...Clearing Jams 7 5 7 4 Adjust the paper guide to match the width of the paper ...

Страница 216: ... exit tray PAPER JAM will appear on the display Remove the jammed paper by pulling gently on the paper as shown in the diagram below CAUTION If there is resistance when you pull the paper and it does not move easily when you pull stop pulling Continue with the next section If Paper is Jammed Inside the Machine ...

Страница 217: ...Clearing Jams 7 7 7 If Paper is Jammed Inside the Machine 1 Open the Control Panel cover 1 and the Cartridge Compartment cover 2 1 2 ...

Страница 218: ...7 8 Troubleshooting 2 Carefully remove the jammed paper as shown in the diagram below 3 Close the Control Panel cover and the Cartridge Compartment cover ...

Страница 219: ...ading Paper on page 1 20 to load paper properly Make sure the adjustable paper guides are positioned correctly Do not overload the paper Never exceed the maximum capacity of 100 sheets of paper in the Automatic Paper Feeder Flex fan and straighten paper before loading it Do not load wrinkled creased damp highly curled or previously stapled paper Do not mix paper types Use only recommended print pa...

Страница 220: ...Check the number and enter under one location RETRY REDIAL The machine is waiting for the programmed interval to automati cally redial a previously busy station You can press the Start button to immediately redial or the Clear Stop button to cancel the redial operation DOCUMENT JAM The document jammed in the paper feeder Refer to Clearing Jams on page 7 2 to remove any jammed paper COVER OPEN CLOS...

Страница 221: ...cument Load a document and try again MEMORY FULL The machine s memory is full Delete unnecessary documents Retransmit after more memory becomes available Split the transmission into more than one operation NO ANSWER The remote machine has not answered and all redial attempts have been made Try again Make sure the remote machine is operational NO NOT ASSIGNED The One Touch or Speed Dial location yo...

Страница 222: ...Machine is Printing on page 7 3 POLLING ERROR POLL CODE ERROR The remote fax machine you want to poll is not ready to respond to your poll When setting up to poll another fax machine you have used an incorrect poll code The remote operator should know in advance that you are polling and have their fax unit loaded with the original document Enter the correct poll code POWER FAILURE A power failure ...

Страница 223: ... phone numbers NO ANSWER Did not detect a fax tone after all retry attempts Check with the remote operator to ensure the remote machine is working properly LINE BUSY Remote line was busy Try operation again or at a later time PRE MSG ERROR or POST MSG ERROR or COMPATIBLE ERROR or SEND ERROR or RECEIVE ERROR Errors detected at the beginning during or at the end of the transmis sion This is normally...

Страница 224: ...es have been received request those pages to be resent If remote has error correc tion capability ensure that it is enabled PAGE MISMATCH Print capabilities of the remote do not match Try operation again using a lower resolution CARTRIDGE ERROR An error detected with the ink cartridge The ink cartridges may be out of ink or installed incorrectly Check and reinstall or replace car tridge LCD Displa...

Страница 225: ...ers stored in memory do not dial correctly Make sure the telephone numbers are stored correctly in memory Print a Telephone Num bers List See To Print Reports Lists on page 1 59 The document does not feed into the machine Make sure the document is not wrinkled or creased and you are feeding it correctly Also ensure that the document is within specification for size and thickness You cannot receive...

Страница 226: ...sending to is able to receive faxes You cannot poll another machine The fax machine you are calling may be using a poll code The document you are trying to retrieve is not loaded into the remote machine Blank spaces or poor text quality appear in incoming faxes The machine sending the fax may be faulty Line errors due to excessive noise on phone line Check your machine by making a copy Try cleanin...

Страница 227: ...ming calls Have the operator of the other machine investigate the problem The machine is unable to store a document in mem ory There may be insufficient memory available to store the document If the display shows a MEMORY FULL error message delete any documents you no longer need from the mem ory then try storing the document Blank areas appear at the bottom of each page or on other pages only a s...

Страница 228: ...red incorrectly Check printer setting in Windows to make certain that the print job is being sent to the correct port for example LPT1 A paper jam has occurred Refer to Clearing Jams on page 7 2 The printer may be configured incorrectly within an application Check the application to verify that all print settings are correct The printer driver may be incorrectly installed Re install the printer dr...

Страница 229: ...the scaling setting in the Paper Output dialog box The parallel printer cable may be incorrect Use or replace the cable with an IEEE 1284 rated cable The USB cable may be defective Replace the USB cable The ink cartridge may be empty The printer prints the wrong data or it prints incorrect characters The printer cable may be connected improperly Check the cable connection There may be a problem wi...

Страница 230: ...hod may be incorrect If printing onto envelopes insert the envelopes so that there is a gap of approximately 1 mm 1 32 between the left and right edges of the envelopes at the paper guide Printing is too slow If using Windows 95 98 Windows 2000 or NT 4 0 the Spooling Setting may be set incorrectly From the Start menu select Settings and Printers Click the Work Centre icon with the right mouse butt...

Страница 231: ...head may need cleaning See Print Cartridge Nozzle Test on page 8 9 Solid black areas on trans parencies contain white streaks Try changing the fill pattern in your application software The print head may need cleaning See Print Cartridge Nozzle Test on page 8 9 Smudged or dark characters Make sure you are using the correct type of paper Try another type of paper Make sure the paper is straight and...

Страница 232: ...d or is an unsupported size or type See Paper Guidelines on page 1 29 For special media it is recommended to feed one sheet at a time Make sure you do not have hard coded spaces at the left margin in your application The print head may need cleaning See Print Cartridge Nozzle Test on page 8 9 The print cartridge may be mis aligned See Cartridge Alignment on page 8 22 Vertical straight lines are no...

Страница 233: ...cing the Ink Cartridge on page 8 19 Color print quality is poor Ensure that you are using the correct type of paper Ensure that the Paper Type setting is correct for the type of paper loaded See Main Tab on page 5 8 Change the Print Quality setting to High or Normal See Main Tab on page 5 8 Printer power is on but nothing prints The printer is improperly connected to the computer Make sure the pri...

Страница 234: ...e printer cable The print head may need cleaning See Print Cartridge Nozzle Test on page 8 9 Printer prints very slowly You may be using High 1200 dpi print quality Change the Print Quality setting to Normal See Main Tab on page 5 8 Graphics print more slowly than text Color prints more slowly than black Special media prints more slowly than plain paper Another application currently open affects p...

Страница 235: ...s of paper Make sure you are using the correct type of paper Remove paper from the APF and flex or fan the paper Humid conditions may cause some paper to stick together Paper fails to feed Make sure the envelope guide is not in the upright position Remove any obstructions inside the machine Multiple sheets of paper feed Different types of paper may be stacked in the Automatic Paper Feeder Load pap...

Страница 236: ...t side of the paper is aligned with the right edge of the feeder and the left paper guide is set against the left side of the paper Make sure the envelope guide is not in the envelope position Transparencies stick together in the paper exit Use only the transparencies specially designed for printer Remove each transparency as it exits from the printer Envelopes skew or fail to feed correctly Ensur...

Страница 237: ...d in memory The unit scans very slowly Graphics are scanned more slowly than text Communication speed becomes slow in scan mode because of the large amount of memory required to analyze and reproduce the scanned image Set your computer to ECP mode through BIOS setting It will help to increase the speed For details on how to set BIOS refer to the documentation for your computer The following messag...

Страница 238: ...ter The following message appears on the computer screen Port is disabled Check if the port is properly con nected power is on scan ner is not busy Then restart your computer The printer cable may be improperly connected or the power may be off Ensure that the WorkCentre 490cx is plugged in If the prob lem persists turn the computer and printer off Wait about 10 seconds turn them both on and try a...

Страница 239: ...on stored in your machine s memory 1 Press the Menu button then press the 0 5 buttons on the keypad Then press the Start button 2 MEMORY CLEAR ITEM 1 4 appears briefly on the display followed by the list shown below Use the Up and Down buttons to scroll through the list of options ...

Страница 240: ...Right button to choose YES then press the Start button The selected memory is cleared Memory Clear Items 1 SYSTEM ID The System ID number and name are cleared from the machine s memory 2 SYSTEM DATA Restores user selectable options to the default value 3 PHONEBOOK MEMORY Clears the Group Dial numbers stored in memory All the Scheduled Job operations you have reserved are also canceled 4 TX RX JOUR...

Страница 241: ...nally clean the white roller Automatic Document Feeder ADF rubber and the scanning glass If they are dirty documents sent to another fax machine may not be clear 1 Power off the WorkCentre 490cx by unplugging it from the wall outlet 2 Open the Control Panel by pulling lightly on the Control Panel Cover assembly ...

Страница 242: ...ows a Both ends of the white roller have plastic bushings that are used to secure the roller in the machine Pull the two bushings slightly inward A b Rotate the bushings until they reach a vertical position B c Pull the roller upward and out of the machine ...

Страница 243: ...Cleaning the Document Scanner 8 5 8 4 Wipe the roller surface with a soft cloth dampened with water 5 Using a cotton swab or a soft dry cloth clean the ADF rubber pad ...

Страница 244: ...scanning glass with a SOFT DRY CLOTH If the glass is very dirty first wipe it with a slightly dampened cloth then with a dry cloth Be very careful not to scratch the glass surface CAUTION Never spray liquid directly onto the scanning glass ...

Страница 245: ...Cleaning the Document Scanner 8 7 8 7 Replace the roller by performing steps one and two in reverse order 8 Close the control panel firmly until it clicks into place ...

Страница 246: ... it Immediately replace the ink cartridge or store it in the storage unit The ink cartridge will not print correctly if removed from the machine and left exposed for an extended period Do not swap the color cartridge with the black cartridge The color cartridge should be installed in the Left carrier and the black cartridge should be installed in the Right carrier If you have an opened ink cartrid...

Страница 247: ...n see the results Use the nozzle test When you suspect the nozzles are clogged When characters are not printing completely Cleaning the Print Heads To clean the print head using your WorkCentre The Clean Head procedure cleans the print nozzles and removes any deposits that may impair printing functions To run the Clean Head Procedure 1 Press the Menu button then press the 1 2 buttons on the keypad...

Страница 248: ...e color indicate a clogged nozzle Try running the Clean Head procedure again if you see breaks in the diagonal lines To clean the nozzles from your PC In Windows 95 98 or Windows 2000 1 Go to Start Programs Xerox WorkCentre 490cx 2 Select Xerox WorkCentre 490cx Control Program 3 The Control Program window opens Note For Windows NT 4 0 open the 490cx properties by right clicking on the 490cx in the...

Страница 249: ...the Cartridges tab then click the Clean Print Nozzles button The printer feeds a sheet of paper and prints the nozzle test pattern Note There are minor differences in the appearance of the Cartridges tab between Windows 95 98 and Windows NT 4 0 ...

Страница 250: ...low shows a test pattern of all nozzles functioning correctly on the color and black ink cartridges Compare the diagonal same color lines at the top and bottom of the test pattern Look for a break in the diagonal lines a broken line shows any clogged nozzles ...

Страница 251: ...ridge Nozzles and Contacts below Wiping the Ink Cartridge Nozzles and Contacts If print quality does not improve after repeating the nozzle test the problem may be caused by dried ink on the ink cartridge nozzles contacts carrier contacts in the printer Follow this procedure 1 Remove the ink cartridge Refer to Replacing the Ink Cartridge on page 8 19 2 Use a clean lint free cloth dampened with wat...

Страница 252: ...tridge carrier contacts in your machine Refer to Cleaning the Cartridge Carrier Contacts on page 8 14 If print quality still has not improved replace the ink cartridge Cleaning the Cartridge Carrier Contacts 1 Press the Menu button then press the 1 2 buttons on the keypad Press the Start button Press the Up and Down button until CLEAN HEAD appears in the LCD display 2 Open the Control Panel and th...

Страница 253: ...Managing the Ink Cartridges 8 15 8 3 Unplug the power cord from the electrical outlet or the rear of the machine ...

Страница 254: ...8 16 Maintenance 4 Remove the Ink Cartridges ...

Страница 255: ...Managing the Ink Cartridges 8 17 8 5 Use a CLEAN LINT FREE DRY CLOTH to clean the ink cartridge carrier contacts inside the printer ...

Страница 256: ...8 18 Maintenance 6 Reinstall the ink cartridge 7 Close the Control Panel and the Cartridge Compartment Cover 8 Plug the power cord in ...

Страница 257: ...nting After PC printing is completed replace the ink cartridge Note Your machine counts and keeps ink low counts for both ink cartridges To replace the ink cartridge perform the following steps 1 Open the control panel 1 and the cartridge compartment cover 2 2 Pull the handle of the ink cartridge s you want to replace toward you until there is a click Remove the ink cartridge s 3 Remove a new ink ...

Страница 258: ...t has not clicked into place Repeat this step 5 Close the cover and the control panel 6 The LCD displays CARTRIDGE CHANGED NO Select the desired action item using the Up and Down buttons If you Select did not change any cartridge CARTRIDGE CHANGED NO changed a color cartridge CARTRIDGE CHANGED LEFT changed a black cartridge CARTRIDGE CHANGED RIGHT changed a color and a black cartridge CARTRIDGE CH...

Страница 259: ...ew cartridge select NEW COLOR or NEW BLACK to reset the ink counters 9 Press the Start button The machine returns to Standby mode Note If you selected NEW COLOR or NEW BLACK the machine automatically prints out an Alignment Pattern to adjust the alignment for new ink cartridges Note If you are interrupted and leave the print carrier in the load position for more than 60 seconds the ink cartridge c...

Страница 260: ... test will straighten the vertical lines To align the cartridge from your PC 1 Open the Xerox WorkCentre 490cx Control Program on LPT1 Refer to Starting the WorkCentre 490cx Control Program on page 5 12 and to Using the Cartridges Tab on page 5 14 2 Click the Align Cartridges tab 3 The printer feeds a sheet of paper and prints the alignment test pattern ...

Страница 261: ...the Ink Cartridges 8 23 8 Examine the test print If the vertical lines are straight no adjustment is needed If the lines are not straight select the number in which the lines appear the straightest and click OK ...

Страница 262: ...ay indicates SELF TEST 2 Press the Down button ARRANGE ALIGNMENT appears in the LCD display 3 Press the Start button PRINTING appears on the LCD display The WorkCentre 490cx prints out a Cartridge Alignment pattern sheet consisting of a series of four test patterns Each pattern is made up of a series of lines which are individually numbered By selecting the straightest line from each pattern you c...

Страница 263: ...e of valid pattern selection choices The flashing number on the left side of the display indicates the line from print pattern A that is currently selected as optimal 4 Using the Number Keypad enter the number of the line which appears the straightest from pattern A 5 Press the Up and Down button to confirm your selection The LCD panel updates and the setup screen for the Alignment B test pattern ...

Страница 264: ...e number of the line which appears the straightest from Alignment pattern D 11 Press the Up and Down button to confirm your selection The LCD panel updates and the setup screen for the Alignment E test pattern is displayed 12 Using the Number Keypad enter the number of the line which appears the straightest from Alignment pattern E 13 Press the Up and Down button to confirm your selection The LCD ...

Страница 265: ...rd pad will become worn and may impair the performance of the document feeder Follow this procedure to replace the pad 1 Open the document feeder cover 2 Insert a sharp thin object such as the tip of a small screwdriver and release the latches This will release the Holder so that you can remove the Retard Pad and Support from the machine Holder Support Retard Pad ...

Страница 266: ...8 28 Maintenance 3 Remove the retard pad and plastic support from the machine 4 Insert a new retard pad and support onto the holder and snap into place ...

Страница 267: ... Approx 6 sec page V 17 ECM 14 4 kbps Effective scanning width 8 2 inches 210 mm Effective printing width 8 0 inches 203 mm Scanning method Sheet fed Contact Image Sensor CIS Memory 2 5 MByte Halftone 256 levels Printing speed 9 PPM Mono Draft Letter A4 Size 5 PPM Color Draft Letter A4 Size Replacement Black Ink Cartridge Yield About 1075 Sheets 5 ink coverage on Letter A4 paper Chapter 9 Black in...

Страница 268: ...egistration for 50 numbers Document size Width Length 3 0 to 8 5 inches 76 2 to 216 mm Single page 5 to 14 inches 127 to 356 mm Multi pages 5 to 11 7 inches 128 to 297 mm Recording paper size for automatic paper feeder for manual paper feeder Letter 8 5 x 11 inches 216 x 279 mm A4 8 27 x 11 69 inches 210 x 297 mm Legal 8 5 x 14 inches 216 x 356 mm Length 5 to 14 inches 127 to 356 mm Width 5 6 to 8...

Страница 269: ...i Super fine 300 x 300 dpi Scanning resolution scanner 300 x 600 dpi optically and the higher resolutions up to 4800 dpi can be supported by interpolating via TWAIN Scanner driver Copy resolution 600 x 300 dpi Fixed 600 x 300 dpi 2 path PHOTO Battery backup 60 minutes after 30 minutes of continuous charging ...

Страница 270: ...message This facsimile machine provides the local ID and name features required for the FCC regulation To satisfy the FCC regulation the telephone number and name must be included with the printed document To comply with the FCC rules carefully read and follow the instructions listed in this document to program the local ID and name Data Coupler Information This machine contains an internal data c...

Страница 271: ...mined by the REN you should call your local telephone company to determine the maximum REN for your calling area Ask your local telephone company for the modular jack type installed on your line Connecting this machine to an unauthorized jack can severely damage telephone company equipment You not Xerox assume all responsibility and or liability for any damage caused by the connection of this mach...

Страница 272: ... notifies you that your machine is causing damage disconnect the machine from the telephone line and call for service Do not reconnect the machine until necessary repairs are made The telephone company will where practical notify you when they need to temporarily disconnect service However if action is reasonable and necessary but prior notice is not practical they may still temporarily disconnect...

Страница 273: ...tten notification if the changes can Make your machine incompatible with their equipment Require modification or alteration of the machine Otherwise physically affect performance of the machine When programming emergency numbers and or making test calls to emergency numbers Remain on the line and briefly explain to the dispatcher the reason for the call before hanging up Perform such activities in...

Страница 274: ... If this equipment does cause harmful interference to radio or television reception which can be determined by turning the equipment off and on the user is encourage to try to correct the interference by one or more of the following measures Reorient or relocate the receiving antenna Increase the separation between the equipment and receiver Connect the equipment into an outlet on a circuit differ...

Страница 275: ...g associated with a single line individual service may be extended by means of a certified connector assembly telephone extension cord The customer should be aware that compliance with the above conditions may not prevent degradation of service in some situations Repairs to certified equipment should be made by an authorized Canadian maintenance facility designated by the supplier Any repairs or a...

Страница 276: ...nation on an interface may consist of any combination of devices subject only to the requirement that the sum of the Ringer Equivalence Numbers of all the devices does not exceed 5 This digital apparatus does not exceed the Class B limits for radio noise emissions from digital apparatus set out in the Radio Interference Regulations of Industry Canada Cet appareil numérique est conforme aux limites...

Страница 277: ... the following applicable Directives of the European Union as of the dates indicated January 1 1997 Council Directive 73 23 EEC amended by Council Directive 93 68 EC on the harmonization of the laws of the Member States related to equipment designated for use within certain voltage limits January 1 1997 Council Directive 89 336 EC approximation of the laws of the Member States related to electroma...

Страница 278: ...d tested in compliance with strict safety and radio frequency interference regulations Any unauthorised alteration which includes the addition of new functions or the connection of external devices may impact this certification Please contact your local Xerox Europe representative for a list of approved accessories WARNING In order to allow this equipment to operate in proximity to Industrial Scie...

Страница 279: ...the product Unplug this product from the wall outlet before cleaning Always use materials specifically designated for this product Use of other materials may result in poor performance and could create a hazardous situation Do not use aerosol cleaners Follow the instructions in this User Guide for proper cleaning methods Never use supplies or cleaning materials for purposes other than those for wh...

Страница 280: ...power when the machine is not in use The machine may be left on continuously This product should be operated from the type of power source indicated on the marking label If you are not sure of the type of power available consult your local power company Do not allow anything to rest on the power cord Do not locate the product where persons will step on the cord Slots and openings in the cabinet an...

Страница 281: ... an extension cord with this product is not recommended or authorized Users should check building codes and insurance requirements if an extension cord is to be used Ensure that the total ampere ratings of the products plugged into the extension cord does not exceed the extension cord ampere rating Also make sure that the total amperage of all products plugged into the wall outlet does not exceed ...

Страница 282: ...nstructed maintained and operated All Xerox equipment have been designed to exacting safety standards They have all undergone a variety of stringent safety tests including earth bond insulation resistance and electrical strength tests Xerox Europe manufacturing plants have been awarded ISO 9000 quality certification and are subject to regular audits by the British Standards Institution or equivale...

Страница 283: ...s to prevent so far as reasonably practicable danger This includes ensuring all electrical products connected to such electrical systems are safely constructed maintained and operated QUESTION Does Xerox Europe comply with the Electricity at Work Regulation ANSWER The regulation places a duty on all employers and self employed persons to ensure the electrical systems in their premises are effectiv...

Страница 284: ...ly serviced and maintained by competent persons Xerox Europe Customer Service Engineers ensure Xerox equipment is serviced and maintained to exacting Xerox safety standards If you would like your Xerox equipment to be serviced and maintained to such high standards please contact your local Xerox Europe Customer Service Organisation They will be pleased to assist you QUESTION Does the Xerox equipme...

Страница 285: ...USE OF INAPPROPRIATE TEST PROCEDURES AND TEST EQUIPMENT MAY PROVIDE MISLEADING RESULTS AND MAY CAUSE DEATH PERSONAL INJURY AND OR DAMAGE TO PROPERTY QUESTION I would like to carry out my own safety tests on the Xerox equipment in my premises ANSWER You may of course request such tests as you deem necessary to satisfy yourself that your Xerox equipment is safe Your Xerox Europe Customer Support wil...

Страница 286: ...You will be advised of such action to enable such defects to be corrected PLEASE NOTE YOU MUST ENSURE THAT YOUR XEROX EQUIPMENT IS SAFE AT ALL TIMES Please contact us if you have any queries regarding the information provided in this document Xerox Europe Product Safety Xerox Europe Technical Centre PO Box 17 Bessemer Road Welwyn Garden City Herts AL7 1HE England ...

Страница 287: ...nection to the analogue public switched telephone network PSTN in accordance with Directive 1999 5 EC The product has been designed to work with the national PSTNs and compatible PBXs of the following countries In the event of problems you should contact your local Xerox representative in the first instance Austria Greece Norway Belgium Iceland Portugal Denmark Ireland Spain Finland Italy Sweden F...

Страница 288: ...levant advisory notes contained in this document The product may be configured to be compatible with other country networks Please contact your Xerox representative if it needs to be reconnected to another country s network There are no user adjustable network settings in the product Note Although this product can use either loop disconnect pulse or DTMF tone signalling it is recommended that it i...

Страница 289: ...everal different telephone accessories The Install Guide and Quick Reference Guide cover the most common ways to set up the WorkCentre This guide covers those again as well as more complicated setups These include Using your WorkCentre as a stand alone fax machine without a PC Connecting the WorkCentre to a PC and extension telephone the most common ...

Страница 290: ...with a fax data modem and extension telephone Connecting the WorkCentre to a PC with a fax data modem answering machine and extension telephone Connecting the WorkCentre to a PC with a fax data modem with voice mail capabilities and extension telephone All of the above configurations are connected to a single telephone line ...

Страница 291: ...nectors There are two telephone connectors on the side of the WorkCentre They are Line EXT Line is always the direct connection to your telephone wall outlet EXT is used for other accessories such as an answering machine extension telephone or PC fax data modem EXT LINE ...

Страница 292: ...xplains the settings for different FAX users It shows how to use the EXT connection using a single telephone line with the accessories mentioned Note In some countries there is a handset connection on the left front location of the machine ...

Страница 293: ...WorkCentre s Line connector and the other end into the wall telephone line outlet The WorkCentre is set up at the factory to automatically answer an incoming call If you do not want the WorkCentre to answer the phone set the Receive mode to TEL At the control panel press the Receive Mode button until TEL displays Wall Outlet From the Line connector ...

Страница 294: ... ON RINGS setting At the control panel press the following keys MENU 0 1 Start UP ARROW 7 TIMES until ANSWER ON RINGS displays Next enter the number that represents the number of rings that you want to occur before the WorkCentre answers the call and press the Clear Stop button You can connect an extension telephone to EXT on the WorkCentre ...

Страница 295: ...able into the WorkCentre s Line connector and the other end into the wall telephone line outlet Plug the extension telephone into the EXT connector Connect the PC printer port or USB port to the WorkCentre s printer port or USB port Wall Outlet From the EXT connector From the LINE connector From the Printer connector From the USB connector Optional ...

Страница 296: ...the Receive Mode button until TEL displays Or you may want to leave the Receive mode on Fax but increase the number of rings before the WorkCentre answers the call At the control panel press the following keys MENU 0 1 Start UP ARROW 7 TIMES until ANSWER ON RINGS displays Next enter the number of times you want the telephone to ring before the WorkCentre answers the call and press the Clear Stop b...

Страница 297: ... a fax data modem In this configuration the answering machine should answer incoming calls The WorkCentre will monitor the call and take control of the telephone line if a fax call is detected Wall Outlet From the EXT connector From the LINE connector From the Printer connector Answering machine From the USB connector Optional ...

Страница 298: ...machine Line into the EXT connector and plug the extension telephone into the answering machine The PC printer port is connected to the WorkCentre s printer port with the Xerox supplied printer cable or using a USB connection Set the WorkCentre s Receive mode to ANS FAX At the control panel press the Receive Mode button until ANS FAX displays ...

Страница 299: ...a PC with a fax data modem In this configuration you may have two fax machines the WorkCentre and your PC fax data modem Dual Wall Outlet From the EXT connector From the LINE connector From the Printer connector From the PC modem LINE connector Both on same Line From the USB connector Optional ...

Страница 300: ...rkCentre s printer port with the Xerox supplied printer cable or USB connection If both units are set to automatically answer an incoming call the machine set to answer the call in the fewest number of rings will receive the incoming fax If you do not want the WorkCentre to answer the phone set the Receive mode to TEL At the control panel press the Receive Mode button until TEL displays Consult yo...

Страница 301: ...ax data modem In this configuration you have two fax machines the WorkCentre and your PC fax data modem In addition you have an answering machine connected to the WorkCentre Answering machine Dual Wall Outlet From the EXT connector From the LINE connector From the Printer connector From the PC modem LINE connector Both on same Line ...

Страница 302: ...rkCentre and the external telephone into the Line out connector of the answering machine The PC printer port is connected to the WorkCentre s printer port with the Xerox supplied printer cable or USB connection The answering machine will answer incoming calls but the WorkCentre will take over if the incoming call is a fax Set the WorkCentre s Receive mode to ANS FAX At the control panel press the ...

Страница 303: ...ice mail capabilities In this configuration you have two fax machines the WorkCentre and your PC fax data modem In addition the PC fax data modem can be used for voice mail answering machine Dual Wall Outlet From the EXT connector From the LINE connector From the Printer connector From the PC modem LINE connector Both on same Line ...

Страница 304: ...nter port is connected to the WorkCentre s printer port with the Xerox supplied printer cable or USB connection You should use the PC fax data voice mail to answer incoming calls and receive faxes Use the WorkCentre to send hard copy faxes and print At the WorkCentre set the Receive mode to TEL At the control panel press the Receive Mode button until TEL displays Consult your PC fax data modem doc...

Страница 305: ... ANS FAX mode the machine automatically answers the phone call If the machine detects a fax signal it will receive that fax If a fax signal is not detected the machine will send the call to the answering machine Automatic Paper Feeder You can stack up to 100 sheets of plain paper or up to 10 envelopes or other special media in this feeder It will automatically feed the loaded media one at a time ...

Страница 306: ...of an image There is a Contrast button on the control panel to increase or decrease image contrast on printed sheets Dial Mode You can select the type of phone line service for your machine Dial or pulse mode DDMMYYYY This expression refers to Day Month Year in an eight digit format Document Scanner The Document Scanner is a device in your machine that scans your document for the purpose of copyin...

Страница 307: ...ots per inch abbreviation A unit of measure indicating the resolution of the image The greater the dpi value the higher the resolution of the image There is a Resolution button on the control panel DRPD Distinctive Ring Pattern Detection abbreviation This is a telephone company service that lets you use a single phone line to answer several different phone numbers Dual job Your machine can perform...

Страница 308: ...x FCC Federal Communications Commission This a branch of the United States Federal Government that establishes laws and standards for any machines involving communications There is an FCC Registration number on your machine s Xerox label located on the back of the machine Form Feed Used to eject paper from the printer if paper is not automatically fed out after printing Also used to load paper if ...

Страница 309: ...ipment certified in Canada ips Inches per second Job Status Used to show status of job operating in background Landscape Landscape orientation on the printed page refers to the image horizontal dimension being longer than the vertical dimension LCD Liquid Crystal Display The LCD on your machine is located near the top edge of the control panel This LCD is used to display all menu items and error m...

Страница 310: ...stem Example Windows 95 is an Operating System Parallel interface port This refers to the printer port found on the back of your machine The Centronics printer cable plugs into this port Pause This allows you to pause dialing Portrait A printing term specifying that the long axis of the printed page is vertically oriented Power Saving This feature lets you reduce machine power when the printer is ...

Страница 311: ...sheets RAM Random Access Memory All PCs need RAM to execute programs Redial When you press the Redial button the machine automatically begins to send the document that is loaded in the document tray using the phone number previously dialed Redial Interval This refers to the period of time before an automatic redial occurs Redial Try This refers to the number of redials the machine will attempt bef...

Страница 312: ...ded in your machine the machine can reduce the data in the document to fit into your loaded paper size Options also include Horizontal Reduction reduce data in size and Discard Size discard excess image at the bottom Select language You can select the language used in the LCD display and for printing machine diagnostic reports Sound control At your option an alarm sounds when an error occurs in th...

Страница 313: ...phone Number List System Data List Transmission or Reception Journal Multi Communication Report Call Back Message and Power Failure Report TEL LINE This is a jack on the back of your machine into which you plug the telephone line cord for all phone related purposes TEL Mode In TEL Mode your machine is set for you to manually answer any call If you hear a fax signal you then press the Start button ...

Страница 314: ...es to operate from a single USB port on a computer Xerox Data label This is the machine label found on the back of your machine It contains such items as the Federal Communications Commission Registration number the Ringer Equivalence Number and the machine s serial number ...

Страница 315: ...lock Mode 1 70 Confirming fax transmission 3 10 Contrast settings for faxes 3 27 Control locations and functions 1 2 Copy Adjusting contrast 2 2 Copy features 2 1 Making a copy 2 1 Using Copy menu features 2 2 Copy menu 2 2 Copy Size 2 6 D Delayed Transmission 3 14 3 17 Canceling 3 19 Delete Button 1 42 Dial Mode 1 65 Discard Size 1 67 Distinctive Ring Pattern Detection 4 9 Document jams Avoiding ...

Страница 316: ...inger volume 1 44 Setting System ID 1 55 System setup 1 43 Using the Automatic Paper Feeder 1 21 Using the Manual Paper Feeder 1 27 Glossary 10 1 Glossy paper type 2 9 Group Dialing 3 21 Sending faxes 3 7 Storing numbers 3 21 I Images Scanning 6 4 Ink Cartridge Replacing 8 19 Ink Cartridge installation 1 14 Installing Software 1 35 Invert Image 6 17 J Jams 7 2 Avoiding 7 9 L LaserFAX Application F...

Страница 317: ...per type 2 9 Preparing documents for faxing 3 1 Print quality problems 7 21 Printer problems 7 18 Printer settings In Windows 95 Image Quality Tab 5 8 In Windows 95 98 NT 5 4 5 9 Paper Tab 5 6 Printing Clearing document jams 7 3 Priority Transmission 3 37 Product Marking Requirements 9 21 R Receiving faxes Out of paper 4 8 To PC 4 18 Reception Modes 4 1 Redial 3 33 Interval 1 68 number of tries 1 ...

Страница 318: ...ote Code 1 65 RX Reduction 1 66 Send from memory 1 68 Setting up your machine 1 1 AC Power Cord connection 1 11 Document Exit Tray 1 5 Document Tray 1 4 Extension Phone 1 7 Installing Ink Cartridges 1 14 Printer Cable 1 7 Printer Exit Tray 1 5 Software Uninstalling 1 39 Speaker Button 1 43 Speaker Volume 1 52 Specifications 9 1 Speed Button 1 42 Speed Dialing 3 19 Storing a number 3 19 System Data...

Страница 319: ...ith TextBridge Pro 6 6 TX Polling 3 39 U UK Safety and Legal Requirements 9 11 Uninstalling Software 1 39 User Options 1 62 Setting 1 62 Using the Control Panel 1 40 Using the Number Keypad 3 28 Editing Numbers or Names 3 32 Entering Alphameric Characters 3 29 Inserting Pause 3 32 Keypad Character Assignments 3 31 V Volume Speaker adjustment 1 52 W Windows 95 Printer Settings Image Quality Tab 5 8...

Страница 320: ...Index 6 ...

Отзывы: