1-12
a.
If the welds in the lower rail are cracked or burned out, the frypot must be replaced. Refer to Section
1.9.11 for procedure.
b.
If the welds in the upper rail are cracked or burned out, the upper rail must be replaced. Refer to
Section 1.9.12 for procedure.
16.
Wrap a new insulating strip along the top, rear, and bottom edge of the burner.
NOTE:
Use P/N 826-0931
for full-vat frypots and P/N 826-0932 for dual-vat frypots.
17.
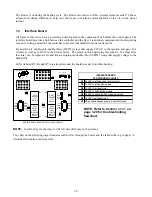
Carefully slide the replacement burner into the rails starting at the top and lifting slightly up on the bottom
(see Figure 3). Ensure that the insulation is not torn or damaged.
18.
In reverse order reassemble insulation and holding plates.
19.
Install flue collector.
20.
Install the flue.
21.
Install the cross brace ensuring the flue cap is secured to the brace.
22.
Replace the fryer back.
23.
Reattach the elbow, gas line and enrichment tubes to the front of the burner.
24.
Fill the frypot with oil. Turn the fryer on, turn off or bypass the melt cycle, and operate the unit for at least
10 minutes.
25.
Visually examine the burner flame. The color and intensity on both sides should be the same.
26.
Use an inspection mirror to check for leaks in areas that cannot be directly observed.
27.
If a leak is detected, tighten all the lower insulation retainer nuts, allow the frypot to run for five additional
minutes, and repeat steps 25 and 26.
28.
If the leak persists, use a rubber hammer and a small block of wood to tap the corners of the lower
combustion chamber insulation retainers. Repeat steps 25 through 27.
Repeat this step until no leakage is
detected.
1.9.10 Replacing the Filter Motor or Filter Pump
1.
Disconnect the unit from the electrical power supply.
2.
Remove the filter pan from the unit.
3.
Position a container beneath the oil return fitting at the front of the cabinet. Disconnect the flexible oil line
from the fitting, allowing any residual oil to drain into the container.
4.
At the rear of the fryer, unplug the left connector (as viewed from the rear of the fryer) from the transformer
box.
5.
Remove the four nuts and bolts attaching the motor mount to the rear motor mount support.
6.
At the front of the fryer, remove the cover plate from the front of the motor and disconnect the motor wires.
7.
Place a 1-foot (30.5-cm) length of wood (or similar support) beneath the motor mount near the front of the
unit and remove the two remaining nuts and bolts attaching the motor mount to the front cabinet cross-
brace.
8.
Carefully remove the support and lower the motor mount to the floor, allowing the rear of the mount to
slide forward and off the rear motor mount support.
9.
Disconnect the return flexline from the pump. The motor and pump assembly can now be pulled from
beneath the fryer and the failed component can be removed and replaced.
10.
Position the replacement motor and pump assembly beneath the fryer and reconnect the oil return flexline to
the pump. Lift the rear of the motor mount up and onto the rear motor mount support.
11.
Lift the front of the motor mount up and support it with a 1-foot (30.5-cm) piece of wood or a similar
support. Install but do not tighten the two nuts and bolts that attach the motor mount to the front cabinet
cross-brace.
12.
Install and tighten the four nuts and bolts that secure the motor mount to the rear motor mount support.
13.
At the front of the fryer, tighten the two nuts and bolts at the front of the motor mount. Reconnect the
motor power wires and reinstall the wiring cover plate.
14.
Reconnect the oil return flexline and reinstall the filter pan.
15.
Reconnect the unit to the electrical power supply, fill the frypots with oil and check for proper operation.
1.9.11 Replacing the Frypot
1.
Disconnect the fryer from the electrical and gas supplies.
Содержание Frymaster FilterQuick 2FQG30U
Страница 8: ...1 3 ...
Страница 41: ...1 36 1 16 2 Bulk Wiring ...
Страница 56: ...1 51 1 18 6 Clogged Drain Failed Oil Sensor Error Flowchart ...
Страница 57: ...1 52 1 18 7 Menu Trees 1 18 7 1 FilterQuick Controller Setup Menu Tree ...
Страница 58: ...1 53 1 18 7 2 FilterQuick Filter and Info Mode Menu Tree ...
Страница 62: ...1 57 1 20 Principal Wiring Connections ...
Страница 63: ...1 58 1 21 Wiring Diagrams 1 21 1 Main FQG 230 430 120V CE Export ...
Страница 64: ...1 59 1 21 2 Main FQG 230 430 Australia ...
Страница 65: ...1 60 1 21 3 Main FQG 230 430 120V CE Export with Solid Shortening ...
Страница 66: ...1 61 1 21 4 Main FQG 230 430 Australia with Solid Shortening ...
Страница 67: ...1 62 1 21 5 Main FQG 330 530 120V CE Export ...
Страница 68: ...1 63 1 21 6 Main FQG 330 530 Australia ...
Страница 69: ...1 64 1 21 7 Main FQG 330 530 120V CE Export with Solid Shortening ...
Страница 70: ...1 65 1 21 8 Main FQG 330 530 Australia with Solid Shortening ...
Страница 71: ...1 66 1 21 9 Transformer Filter Box 430 530 ...
Страница 72: ...1 67 1 22 Simplified Wiring Diagrams 1 22 1 FilterQuick FQG30 Series Simplified Wiring with Push Pull Handles ...
Страница 73: ...1 68 1 22 2 FilterQuick FQG30 Series Simplified Wiring with Push Buttons ...
Страница 74: ...1 69 1 22 3 FilterQuick FQG30 Series Data Network Flowchart ...
Страница 76: ...1 71 1 24 Shortening Melting Unit Wiring Diagram ...
Страница 77: ...1 72 1 25 Modular Basket Lift Wiring Diagram 100 120V 1 2 4 3 5 6 12 7 8050518E ...
Страница 79: ...1 74 1 27 Basket Lift Interface Harness ...


