48
On/Off-Switch
To switch the appliance on or off. This switch is located at
the lower right side of the housing. If you don’t use the ap-
pliance, you should always switch it off in order to inter-
rupt the power supply and then take the plug out of the re-
ceptacle.
The programs can only be selected and started when the
appliance has been switched on.
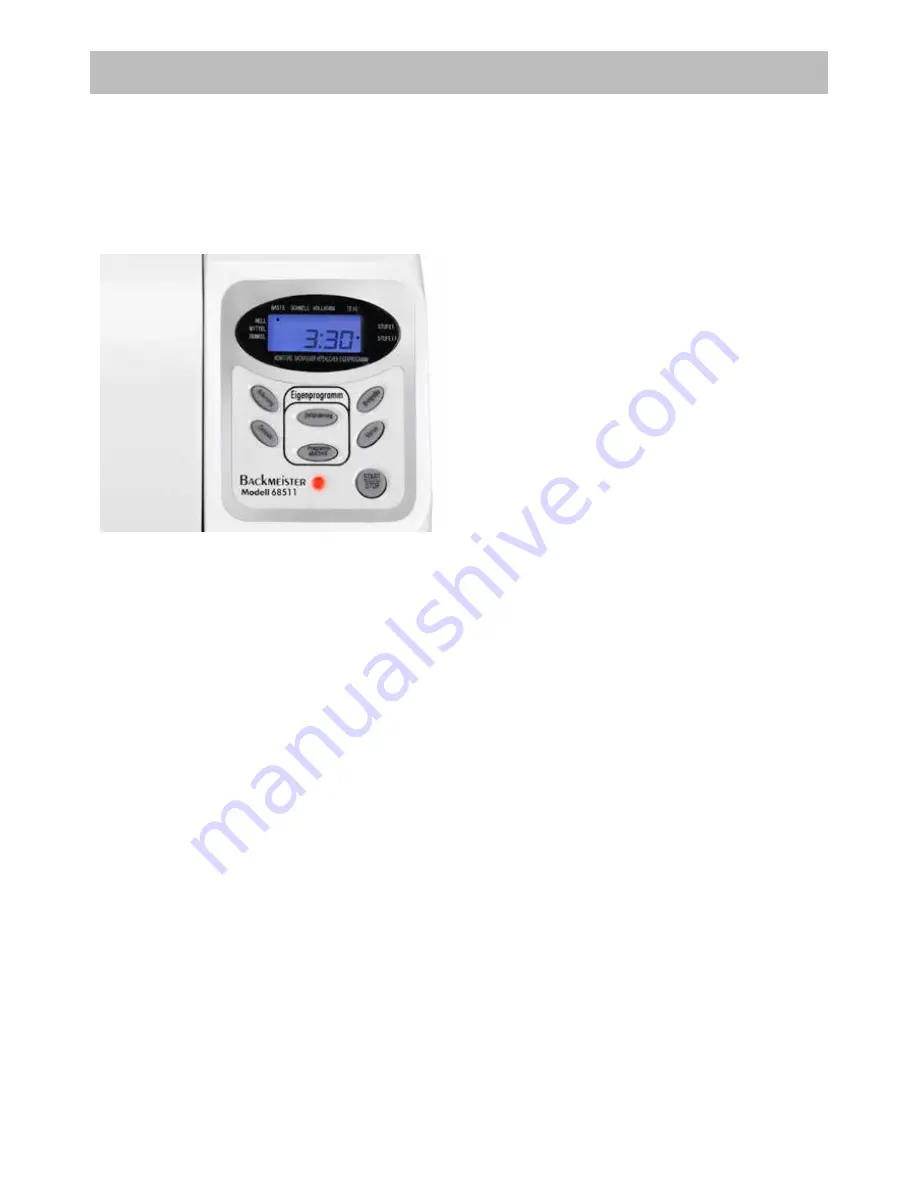
Display
BASIC SETTING
As soon as the plug is inserted in the socket, the display
shows the duration of the last program used. After a longer
period of non-use this is the programm BASIS 3:30 - (the
figures blink). The arrow points to BASIS, SIZE I and brow-
ning MEDIUM. The breadmaker is ready for use.
During operation, the program status is indicated both by
the time countdown and the information on the display.
The display texts as follows:
PREHEAT = the liquid and the ingredients are being
warmed up to the optimum temperature,
if necessary
KNEAD
= is shown when the appliance commences
the kneading phase;
ADD
= a beep reminds you to add ingredients
such a nuts, seeds etc.
RISE (1-3) = the various raising phases are shown;
BAKE
= baking is being carried out;
COMPLETE = the baking is finished - the bread can now
be removed;
KEEP WARM= the baked articles will be kept warm for
1 hour.
The following messages on the display indicate an error:
HHH: If this appears after pressing the START/STOP but-
ton the appliance is still too hot from the last program.
Open the lid and allow the appliance to cool for another
10 to 20 minutes.
LLL: If this appears, then the temperature in the appliance
is too low. Open the lid and allow the appliance to warm
up to room temperature for about 10 to 20 minutes. We re-
commend an ambient temperature of 15 to 34 °C.
E E0 and E E1: This message indicates a defect in the tem-
perature sensor. Please have the appliance inspected by
our service department.
START/STOP button
This button is used to start and stop the program. By pres-
sing the START/STOP button you can discontinue the pro-
gram at any time. For safety reasons, this button responds
with a slight delay; therefore, keep the button pressed un-
til you hear a signal tone. Afterwards, the start position
of the Basic program will appear. If you wish to use a dif-
ferent program, select the appropriate program with the
Menu button.
ZEITWAHL/TIME PRESETTING
Only use the time presetting for recipes which you have
already tested under close supervision and do not modify
these recipes to avoid overflowing of the dough with all it’s
risks.
CAUTION:
In case of too much dough the dough may flow over and
may burn on the heating.
Most of the programmes (except BACKEN/BAKE and TEIG/
Dough) can be started with a time delay.
Example:
It is evening 8:00 p.m. and you wish to have freshly baked
white bread at 7:00 in the morning:
Put the ingredients in the prescribed order nto the pan and
set in the appliance. Care must be taken that the yeast
does not come into contact with liquid.
Choose the required programmewith the MENU button and
enter the required browning with the BRÄUNUNG button.
In this example we choose programme1 = BASIS/Basic that
requires 3:00 hours, plus a keep-warm time of 1 hour (i.e.
total time of 4 hours), which means that the programme
must begin at 3:00 a.m. in the night.
If you want to have fresh bread at 7:00 a.m., and you are
going to programm the breadmaker at 20:00 p.m. you
have to increase the displayed programme duration from
3 hrs to totally 11 hrs by pressing the ZEIT/Time-key seve-
ral times. When the display shows the required time, just
press START/STOP to activate the programming.
Now there is a waiting time of 8 hrs plus 3 hrs programme
time. The bread is ready at 7:00 a.m. If not taken out at
this time, the keep-warm time starts. Latest at 8:00 p.m.
the bread has to be taken out.
ATTENTION:
Always fill in the liquid first and the yeast least in order to
avoid an early contact between water and yeast.
For time delayed baking please do not use perishable in-
gredients such as milk, eggs, fruit, yoghurt or onions, etc.
The beep alert to add ingredients and the beep alert at the
end of the programmecan not be deactivated for night ope-
ration.
MENU
The Menu button is used to select the individual programs,
which are described in detail in the program sequence ta-
ble. The arrow points to indicate the selected program. Use
the programs as described below:
EXPLANATION OF THE CONTROL PANEL
Содержание 68511 BACKMEISTER EXTRA
Страница 6: ...6 EINZELTEILE 1 2 3 5 4 9 8 7 6 ...
Страница 171: ...171 Weitere Informationen zu unserem Sortiment erhalten Sie unter www unold de ...
Страница 172: ...Aus dem Hause ...


