18
6. PREPARATION FOR MEASUREMENT
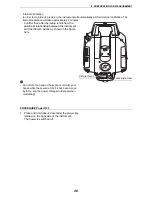
The carrying handle can be removed from the instrument. To remove it, loosen the 2 handle rocking
screws.
• Remove the handle when scanning around the zenith or the whole circumference.
• To remove the handle, hold both sides of the handle and lift it straight above. If you hold the handle by
one hand or incline it, the terminal attached on the handle may be damaged.
• When using the instrument with the handle detached, pay careful attention that no water or dust has
adhered to the terminal.
To attach the handle, position and align the handle and then tighten up the handle locking screws. (Two
points need to be screwed.)
The instrument is easily detached or attached to the tribrach.
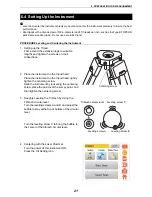
PROCEDURE Detaching the instrument from the levelling base
1. Loosen the levelling base locking screw by
turning 2 or 3 rotations in the counterclockwise
direction.
2. Turn the tribrach clamp counterclockwise to
loosen. (When the tribrach fixing lever securing
screws are screwed in, use the driver provided in
the package to loosen.)
3. Lift the instrument to detach.
6.1 Detaching / attaching the Handle
6.2 Detaching / attaching the Tribrach
Securing screw
Tribrach fixing lever
Tribrach alignment groove
Tribrach fixing screw
Tribrach circular level
Содержание GLS -2000 Series
Страница 1: ...GLS 2000 SERIES LASER SCANNER INSTRUCTION MANUAL 64652 90261 ...
Страница 71: ...67 10 MEASURING SCANNING 12 The scanning results will be displayed Check the scanning range and then press OK ...
Страница 93: ...89 17 REGULATIONS EU EU Battery Directive Region Country Directives Regulations Labels Declarations ...


