Basic Operation
3-1
3
OPOS (Optical POSitioning)
3.1
Introduction
Contour cutting is made possible by the S CLASS 2’s highly accurate Optical Positioning
System (OPOS).
The OPOS sensor, which is mounted on the right-hand side of the tool carriage, registers
printed squares that are placed around the graphic. Because of this registration process,
OPOS can determine the exact position of the printed graphic.
The sensor drops automatically while registering the marks and rises again after completing
this task. The improved sensor can read virtually any kind of media-mark combination.
NOTE:
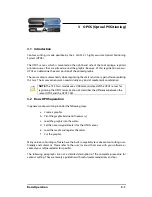
The T4 S Class models use a USB camera instead of the OPOS sensor for
registering the OPOS marks. Section 3.5 describes the differences between the
sensor OPOS and the OPOS CAM.
3.2
Basic OPOS operation
In general, contour cutting includes the following steps:
a.
Create a graphic.
b.
Print the graphic (laminate if necessary).
c.
Load the graphic into the cutter.
d.
Set the necessary parameters for the OPOS sensor.
e.
Load the media and register the marks.
f.
Cut the graphic.
Many versions of cutting software have the built-in capability to make contour cutting user-
friendly and automatic. Please refer to the user’s manual that came with your software or
contact your software dealer for specifics.
The following paragraphs are not a detailed description of the complete procedure for
contour cutting. They are merely a guideline with useful recommendations and tips.
Содержание S Class 2 OPOS-CAM
Страница 1: ...User s Manual Rev 3b...


