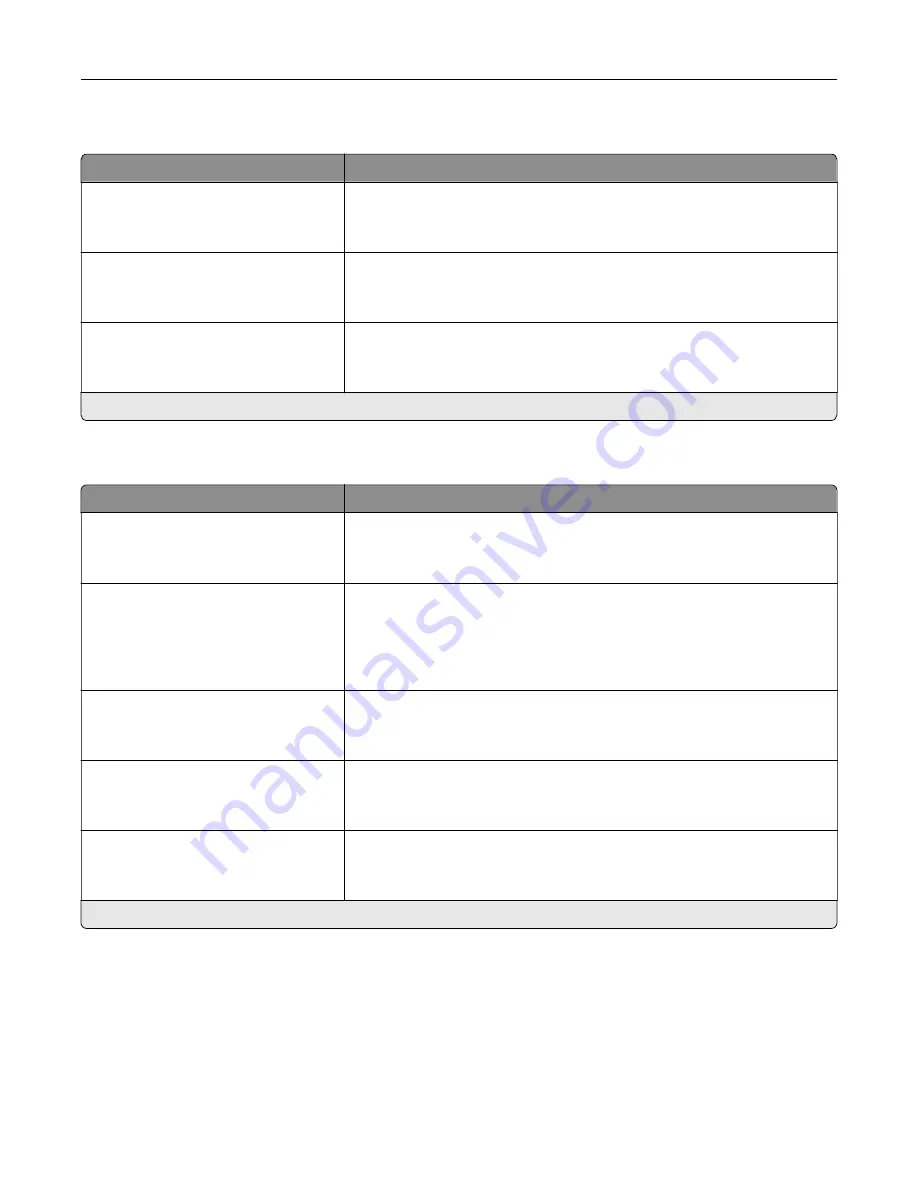
Menu item
Description
Scale To Fit
Off*
On
Scale the page content to fit the selected paper size.
Annotations
Do Not Print*
Specify whether to print annotations in the PDF.
Print PDF Error
Off
On*
Enable the printing of PDF error.
Note:
An asterisk (*) next to a value indicates the factory default setting.
PostScript
Menu item
Description
Print PS Error
Off*
On
Print a page that describes the PostScript® error.
Note:
When an error occurs, processing of the job stops, the printer
prints an error message, and the rest of the print job is flushed.
Minimum Line Width
1–30 (2*)
Set the minimum stroke width.
Notes:
•
Jobs printed in 1200 dpi use the value directly.
•
Jobs printed in 4800 CQ use half the value.
Lock PS Startup Mode
Off
On*
Disable the SysStart file.
Image Smoothing
Off*
On
Enhance the contrast and sharpness of low
‑
resolution images.
Note:
This setting has no effect on images with a resolution of 300 dpi or
higher.
Wait Timeout
Off
On*
Enable the printer to wait for more data before canceling a print job.
Note:
When enabled, the factory default setting is 40 seconds.
Note:
An asterisk (*) next to a value indicates the factory default setting.
Understanding the printer menus
49
Содержание MX-C607P
Страница 1: ...DIGITAL FULL COLOR PRINTER MX C607P User s Guide October 2021 Machine type 5063 Model 53H ...
Страница 85: ...Replacing parts and supplies Replacing a developer unit 1 Open door A Maintaining the printer 85 ...
Страница 86: ...2 Remove the waste toner bottle Maintaining the printer 86 ...
Страница 88: ...7 Insert the imaging unit 8 Insert the waste toner bottle 9 Close door A Maintaining the printer 88 ...
Страница 91: ...Replacing a photoconductor unit 1 Open door A Maintaining the printer 91 ...
Страница 92: ...2 Remove the waste toner bottle Maintaining the printer 92 ...
Страница 94: ...7 Insert the imaging unit 8 Insert the waste toner bottle 9 Close door A Maintaining the printer 94 ...
Страница 95: ...Replacing an imaging unit 1 Open door A Maintaining the printer 95 ...
Страница 96: ...2 Remove the waste toner bottle Maintaining the printer 96 ...
Страница 100: ...2 Remove the waste toner bottle 3 Unpack the new waste toner bottle Maintaining the printer 100 ...
Страница 101: ...4 Insert the new waste toner bottle 5 Close door A Maintaining the printer 101 ...
Страница 102: ...Replacing the transfer belt 1 Turn off the printer 2 Open door A Maintaining the printer 102 ...
Страница 103: ...3 Remove the waste toner bottle 4 Open door A1 Maintaining the printer 103 ...
Страница 105: ...8 Close door A1 9 Insert the waste toner bottle 10 Close door A 11 Turn on the printer Maintaining the printer 105 ...
Страница 107: ...4 Insert the new transfer roller 5 Remove the white packing material 6 Close door B Maintaining the printer 107 ...
Страница 129: ...Staple jam in door G 1 Open door G 2 Pull out the staple cartridge holder Clearing jams 129 ...
Страница 131: ...5 Insert the staple cartridge holder 6 Close door G Clearing jams 131 ...


