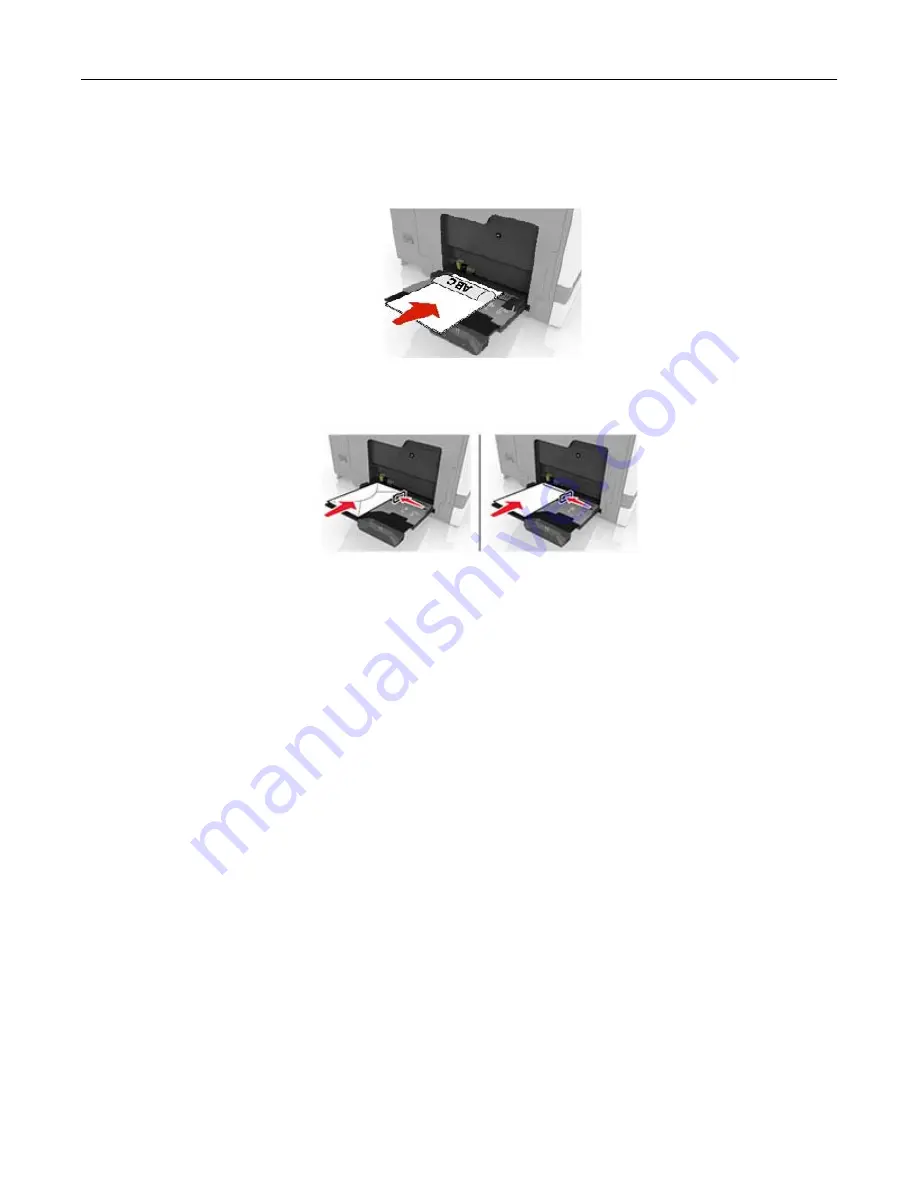
4
Load the paper.
•
Load paper, card stock, and transparencies with the printable side facedown and the top edge entering
the printer first.
•
Load envelopes with the flap side up and against the left side of the paper guide. Load European
envelopes with the flap side up and entering the printer first.
Warning—Potential Damage:
Do not use envelopes with stamps, clasps, snaps, windows, coated
linings, or self
‑
stick adhesives.
5
From the control panel, set the paper size and type to match the paper loaded in the tray.
Linking trays
1
From the home screen, touch
Settings
>
Paper
>
Tray Configuration
> select a paper source.
2
Set the same paper size and paper type for the trays that you are linking.
3
From the home screen, touch
Settings
>
Device
>
Maintenance
>
Configuration Menu
>
Tray Configuration
>
Tray Linking
.
4
Touch
Automatic
.
To unlink trays, make sure that no trays have the same paper size and paper type settings.
Warning—Potential Damage:
The temperature of the fuser varies according to the specified paper type. To
avoid printing issues, match the paper type setting in the printer with the paper loaded in the tray.
Loading paper and specialty media
21
Содержание MX-C607P
Страница 1: ...DIGITAL FULL COLOR PRINTER MX C607P User s Guide October 2021 Machine type 5063 Model 53H ...
Страница 85: ...Replacing parts and supplies Replacing a developer unit 1 Open door A Maintaining the printer 85 ...
Страница 86: ...2 Remove the waste toner bottle Maintaining the printer 86 ...
Страница 88: ...7 Insert the imaging unit 8 Insert the waste toner bottle 9 Close door A Maintaining the printer 88 ...
Страница 91: ...Replacing a photoconductor unit 1 Open door A Maintaining the printer 91 ...
Страница 92: ...2 Remove the waste toner bottle Maintaining the printer 92 ...
Страница 94: ...7 Insert the imaging unit 8 Insert the waste toner bottle 9 Close door A Maintaining the printer 94 ...
Страница 95: ...Replacing an imaging unit 1 Open door A Maintaining the printer 95 ...
Страница 96: ...2 Remove the waste toner bottle Maintaining the printer 96 ...
Страница 100: ...2 Remove the waste toner bottle 3 Unpack the new waste toner bottle Maintaining the printer 100 ...
Страница 101: ...4 Insert the new waste toner bottle 5 Close door A Maintaining the printer 101 ...
Страница 102: ...Replacing the transfer belt 1 Turn off the printer 2 Open door A Maintaining the printer 102 ...
Страница 103: ...3 Remove the waste toner bottle 4 Open door A1 Maintaining the printer 103 ...
Страница 105: ...8 Close door A1 9 Insert the waste toner bottle 10 Close door A 11 Turn on the printer Maintaining the printer 105 ...
Страница 107: ...4 Insert the new transfer roller 5 Remove the white packing material 6 Close door B Maintaining the printer 107 ...
Страница 129: ...Staple jam in door G 1 Open door G 2 Pull out the staple cartridge holder Clearing jams 129 ...
Страница 131: ...5 Insert the staple cartridge holder 6 Close door G Clearing jams 131 ...


