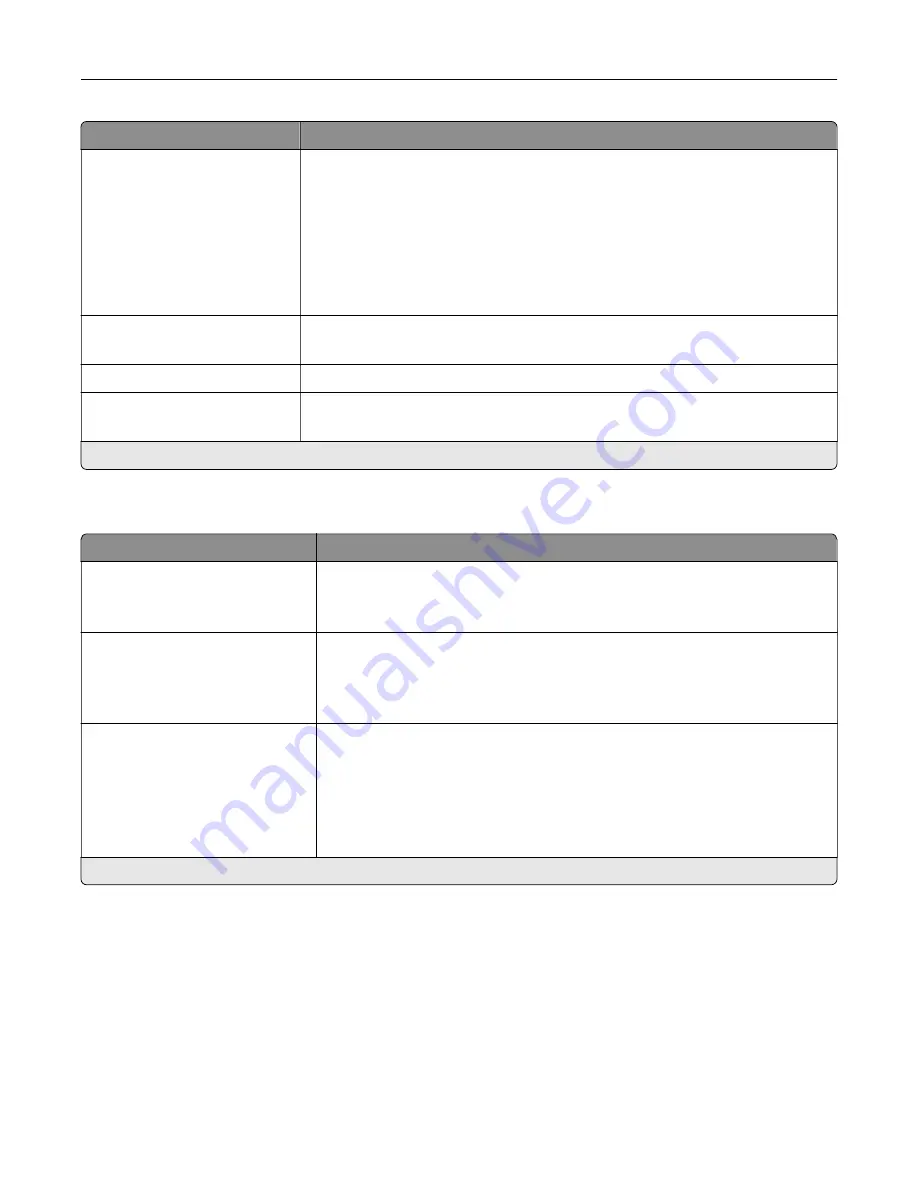
Menu item
Description
Color Correction
Off
Auto*
Manual
Modify the color settings used to print documents.
Notes:
•
Off sets the printer to receive the color correction from the software.
•
Auto sets the printer to apply different color profiles to each object on the
printed page.
•
Manual allows the customization of the RGB or CMYK color conversions
applied to each object on the printed page.
Color Samples
Print Color Samples
Print sample pages for each of the RGB and CMYK color conversion tables used
in the printer.
Color Adjust
Calibrate the printer to adjust color variations in the printed output.
Spot Color Replacement
Set Custom CMYK
Assign specific CMYK values to twenty named spot colors.
Note:
An asterisk (*) next to a value indicates the factory default setting.
Job Accounting
Menu item
Description
Job Accounting
Off*
On
Set the printer to create a log of the print jobs that it receives.
Note:
This menu item appears only when a flash memory or hard disk is
installed.
Accounting Log Frequency
Daily
Weekly
Monthly*
Specify how often the printer creates a log file.
Log Action at End of Frequency
None*
E
‑
mail Current Log
E
‑
mail & Delete Current Log
Post Current Log
Post & Delete Current Log
Specify how the printer responds when the frequency threshold expires.
Note:
The value defined in Accounting Log Frequency determines when this
action is triggered.
Note:
An asterisk (*) next to a value indicates the factory default setting.
Understanding the printer menus
47
Содержание MX-C607P
Страница 1: ...DIGITAL FULL COLOR PRINTER MX C607P User s Guide October 2021 Machine type 5063 Model 53H ...
Страница 85: ...Replacing parts and supplies Replacing a developer unit 1 Open door A Maintaining the printer 85 ...
Страница 86: ...2 Remove the waste toner bottle Maintaining the printer 86 ...
Страница 88: ...7 Insert the imaging unit 8 Insert the waste toner bottle 9 Close door A Maintaining the printer 88 ...
Страница 91: ...Replacing a photoconductor unit 1 Open door A Maintaining the printer 91 ...
Страница 92: ...2 Remove the waste toner bottle Maintaining the printer 92 ...
Страница 94: ...7 Insert the imaging unit 8 Insert the waste toner bottle 9 Close door A Maintaining the printer 94 ...
Страница 95: ...Replacing an imaging unit 1 Open door A Maintaining the printer 95 ...
Страница 96: ...2 Remove the waste toner bottle Maintaining the printer 96 ...
Страница 100: ...2 Remove the waste toner bottle 3 Unpack the new waste toner bottle Maintaining the printer 100 ...
Страница 101: ...4 Insert the new waste toner bottle 5 Close door A Maintaining the printer 101 ...
Страница 102: ...Replacing the transfer belt 1 Turn off the printer 2 Open door A Maintaining the printer 102 ...
Страница 103: ...3 Remove the waste toner bottle 4 Open door A1 Maintaining the printer 103 ...
Страница 105: ...8 Close door A1 9 Insert the waste toner bottle 10 Close door A 11 Turn on the printer Maintaining the printer 105 ...
Страница 107: ...4 Insert the new transfer roller 5 Remove the white packing material 6 Close door B Maintaining the printer 107 ...
Страница 129: ...Staple jam in door G 1 Open door G 2 Pull out the staple cartridge holder Clearing jams 129 ...
Страница 131: ...5 Insert the staple cartridge holder 6 Close door G Clearing jams 131 ...


