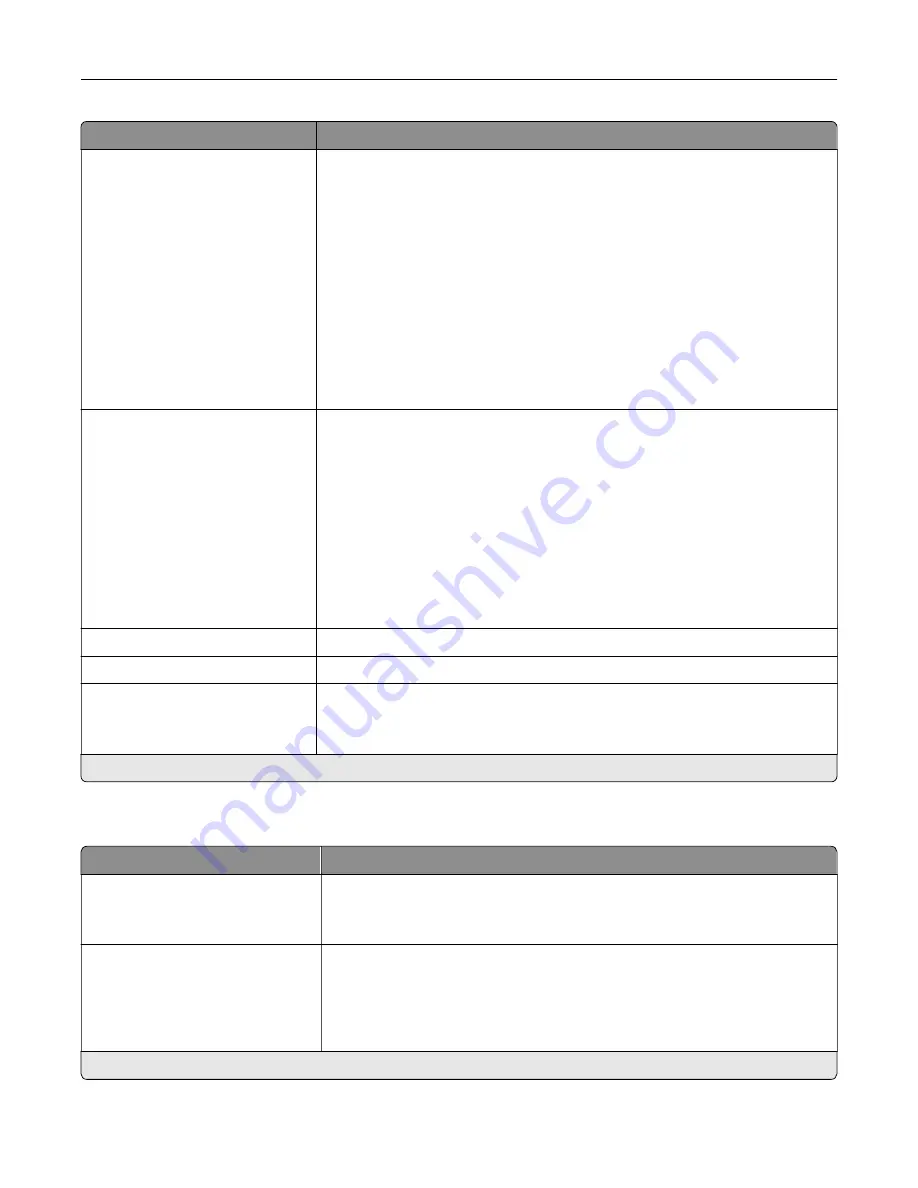
Menu item
Description
Log Action at Near Full
None*
E
‑
mail Current Log
E
‑
mail & Delete Current Log
E
‑
mail & Delete Oldest Log
Post Current Log
Post & Delete Current Log
Post & Delete Oldest Log
Delete Current Log
Delete Oldest Log
Delete All But Current
Delete All Logs
Specify how the printer responds when the hard disk is nearly full.
Log Action at Full
None*
E
‑
mail & Delete Current Log
E
‑
mail & Delete Oldest Log
Post & Delete Current Log
Post & Delete Oldest Log
Delete Current Log
Delete Oldest Log
Delete All But Current
Delete All Logs
Specify how the printer responds when hard disk usage reaches the maximum
limit (100MB).
URL to Post Log
Specify where the printer posts job accounting logs.
E
‑
mail Address to Send Logs
Specify the e
‑
mail address to which the printer sends job accounting logs.
Log File Prefix
Specify the prefix for the log files.
Note:
The current host name defined in the TCP/IP menu is used as the
default log file prefix.
Note:
An asterisk (*) next to a value indicates the factory default setting.
XPS
Menu item
Description
Print Error Pages
Off*
On
Print the error pages that the printer encountered while processing an XPS
file.
Minimum Line Width
1–30 (2*)
Set the minimum stroke width.
Notes:
•
Jobs printed in 1200 dpi use the value directly.
•
Jobs printed in 4800 CQ use half the value.
Note:
An asterisk (*) next to a value indicates the factory default setting.
Understanding the printer menus
48
Содержание MX-C607P
Страница 1: ...DIGITAL FULL COLOR PRINTER MX C607P User s Guide October 2021 Machine type 5063 Model 53H ...
Страница 85: ...Replacing parts and supplies Replacing a developer unit 1 Open door A Maintaining the printer 85 ...
Страница 86: ...2 Remove the waste toner bottle Maintaining the printer 86 ...
Страница 88: ...7 Insert the imaging unit 8 Insert the waste toner bottle 9 Close door A Maintaining the printer 88 ...
Страница 91: ...Replacing a photoconductor unit 1 Open door A Maintaining the printer 91 ...
Страница 92: ...2 Remove the waste toner bottle Maintaining the printer 92 ...
Страница 94: ...7 Insert the imaging unit 8 Insert the waste toner bottle 9 Close door A Maintaining the printer 94 ...
Страница 95: ...Replacing an imaging unit 1 Open door A Maintaining the printer 95 ...
Страница 96: ...2 Remove the waste toner bottle Maintaining the printer 96 ...
Страница 100: ...2 Remove the waste toner bottle 3 Unpack the new waste toner bottle Maintaining the printer 100 ...
Страница 101: ...4 Insert the new waste toner bottle 5 Close door A Maintaining the printer 101 ...
Страница 102: ...Replacing the transfer belt 1 Turn off the printer 2 Open door A Maintaining the printer 102 ...
Страница 103: ...3 Remove the waste toner bottle 4 Open door A1 Maintaining the printer 103 ...
Страница 105: ...8 Close door A1 9 Insert the waste toner bottle 10 Close door A 11 Turn on the printer Maintaining the printer 105 ...
Страница 107: ...4 Insert the new transfer roller 5 Remove the white packing material 6 Close door B Maintaining the printer 107 ...
Страница 129: ...Staple jam in door G 1 Open door G 2 Pull out the staple cartridge holder Clearing jams 129 ...
Страница 131: ...5 Insert the staple cartridge holder 6 Close door G Clearing jams 131 ...


