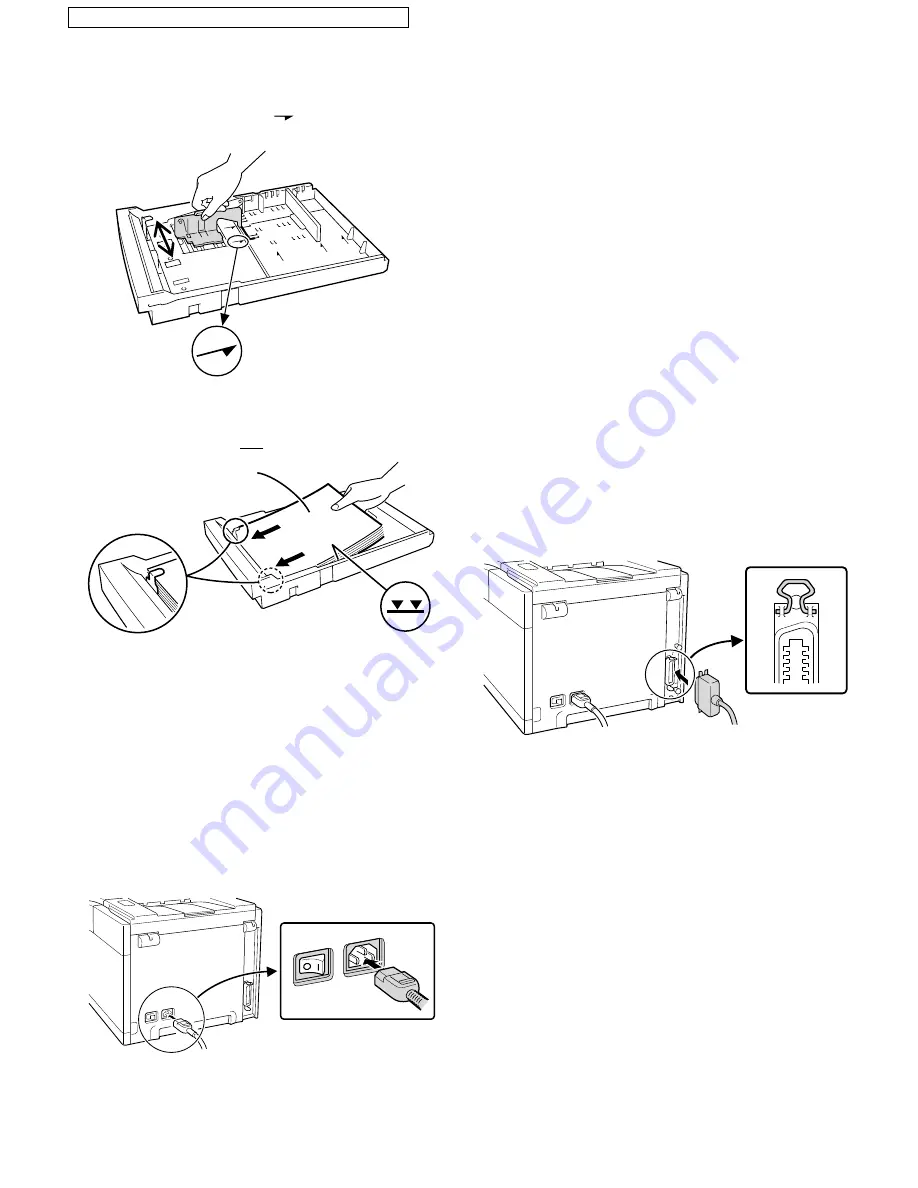
Adjusting the horizontal guide:
While referring to the figure below, press the lock lever on the
middle of the horizontal guide and move the horizontal guide
sideways to the paper size mark (
) for the size of paper that
you want to use.
4
Load the paper, with the side to be printed on facing upwards, into
the universal cassette. The entire stack should fit under the right
and left tabs at the front of the paper tray. Do not load the paper
above the red maximum line
c c
or the paper may misfeed.
5
Replace the universal cassette into the printer and proceed to the
next section,
Connecting the Power Cord
.
7. Connecting the Power Cord
1) Make sure that the printer is turned off (O). Insert the power cord
supplied with the printer into the power cord plug on the back of
the printer.
WARNING: If you use the printer in a country other than the country
where the printer was purchased, you will need to make
sure that your local power supply is compatible with
your model. If you plug the printer into an incompatible
power supply, irreparable damage to the printer will
result.
2) Insert the power cord into your wall outlet.
CAUTION: Only insert the power cord into a properly grounded wall
socket.
8. Connecting the Interface Cable
Your printer comes standard with a Centronics Parallel interface port.
Also available are the optional Network, LocalTalk, and Serial inter-
faces. Read the section below that corresponds to the interface you
will be using.
NOTE: The interface cable is not supplied with your printer. You
must purchase the cable of the required length and
specifications depending on your application.
(1) Centronics Parallel for PC/AT-Compatible
Computers
To connect the interface, you will need a standard parallel printer
cable.
NOTE:
•
To comply with FCC Class B or VDE 0871 and 0875
requirements, you need a shielded, grounded cable
(IEEE-1284 conforming).
1) Make sure that the power to the printer and computer are
switched off.
2) Remove the protective cover from the parallel interface connector
on the printer. Keep it in case you need it when moving the
printer.
3) Plug the cable into the socket on the printer and connect the other
end to your computer (e.g., LPT1 or LPT2 ports). Pull up the two
clips at the side of the socket to grip the parallel plug and hold it in
place.
NOTE: The location of the parallel port on the computer will vary
from computer to computer. Refer to your computer’s
manual for the location of the parallel port on your computer.
(2) Serial Interface for PC/AT-Compatible
Computers
If your printer is equipped with the optional LocalTalk/RS-232C serial
interface board, it can be connected using the serial interface. To
connect the serial interface, you will need a standard RS-232C serial
printer cable.
1) Make sure that the power of the printer and computer are
switched off.
2) Plug the cable into the socket on the printer and connect the other
end to your computer (e.g., COM1 or COM2 ports). Secure the
cable screws to grip the serial plug and hold it in place.
Print face
SHARP SERVICE MANUAL JX8200SM [5] INSTALLATION
5 – 11
Содержание JX-8200
Страница 201: ...14 2 ...
Страница 202: ...14 3 ...
Страница 203: ...14 4 ...
Страница 204: ...14 5 ...


