


56
Chapter 3. Versatile Performance Functions
4.
Turning [S1] on/off will switch the speed of the rotary effect.
You can also use the above procedure to make settings for other
effects; for example, you could change the amount of drive for an
overdrive effect.
If you want to keep these settings, save the system settings in
System (p. 145) and save the effect settings in the patch (p. 97).
If you find it difficult to hear the effect, check the following
settings.
• In the EFFECT ROUTING screen (p. 80) of the selected patch,
make sure that the “Tone Output Level” is raised for tones whose
“Tone Switch” is on, and that the “MFX Output Level” is high
enough. If these settings are too low, raise them.
• In the EFFECT ROUTING screen (p. 80) of the selected patch,
make sure that “PATCH OUT” is set to “MFX.” If any other setting
is selected, change it to “MFX.”
■
In Performance mode
Before you continue with the following procedure, prepare the patch
to which you want to apply the rotary effect. Make settings as
described in steps 2 and 3 of “In Patch mode.”
1.
For the desired part of the performance, select the patch you
prepared above.
As our example in this explanation, we’ll use part 2 (or LOWER).
2.
Assign the performance parameter “Switch 1” to “SYS CTRL 1
SRC.”
* Set the system control number (SYS CTRL) to match the value you
specified for “Source” in step 3–5) of “In Patch mode.”
1) Hold down [SHIFT] and press [S1].
A setting screen will appear.
2) For “Switch 1,” set “Assign” to “SYS CTRL 1 SRC.”
3) Press [EXIT] to access the PERFORM PLAY screen.
3.
Make effect settings.
1) Press [EDIT] and select “EFFECT EDIT.”
The EFFECT ROUTING screen will appear.
2) In the EFFECT ROUTING screen, make the following settings.
• Set the part number in the upper left to “PART 2 (or
LOWER).”
• Below the part number, set “OUTPUT” to “MFX.”
• Below “OUTPUT,” set “MFX SEL” to “1.”
• Set the “MFX1” Source to “P 2 (or LO)” (the part you
selected in step 1). When you make this setting, the MFX
Type will indicate “21: ROTARY.”
3) Press [EXIT] several times to access the PERFORM PLAY screen.
4.
Use [S1] to apply the effect.
1) In the PERFORM PLAY screen or PERFORM SELECT screen,
select part 2 (or LOWER).
The [S1] effect will apply to the current part; select the part to
which you want the effect to apply.
2) Turning [S1] on/off will switch the speed of the rotary effect.
If you want to keep these settings, save them in the performance
(p. 133).
The D Beam controller can be used simply by waving your hand over
it. It can be used to apply various effects, depending on the function
that is assigned to it. On the JUNO-STAGE, the D Beam controller can
be used not only to modify the sounds, but also to control the pitch of
a monophonic (solo) synthesizer sound.
1.
Press either the D BEAM [SOLO SYNTH], [ACTIVE EXPRESS], or
[ASSIGNABLE] button to turn on the D Beam controller.
2.
While you play the keyboard to produce sound, place your hand
above the D Beam controller and move it slowly up and down.
An effect will be applied to the sound, depending on the function
that is assigned to the D Beam controller.
3.
To turn off the D Beam controller, once again press the button you
pressed in step 1 so the indicator goes out.
If Performance mode is selected, the D Beam controller on/off
setting is saved for each performance as part of the performance
settings.
Using the D Beam Controller to
Modify the Sound
Button
Explanation
[SOLO SYNTH]
Lets you use the D Beam controller as a
monophonic synthesizer.
[ACTIVE EXPRESS]
The D Beam controller will add the ideal
type of expression for each sound.
[ASSIGNABLE]
Operates the function assigned to the D
Beam controller.
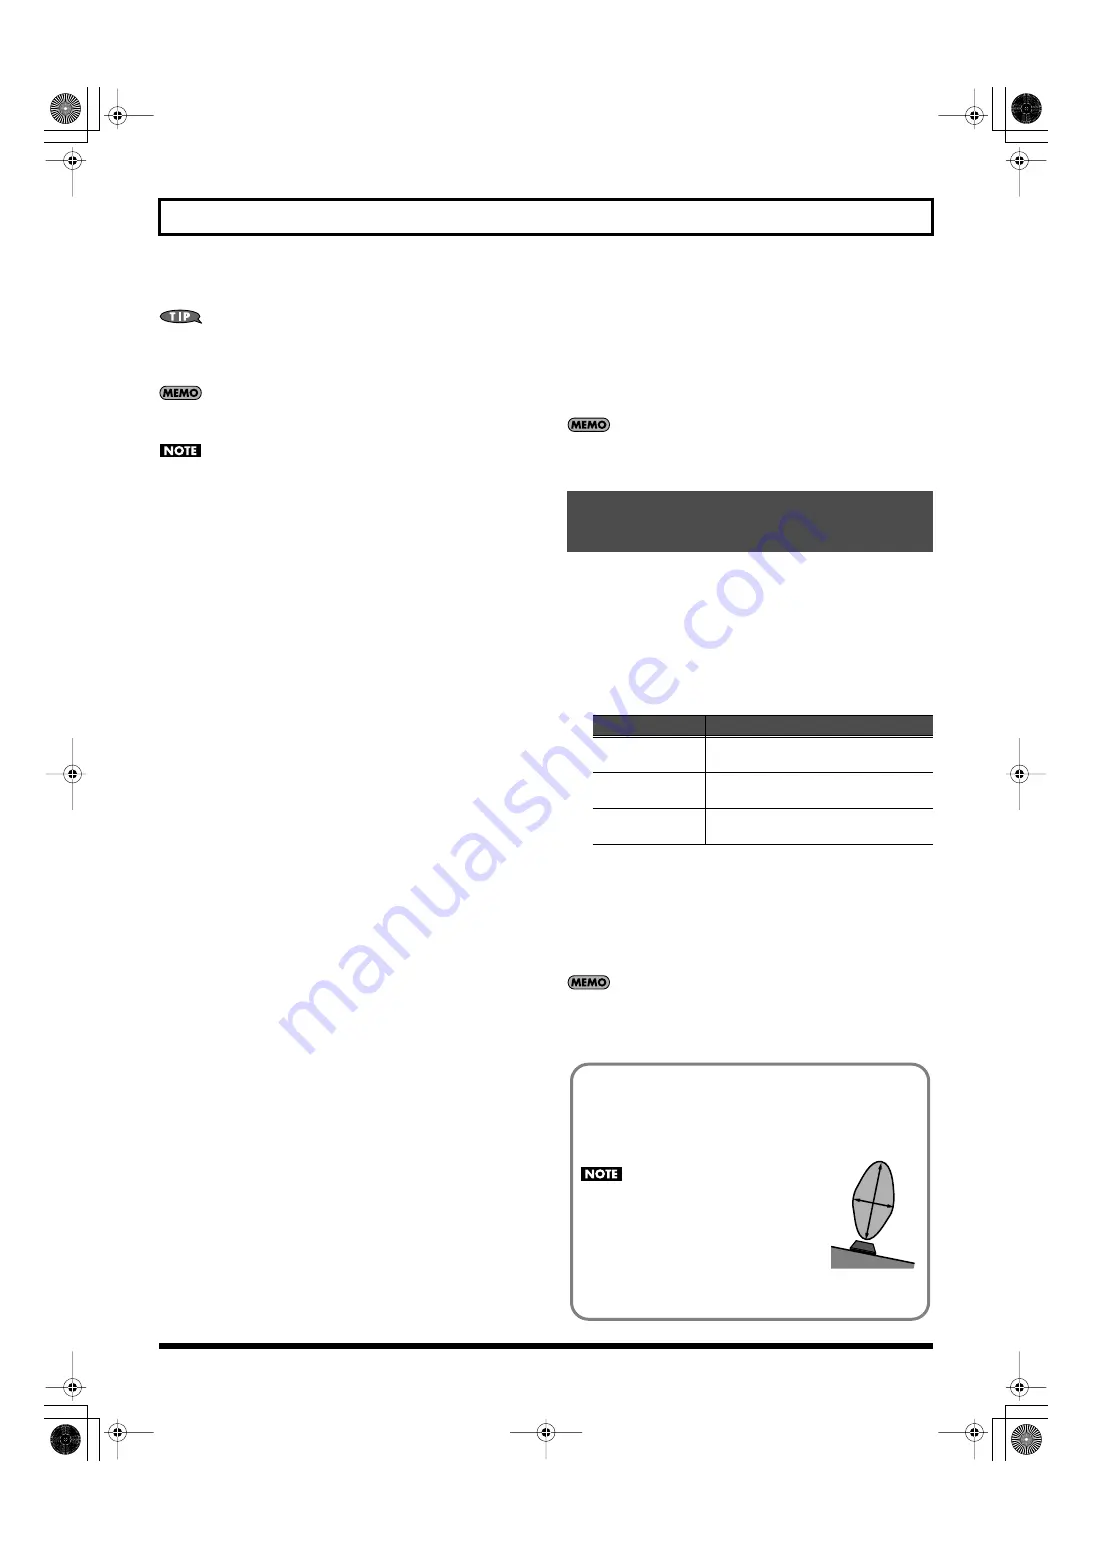
The usable range of the D Beam controller
The following diagram shows the usable range of the D Beam
controller. Waving your hand outside this range will produce no
effect.
fig.DBeamRange
The usable range of the D Beam
controller will become extremely small
when used under strong direct sunlight.
If it does not function as you expect,
adjust the sensitivity as appropriate for
the brightness of your location.
➝
JUNO-STAGE_e.book 56 ページ 2008年10月17日 金曜日 午後12時27分
Содержание Juno-Stage
Страница 1: ...5 1 0 0 0 0 0 0 4 0 0 2 JUNO STAGE_Cover_e1 fm 1...
Страница 13: ...13 Introduction JUNO STAGE_e book 13...
Страница 17: ...17 MEMO JUNO STAGE_e book 17...
Страница 23: ...23 Quick Start JUNO STAGE_e book 23...
Страница 37: ...37 Reference JUNO STAGE_e book 37...
Страница 157: ...157 Appendices JUNO STAGE_e book 157...
Страница 253: ...For EU Countries For China JUNO STAGE_e book 253...
Страница 256: ...5 1 0 0 0 0 0 0 4 0 0 2 JUNO STAGE_Cover_e1 fm 1...


