


95
Chapter 8. Detailed Editing for Patches
3.
Press [3 (PATCH EDIT)], or use the VALUE dial to select “PATCH
EDIT” and then press [ENTER].
The ZOOM EDIT screen will appear.
fig.disp-zoomedit.eps
4.
Use [2]–[5] to select the desired editing screen.
By pressing [6 (PAGE)] you can switch among the [2]–[5]
screens.
5.
Use the cursor buttons to select the parameter that you want to
edit.
6.
Press [TONE SWITCH/SELECT] so it’s lit, and use TONE SELECT [1]–
[4] to select the tone that you want to edit.
●
To simultaneously edit the same parameter for multiple tones
Simultaneously press TONE SELECT [1]–[4] corresponding to
the tones that you want to edit, so they’re lit in red.
●
To switch tones on/off
Press TONE SWITCH [1]–[4] to turn each tone on/off.
7.
Use the VALUE dial or [DEC] [INC] to edit the value.
If you’ve selected more than one tone for editing, all of those
tones will be set to the same value.
In PRO EDIT (p. 95) you can edit while preserving the relative
differences between tones.
8.
Repeat steps 4–7 to edit the patch as desired.
9.
If you want to save the changes you’ve made, press [WRITE]
(p. 97).
If you decide not to save the changes, press [EXIT] to exit the
ZOOM EDIT screen.
If you exit the ZOOM EDIT screen without saving, an “*” will be
displayed in the PATCH PLAY screen of Patch mode.
If you turn off the power or select a different sound when the “*”
is displayed, the patch settings you edited will be lost.
This shows the parameters of ZOOM EDIT, and additionally allows
you to edit in greater detail.
For details on the parameters refer to p. 98 and following.
1.
In Patch mode or Performance mode, select the patch that you
want to edit.
For details, refer to “Selecting Patches in Patch Mode” (p. 45) or
“Selecting a Patch for Each Part” (p. 50).
If you want to create a patch from scratch without using an
existing patch, execute the Initialize operation (p. 96).
2.
Press [EDIT].
3.
Either press [3 (PATCH EDIT)] or use the VALUE dial to select
“PATCH EDIT,” and then press [ENTER].
The ZOOM EDIT screen will appear.
4.
Press [7 (PRO EDIT)].
The PRO EDIT screen will appear.
5.
Use [3 (GRP
↑
)] [4 (GRP
↓
)] to switch between parameter groups.
Alternatively, you can switch between parameter groups by
pressing [2 (GRP LIST)] to access the Patch Pro Edit Menu
window, then using the VALUE dial, [DEC] [INC], or [
] [
]
to select the parameter group, and pressing [ENTER].
6.
Use the cursor buttons to select a parameter.
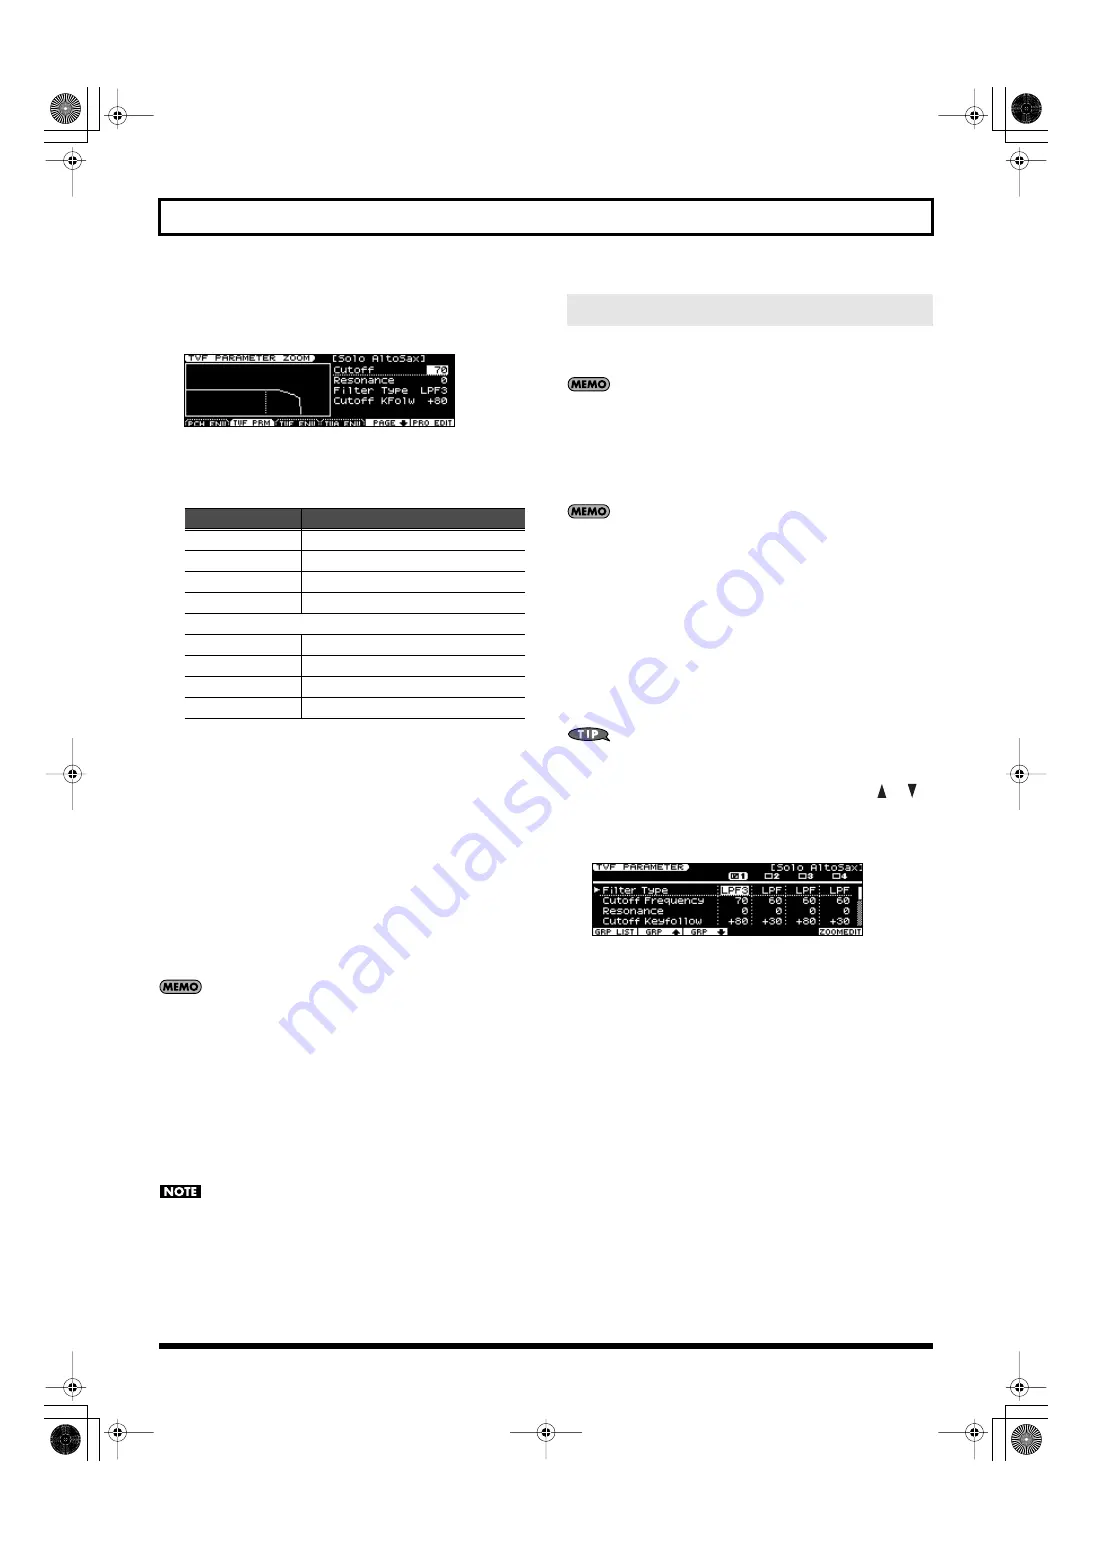
fig.disp-proedit.eps
7.
Press [TONE SWITCH/SELECT] so it’s lit, and use TONE SELECT [1]–
[4] to select the tone that you want to edit.
●
To edit the same parameter of multiple tones simultaneously
Simultaneously press the TONE SELECT [1]–[4] buttons for the
tones that you want to edit, so they’re lit in red.
●
To switch tones on/off
Press TONE SWITCH [1]–[4] to switch tones on/off.
You’ll be editing the tones for which a check mark (
✔
) is
shown for the tone numbers in the upper right of the screen.
8.
Use the VALUE dial or [DEC] [INC] to edit the value.
If you’ve selected more than one tone for editing, their values will
change while their relative differences are preserved.
Button
Screen
[2 (PCH ENV)]
[3 (TVF PRM)]
[4 (TVF ENV)]
[5 (TVA ENV)]
[6 (PAGE
↓
)] [6 (PAGE
↑
)]
[2 (STRUCT)]
[3 (LFO 1)]
[4 (LFO 2)]
[5 (STEPLFO)]
Viewing and Editing All Parameters (PRO EDIT)
JUNO-STAGE_e.book 95 ページ 2008年10月17日 金曜日 午後12時27分
Содержание Juno-Stage
Страница 1: ...5 1 0 0 0 0 0 0 4 0 0 2 JUNO STAGE_Cover_e1 fm 1...
Страница 13: ...13 Introduction JUNO STAGE_e book 13...
Страница 17: ...17 MEMO JUNO STAGE_e book 17...
Страница 23: ...23 Quick Start JUNO STAGE_e book 23...
Страница 37: ...37 Reference JUNO STAGE_e book 37...
Страница 157: ...157 Appendices JUNO STAGE_e book 157...
Страница 253: ...For EU Countries For China JUNO STAGE_e book 253...
Страница 256: ...5 1 0 0 0 0 0 0 4 0 0 2 JUNO STAGE_Cover_e1 fm 1...


