


76
Chapter 4. Using the Song Player
In addition to using the preset rhythm patterns that are provided, you
can freely create your own rhythm patterns.
You can create a rhythm pattern either by step-recording from the
keyboard or by using the VALUE dial and buttons to enter data.
It’s convenient to enter notes from the keyboard if you’re creating a
new rhythm pattern from scratch rather than creating one based on an
existing pattern. Conversely, it’s convenient to use the dial or buttons
to enter notes if you’re editing an existing rhythm pattern.
Initializing a Rhythm Pattern
If you’re creating a rhythm pattern from scratch (rather than starting
with an existing rhythm pattern), you’ll begin by initializing a rhythm
pattern.
1.
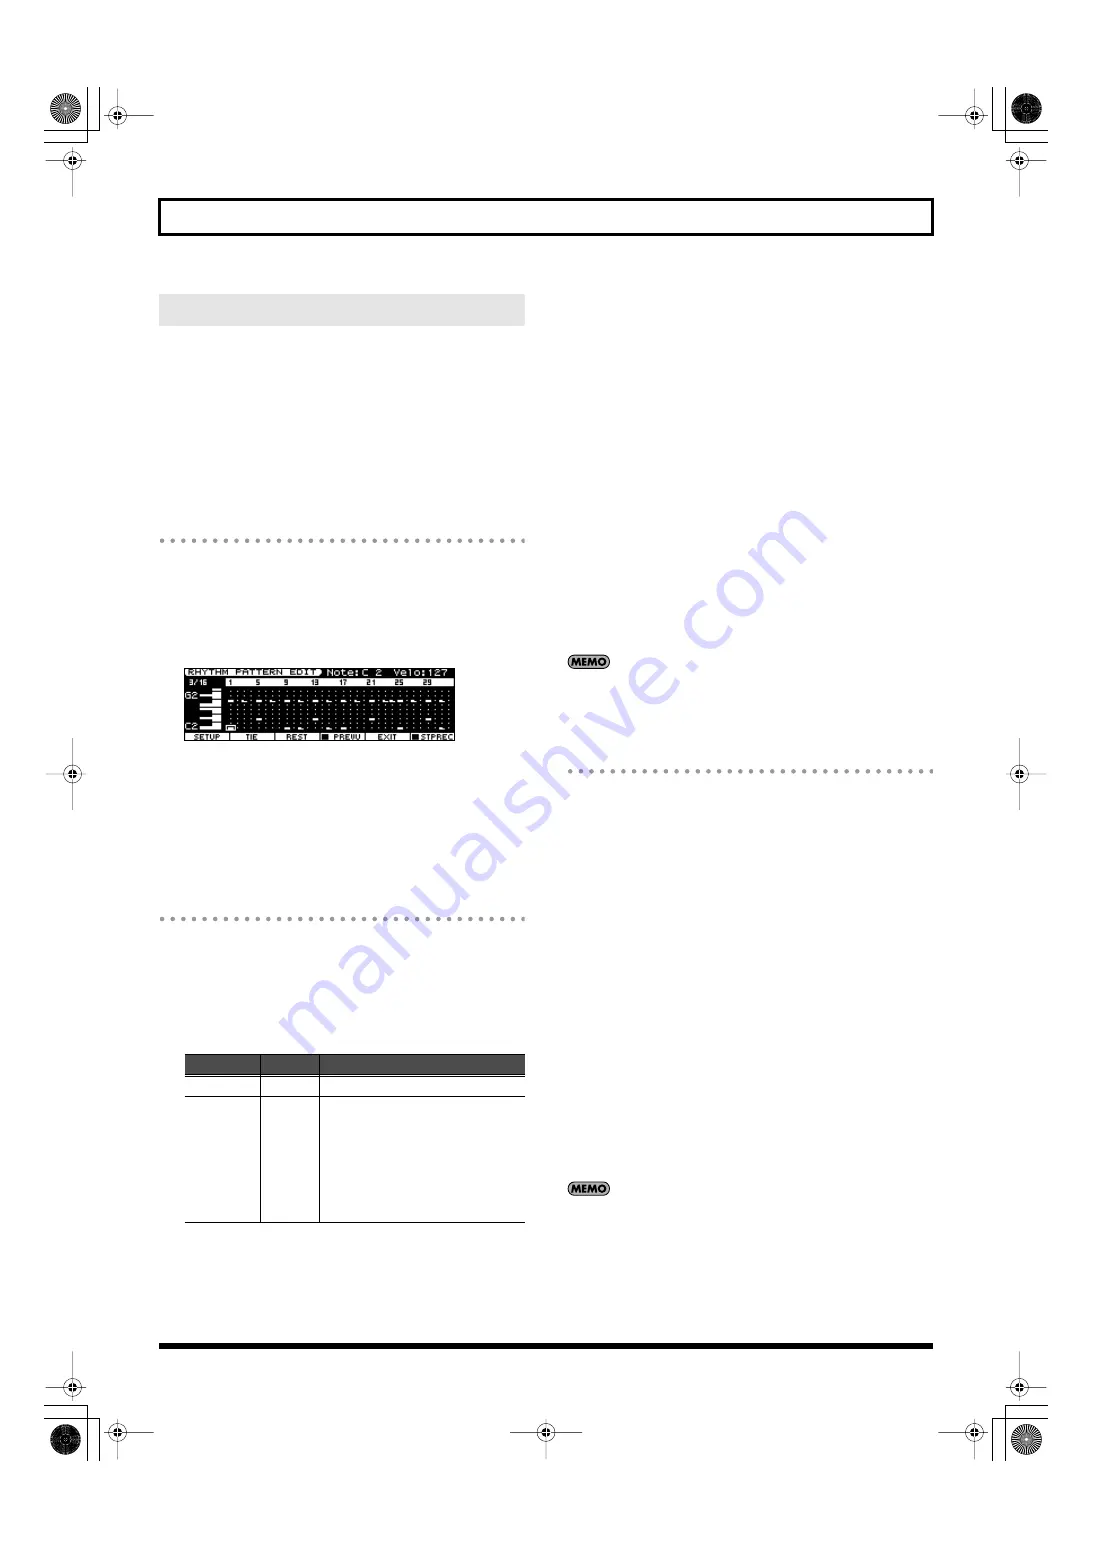
In the RHYTHM PATTERN screen, press [6 (PTN EDIT)].
The RHYTHM PATTERN EDIT screen will appear.
fig.disp-r-ptnedit.eps
2.
Hold down [SHIFT] and press [5 (INIT)].
A confirmation message will appear.
Initialization will be cancelled if you press [6 (CANCEL)].
3.
Press [7 (EXEC)].
The rhythm pattern will be initialized.
Step-recording from the Keyboard
1.
In the RHYTHM PATTERN EDIT screen, press [2 (SETUP)].
The Rhythm Setup window will open.
2.
Use the cursor buttons to move the cursor to the parameter you
want to edit.
3.
Use the VALUE dial or [DEC] [INC] to set the value.
4.
Press [7 (CLOSE)] to close the Rhythm Setup window.
You will return to the RHYTHM PATTERN EDIT screen.
5.
Press [7 (STP REC)] to make the check mark (
✔
) appear.
Now you’re ready to perform step recording.
Proceed with step recording as follows.
• Use cursor buttons to move to the location at which you want
to enter a note.
• The tones of the rhythm set selected in the RHYTHM GROUP
screen will be assigned to the keyboard. Use the keyboard to
enter notes.
• Press [3 (TIE)] to enter a tie.
• Press [4 (REST)] to enter a rest.
• To delete a note, hold down [SHIFT] and press [7 (CLR
NOTE)].
• To delete all notes at the current step, hold down [SHIFT] and
press [6 (CLR STEP)].
• To preview the pattern you’re inputting, press [5 (PREVU)] to
display a check mark (
✔
).
A maximum of sixteen rhythm tone can be used in one pattern.
6.
When you’re finished inputting, press [6 (EXIT)].
Using the Dial and Buttons for Entry
In this method, you’ll use the cursor buttons to specify the step and
tone to be input, and use the VALUE dial or [DEC] [INC] to specify the
velocity of the note.
This method is convenient when you’re editing or modifying an
existing pattern.
1.
In the RHYTHM PATTERN EDIT screen, press [7 (STP REC)] to clear
the check mark (
✔
).
Proceed with step recording as follows.
• Use cursor buttons to specify the step and tone that you want to
enter.
* When using this method for entry, the keyboard can’t be used
to specify the tone. (Unlike the case when step-recording, the
keyboard won’t enter notes.)
• Use the VALUE dial or [DEC] [INC] to enter the velocity value.
By turning the VALUE dial all the way to the right (or using
[INC] to raise the value all the way), you can enter a tie.
• You can also enter a tie by pressing [3 (TIE)].
• To enter a rest, press [4 (REST)].
• To preview the pattern you’re inputting, press [5 (PREVU)] to
display a check mark (
✔
).
A maximum of sixteen rhythm tone can be used in one pattern.
2.
When you’re finished inputting, press [6 (EXIT)].
Creating a Rhythm Pattern
Indication
Values
Explanation
End Step
1–32
Specifies the number of steps.
Input
Velocity
REAL,
1–127
Specifies the velocity of the notes.
Choose “REAL” if you want to enter
the velocity at which you actually
pressed the key. Otherwise, specify
the desired velocity;
p (piano) = 60,
mf (mezzo forte) = 90,
f (forte) = 120.
JUNO-STAGE_e.book 76 ページ 2008年10月17日 金曜日 午後12時27分
Содержание Juno-Stage
Страница 1: ...5 1 0 0 0 0 0 0 4 0 0 2 JUNO STAGE_Cover_e1 fm 1...
Страница 13: ...13 Introduction JUNO STAGE_e book 13...
Страница 17: ...17 MEMO JUNO STAGE_e book 17...
Страница 23: ...23 Quick Start JUNO STAGE_e book 23...
Страница 37: ...37 Reference JUNO STAGE_e book 37...
Страница 157: ...157 Appendices JUNO STAGE_e book 157...
Страница 253: ...For EU Countries For China JUNO STAGE_e book 253...
Страница 256: ...5 1 0 0 0 0 0 0 4 0 0 2 JUNO STAGE_Cover_e1 fm 1...


