


87
Chapter 6. Performing with a Microphone
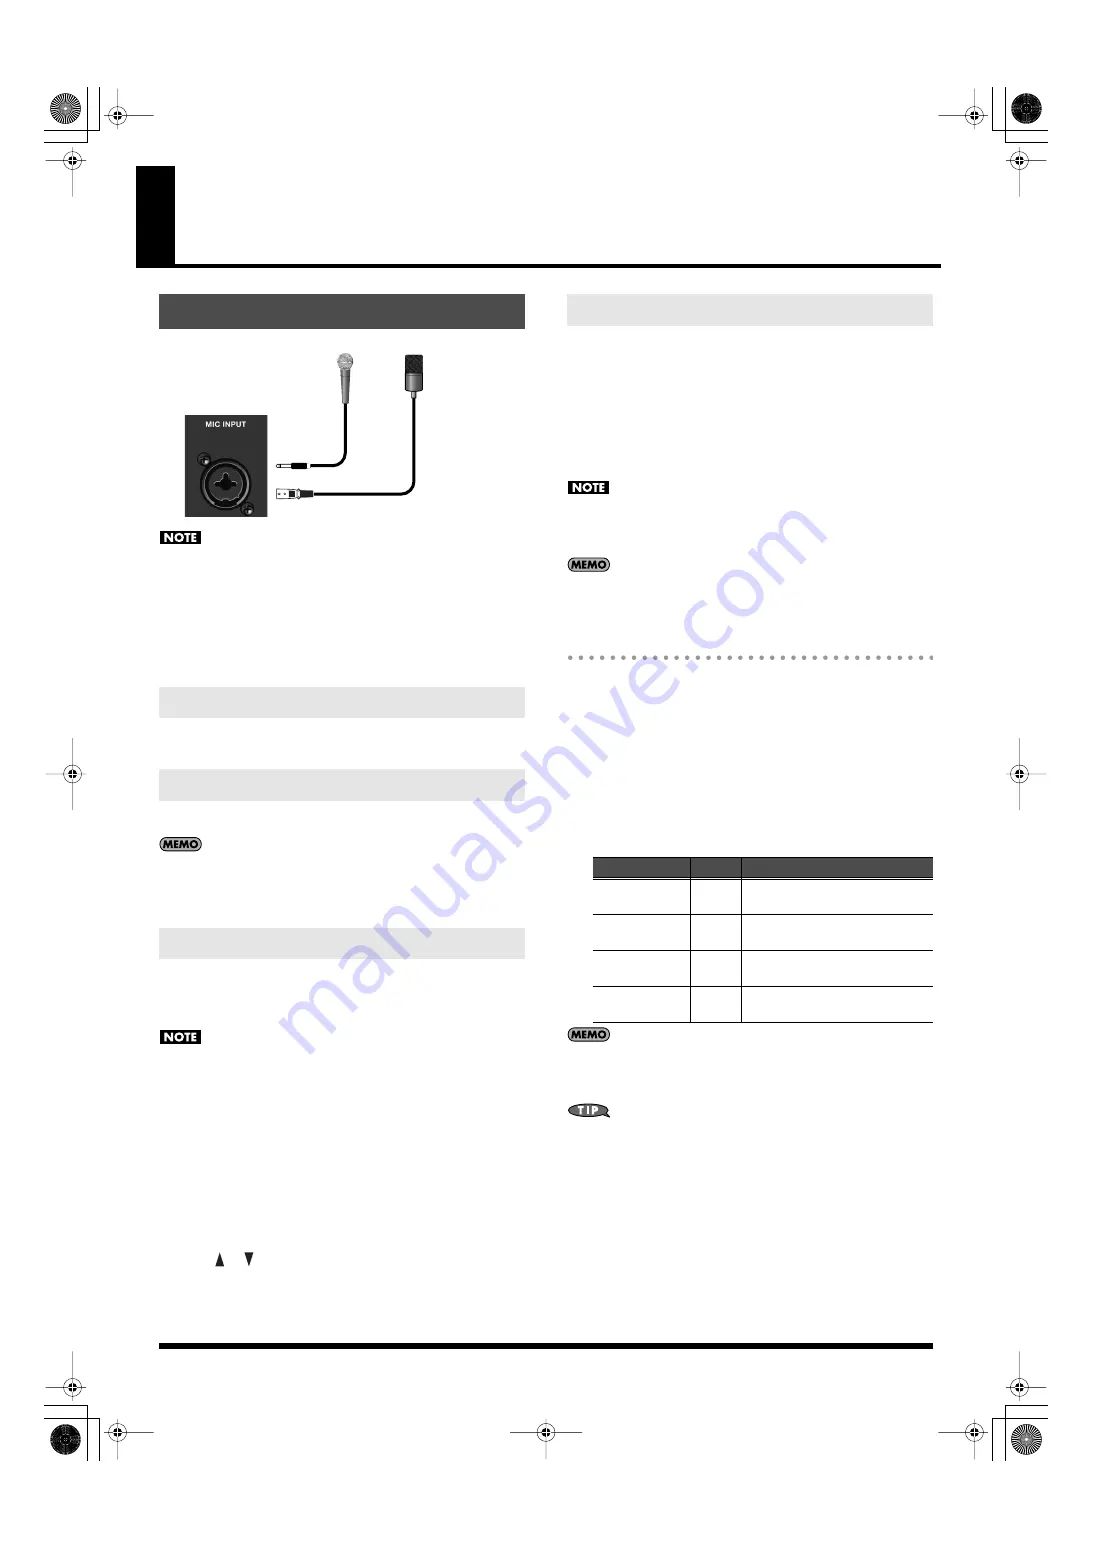
fig.mic-connect
Depending on the position of the microphone relative to the
speakers, you may experience acoustic feedback (a whine or
howl). If this occurs, take the following actions.
• Change the direction of the microphone
• Move the microphone farther away from the speakers
• Lower the volume
1.
Turn the [MIC VOLUME] knob to adjust the mic volume.
1.
Press the MIC IN [REVERB] so it’s lit.
You can make detailed settings for the reverb that is applied to
the mic. Refer to “Detailed Settings for the MIC INPUT (MIC Input
Setting)” (p. 154).
If you want to connect a condenser mic that requires phantom power
to be supplied, you’ll need to change the phantom power setting as
follows.
• You must leave this setting “OFF” unless you are connecting a
condenser mic that requires phantom power. Supplying phantom
power to a dynamic mic will cause malfunctions. Refer to the
owner’s manual of your mic for details on its requirements.
• This setting cannot be saved. Phantom power will be “OFF” each
time the JUNO-STAGE is powered up.
1.
Turn the [VOLUME] knob toward the left to the “MIN” position.
2.
Press [MENU].
The Top Menu window will appear.
3.
Use [
] [
] to select “2. Mic Input Setting,” and press [ENTER].
4.
Use the cursor buttons to move the cursor to “Phantom Power.”
5.
Use the VALUE dial or [DEC] [INC] to turn the setting “ON.”
The JUNO-STAGE uses MFX to simulate a vocoder.
1.
Press [PATCH] so it’s lit.
You’ll be in Patch mode.
2.
Select “PRST 1027 VOCODER Ens” as the patch.
For details on how to select a patch, refer to “Selecting Patches in
Patch Mode” (p. 45).
3.
While you play the keyboard, vocalize into the mic.
The vocoder is applied to the sound from the mic. There will be
no sound if you only play the keyboard without vocalizing into
the mic.
Even for patch other than PRST1027, you can apply the vocoder
effect by selecting “79: VOCODER” as the effect.
Changing the Vocoder Settings
1.
Select “PRST 1027 VOCODER Ens” as the patch.
2.
Press [EDIT].
3.
Press [6 (EFFECT EDIT)] or use the VALUE dial to select “EFFECT
EDIT,” then press [ENTER].
4.
Press [3 (MFX)].
The MFX screen will appear. In this case, “79: VOCODER” will
be selected for MFX.
5.
Use the cursor buttons to select the parameter you want to edit.
6.
Use the VALUE dial or [DEC] [INC] to edit the value.
If you want to keep the edited settings, save the patch as a user
patch. For details, refer to “Saving a Patch You’ve Created
([WRITE])” (p. 97).
To access the MIC INPUT setting screen (p. 154), hold down
[SHIFT] and press MIC IN [REVERB]. If you set “MIC Mode” to
“VOCODER ONLY” in the MIC INPUT setting screen, the sound
of the mic will be output only when you’ve selected “79:
VOCODER” as the effect.
This is convenient when you want to avoid outputting unwanted
sound from the mic, for example when you’re performing live.
Connecting a Mic
Adjusting the Volume of the Mic
Applying Reverb to the Mic
Using a Condenser Mic
Dinamic
Mic
or
Condenser
Mic
Using the Vocoder
Parameter
Values
Explanation
Mic Sens
0–127
Adjusts the input sensitivity of the
mic.
Synth Level
0–127
Adjusts the input level of the
instrument.
Mic Mix
0–127
Adjusts the amount of sound from the
mic added to the vocoder’s output.
Level
0–127
Adjusts the volume level of the sound
that has passed through the vocoder.
JUNO-STAGE_e.book 87 ページ 2008年10月17日 金曜日 午後12時27分
Содержание Juno-Stage
Страница 1: ...5 1 0 0 0 0 0 0 4 0 0 2 JUNO STAGE_Cover_e1 fm 1...
Страница 13: ...13 Introduction JUNO STAGE_e book 13...
Страница 17: ...17 MEMO JUNO STAGE_e book 17...
Страница 23: ...23 Quick Start JUNO STAGE_e book 23...
Страница 37: ...37 Reference JUNO STAGE_e book 37...
Страница 157: ...157 Appendices JUNO STAGE_e book 157...
Страница 253: ...For EU Countries For China JUNO STAGE_e book 253...
Страница 256: ...5 1 0 0 0 0 0 0 4 0 0 2 JUNO STAGE_Cover_e1 fm 1...


