Model menu
Flight modes
F X - 4 0
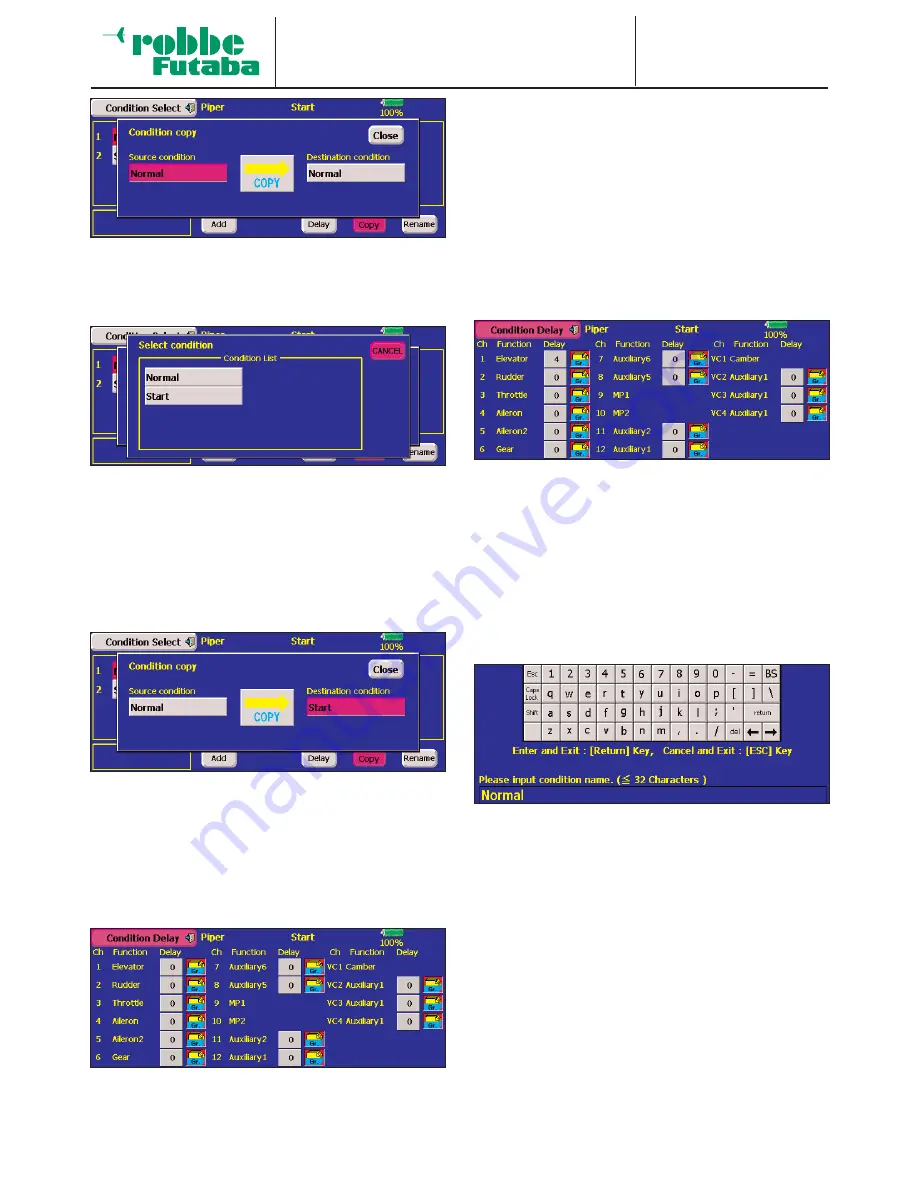
The first step is to determine the source of the flight mode
to be copied by activating the appropriate field. The flight
mode to be copied is selected from the list, as shown
below.
The selected flight mode (the one to be copied) is now dis-
played in the ‘Source’ field. Now mark the field into which
the destination is to be entered. Once again the select list
appears, where you can choose the flight mode which is to
be overwritten.
When everything has been set correctly - as in the screen
shot shown below, for example - initiate the copy process
by marking the ‘Copy’ field.
This action starts the copy process, but it is only carried out
when you confirm the security query with ‘Yes’. The data
content of the destination flight mode is then copied to the
specified location.
• Determining the delay time
In the list of flight modes, mark the one whose priority you
wish to alter, then activate the ‘Delay’ field. The screen now
looks like this:
The adjustment range is 0 to 27 increments: the higher the
number, the longer the delay time. The maximum delay (27
increments) corresponds to a duration of nine seconds. The
default setting is always ‘0’, i.e. there is no programmed
delay time as standard.
Now move to the ‘Delay’ column and mark the field for the
channel which is to be assigned a delay time. You will now
see an additional set of three button fields in the bottom
right corner of the screen. The delay time can be increased
or reduced using the two ‘Arrow’ buttons. Pressing the
‘Reset’ button restores the default value of ‘0’.
In the display below a delay value of four increments has
been entered for the elevator (channel 1) when the flight
mode is switched; this corresponds to a time of around
1.33 seconds.
You can also determine whether the delay time for that
channel is to apply only to the currently active flight mode
(separate) or to all flight modes (global). When you touch
the corresponding field, the display changes from ‘Sepa’ to
‘Glob’, or vice versa. If you change this setting, the altera-
tion takes effect when you answer the security query with
‘Yes’.
• Naming flight modes
Mark the flight mode in the list whose name you would like
to change, then activate the ‘Name’ field. The screen dis-
play now looks like this:
The on-screen ‘keyboard’ is used to enter your chosen
name, which can be a maximum of 32 characters long. The
input process must be concluded by pressing ‘Return’;
selecting ‘ESC’ interrupts the process.
• Changing priorities
When you set up at least a third flight mode, two arrows
appear in the ‘Priority’ field when you mark the second or
additional flight modes; this field enables you to change the
priority of the flight modes.
• Erasing flight modes
Mark the flight mode in the list which you wish to erase,
then activate the ‘Erase’ field. A security query appears;
confirm with ‘Yes’, and the flight mode is erased.
Note:
If the ‘Normal’ flight mode is not active when you switch the
transmitter on, a warning appears on the screen together with
a security query.
56


