Netcon (Remote Administration System)
49
NOTE: To remove the program, select
Start
on the Task Bar on the PDA. Go to
Settings
→
System
→
Control panel
→
Add/Delete programs
→
[DVR] REVO Mobile 3.0.0
in order. Clicking the
Delete
button uninstalls the program.
Configuration and Operation
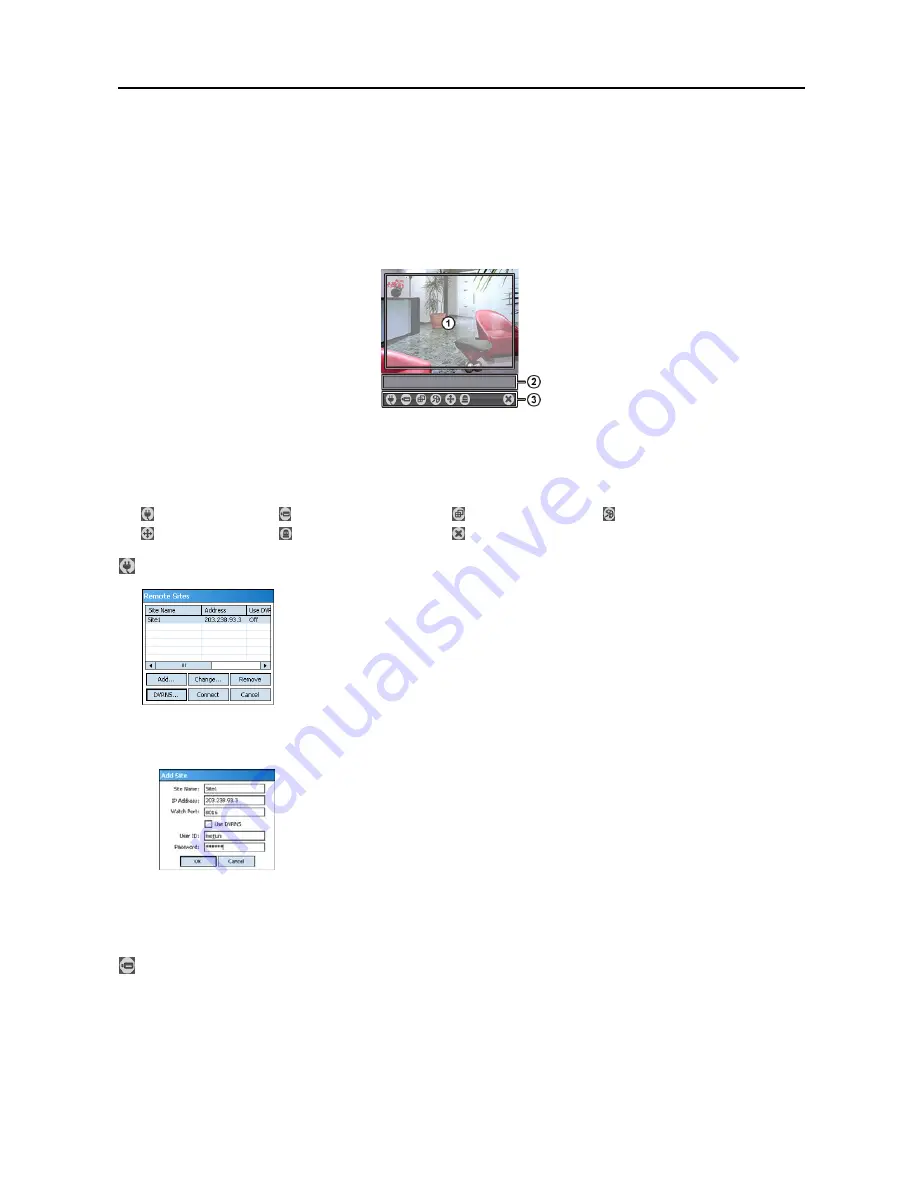
The Graphical User Interface (GUI) of the REVO Mobile is as shown below, and the description of each menu buttons
follows.
①
Monitoring Screen
: Displays live video images from the cameras at the remote site.
②
Status Information
: Displays REVO Mobile version information and the status information about the remote site
connection.
③
Menu Buttons
: Performs REVO Mobile functions.
Connection
Camera
Screen Mode
Image Adjustment
PTZ Control
Alarm out Control
Disconnection
Connection:
Click the button to perform remote site management, DVRNS settings and remote connection.
Change…
: Select the site you want to change and click the
Change…
button, and then edit
the site information.
Remove
: Select the site you want to remove and click the
Remove
button.
DVRNS…
: Click the
DVRNS…
button to set up the DVRNS function and the
DVR Name
Service
screen is displayed. Enter the DVRNS server’s IP address and port number. The
IP address and port number you enter should match the values set during the DVRNS setup
on the remote DVR you want to connect to.
Connect
: Select the site you want to connect to and click the
Connect
button. Once you
connect to the remote site, the live video of camera 1 displays. If the connection fails, the
error message will be displayed in the Status Information box.
Add…
: Click the button to add the remote site.
– Site Name
: Enter a site name. Up to 32 characters may be used for the site names.
– IP Address
: Enter the IP address of the remote site.
– Watch Port
: Set up the port number of the Watch program. The IP port number of
Watch
Port
should match the value set during the network setup of the remote DVR.
– Use DVRNS
: Select whether or not to use the DVRNS function. When using the DVRNS
function, you can enter the remote site’s name registered on the DVRNS server instead of
its IP address in the
IP Address
box. The name you enter should match the name set during
the DVRNS setup on the remote DVR.
– User ID / Password:
Enter the user ID and password of the remote site to be accessed. If
you have entered a user ID and a password, the site will be connected automatically. Up to
32 characters may be used for the user IDs, and up to 10 characters may be used for passwords.
Camera:
Displays the camera buttons. Click the desired camera button to select the camera to be viewed. Live video
Images from the selected camera and the OSD information including camera name and date/time will be displayed
on the Monitoring Screen.
No Video
will be displayed when there is no video signal from the selected camera.
NOTE: The number of camera buttons depends on the specifications of the remote DVR.
Содержание R4-8-16DVR2
Страница 1: ......
Страница 2: ......
Страница 3: ......
Страница 4: ......
Страница 8: ...User s Manual iv...
Страница 53: ......
Страница 54: ......
Страница 56: ...User s Manual ii...
Страница 58: ...User s Manual 2...
Страница 63: ...Netcon Remote Administration System 7 14 Click Finish to complete the MSXML installation...
Страница 64: ...User s Manual 8...
Страница 86: ...User s Manual 30...
Страница 96: ...User s Manual 40...


