Working with the Firewall Access Policy
Quantum Spark 1500, 1600 and 1800 Appliance Series R80.20.40 Locally Managed Administration Guide | 170
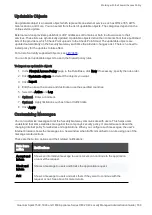
To customize messages:
1. Click
Customize messages
in the
Outgoing access to the Internet
section.
2. Configure the options in each of these tabs:
n
Accept and Inform
n
Block and Inform
n
Ask
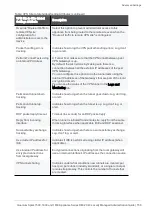
3. Configure the applicable fields for each of the notifications:
n
Title
- Keep the default or enter a different title.
n
Subject
- Keep the default or enter a different subject.
n
Body
- Keep the default or enter different body text. You can click
Optional keywords
for a list
of keywords that you can add in the body text to give the user more information.
n
Ignore text
(only for Ask) - This is the confirmation message for the Ask user message. Keep
the default text or enter different text
n
User must enter a reason
(only for Ask) - Select this checkbox if users must enter an
explanation for their activity. The user message contains a text box for entering the reason.
n
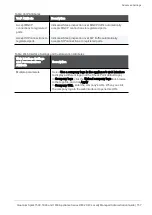
Fallback action
- Select an alternative action (Block or Accept) for when the notification cannot
be shown in the browser or application that caused the notification, most notably in non-web
applications. If it is determined that the notification cannot be shown in the browser or
application, the behavior is:
l
If the Fallback action is
Accept
- The user can access the website or application.
l
If the Fallback action is
Block
- The Security Gateway tries to show the notification in the
application that caused the notification. If it cannot, the website or application is blocked,
and the user does not see a notification.
n
Frequency
- You can set the number of times that users get notifications for accessing
applications that are not permitted by the policy. The options are:
l
Once a day
l
Once a week
l
Once a month
For example, in a rule that contains in the Application - Social Networking category, if
you select
Once a day
as the frequency, a user who accesses Facebook multiple times
get one notification.
n
Redirect the user to URL
- You can redirect the user to an external portal, not on the gateway.
In the
URL
field, enter the URL for the external portal. The specified URL can be an external
system. It gets authentications credentials from the user, such as a user name or password. It
sends this information to the gateway. Only applicable for the Block and Inform notification.
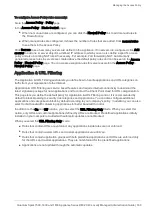
4. Click the
Customize
tab to customize a logo for all portals shown by the appliance (Hotspot and
captive portal used by User Awareness). Click
Upload
, browse to the logo file and click
Apply
. If
necessary, you can revert to the default logo by clicking
Use Default
.
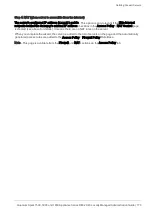
5. Click
Apply
.

