


E-46
Projector Options [Menu]
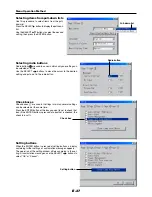
Menu Mode
Select the menu to be displayed.
Upon shipment from the factory, the menu mode
is set to the basic menu on which basic menu
items are registered. To change the items regis-
tered on the basic menu, follow the instructions
at “Basic/Custom Menu Edit”.
Select the menu mode from the menu mode pull-
down list.
Advanced Menu
................... All the menus are displayed.
Basic/Custom Menu
................... The menus you have registered are dis-
played.
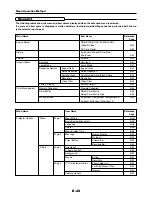
Basic/Custom Menu Edit
Register and delete menu items to be displayed on the basic
menu.
1 Select “Basic/Custom Menu Edit”, then press the ENTER but-
ton. The basic menu editing display opens.
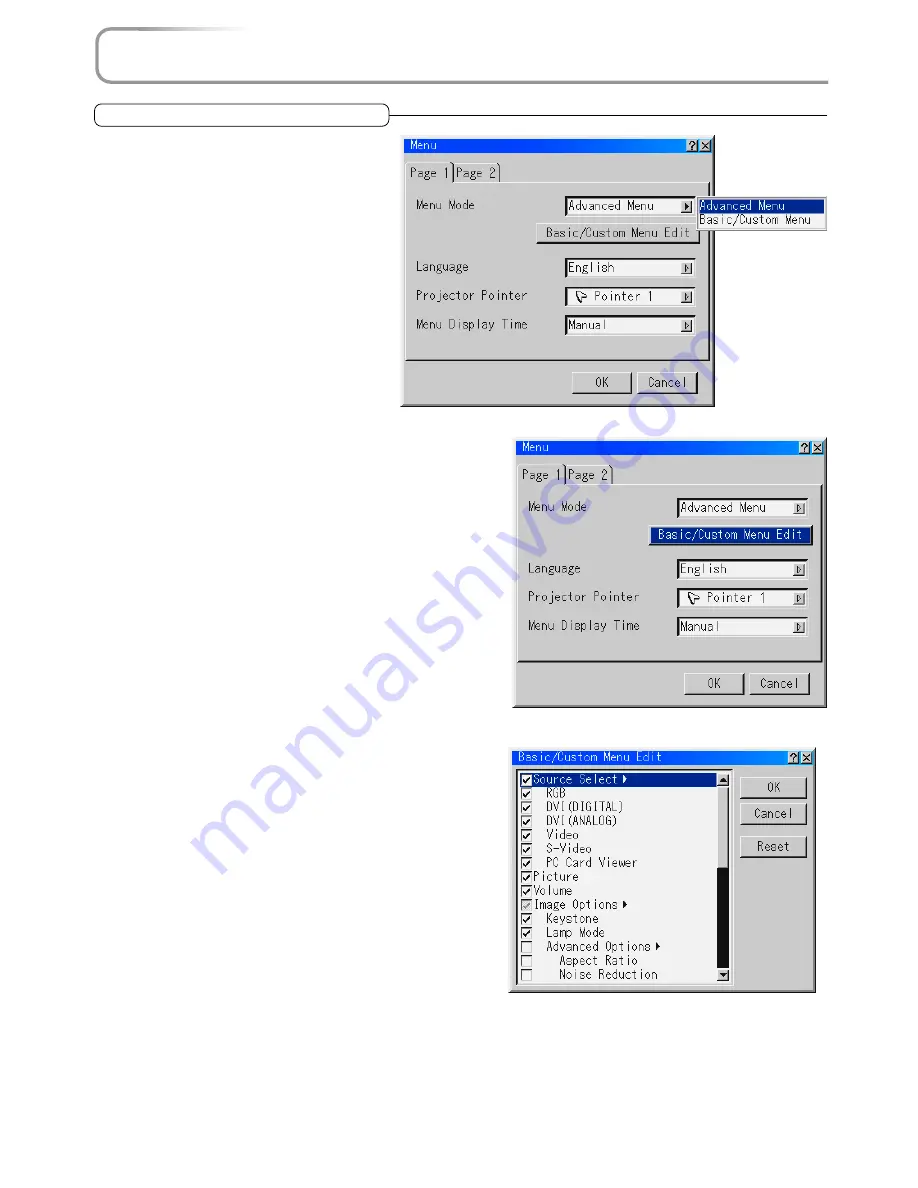
2 Use the SELECT
▲▼
buttons to set the cursor to the menu
item to be registered or deleted.
3 Press the ENTER button to select whether to register (check-
ing the check box) or delete (unchecking the check box) the
menu item.
• Select other menu items in the same way.
• When the cursor is moved to the very bottom of the display
and the SELECT
▼
button is pressed, the display scrolls one
line and the next menu item appears.
4 Once the menu items have been set as desired, use the SE-
LECT
button to select “OK”, then press the ENTER button.
The basic menu editing display closes and the menu setting
window reappears.
• Once “OK” is selected, operating the “Cancel” button (menu
setting) is no longer possible.
In this case, return to “Basic/Custom Menu Edit” and move
the cursor to “Cancel”, then press the ENTER button.
5 Once the menu settings are completed, set them using the “OK”
button.
Resetting the registered items to the factory defaults
At “Basic/Custom Menu Edit”, select “Reset”, then press the EN-
TER button. The menu items are reset to the factory defaults.
Press the SELECT
▲
button, select “OK”, then press the ENTER
button.
The menu setting window reappears.


