6-10
SV61831 Rev. A DA50S/DA55S/DA70S/DA75S AddressRight™ Printers Service Manual
6 • Adjustments
DA70S/DA75S (WS71/WS76) Adjustments
6.10 Main
Brake
Use a 7/64” Allen wrench and a feeler gauge to reduce the gap to .020” be-
tween the two legs of the main brake.
If stream feeding occurs after you set the proper gap, replace the brake as-
sembly (see Chapter 6 for instructions).
Figure 6-9 DA70S/DA75S Brake Adjustment
Brake
Assembly
Screws for
Tensioner
Measure Gap Here
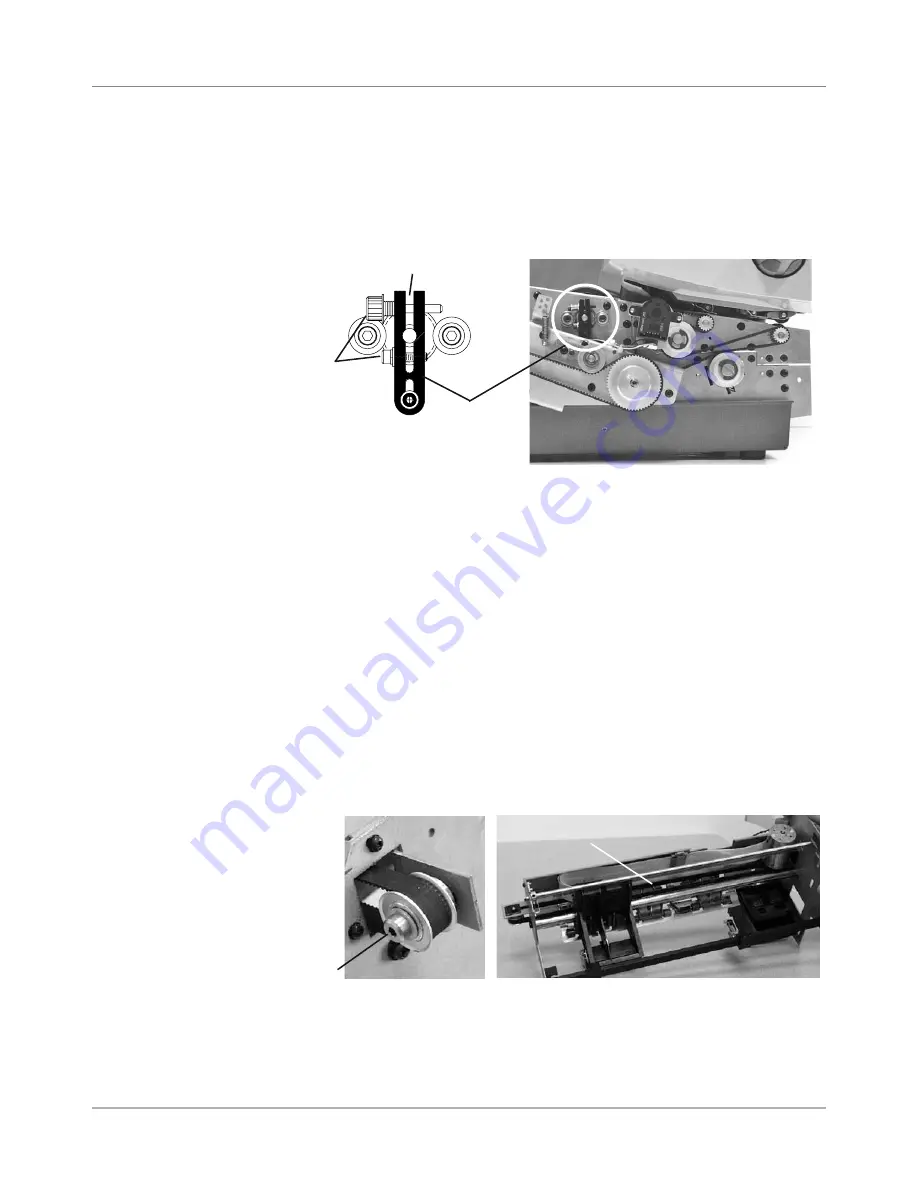
The Print Head Drive Belt tension is set with the adjustable pulley assembly.
Use a Force Dial Gauge with an “L” shaped hook when resetting the tension.
1. Move the print head holder to the park position.
2. Loosen the adjustable pulley assembly. DO NOT FULLY UNDO.
3. With the Force Dial Gauge, pull on middle of the rear of the Print Head
Drive Belt to 8.0 ounces of force (± 2 oz), (just as the rear touches the
front of the belt).
4. Tighten the adjustable pulley.
6.11 Print Head
Drive Belt
Figure 6-10 DA70S/DA75S Print head Drive Belt
Shoulder
Screw
Drive Belt
Содержание AddressRight DA50S
Страница 6: ...Table of Contents vi SV61831 Rev A DA50S DA55S DA70S DA75S AddressRight Printers Service Manual ...
Страница 20: ...2 10 SV61831 Rev A DA50S DA55S DA70S DA75S AddressRight Printers Service Manual 2 Specifications ...
Страница 42: ...4 16 SV61831 Rev A DA50S DA55S DA70S DA75S AddressRight Printers Service Manual 4 Troubleshooting Diagnostics ...


