DA50S/DA55S/DA70S/DA75S AddressRight™ Printers Service Manual
6-11
Adjustments • 6
DA70S/DA75S (WS71/WS76) Adjustments
6.12 Timing
Belt
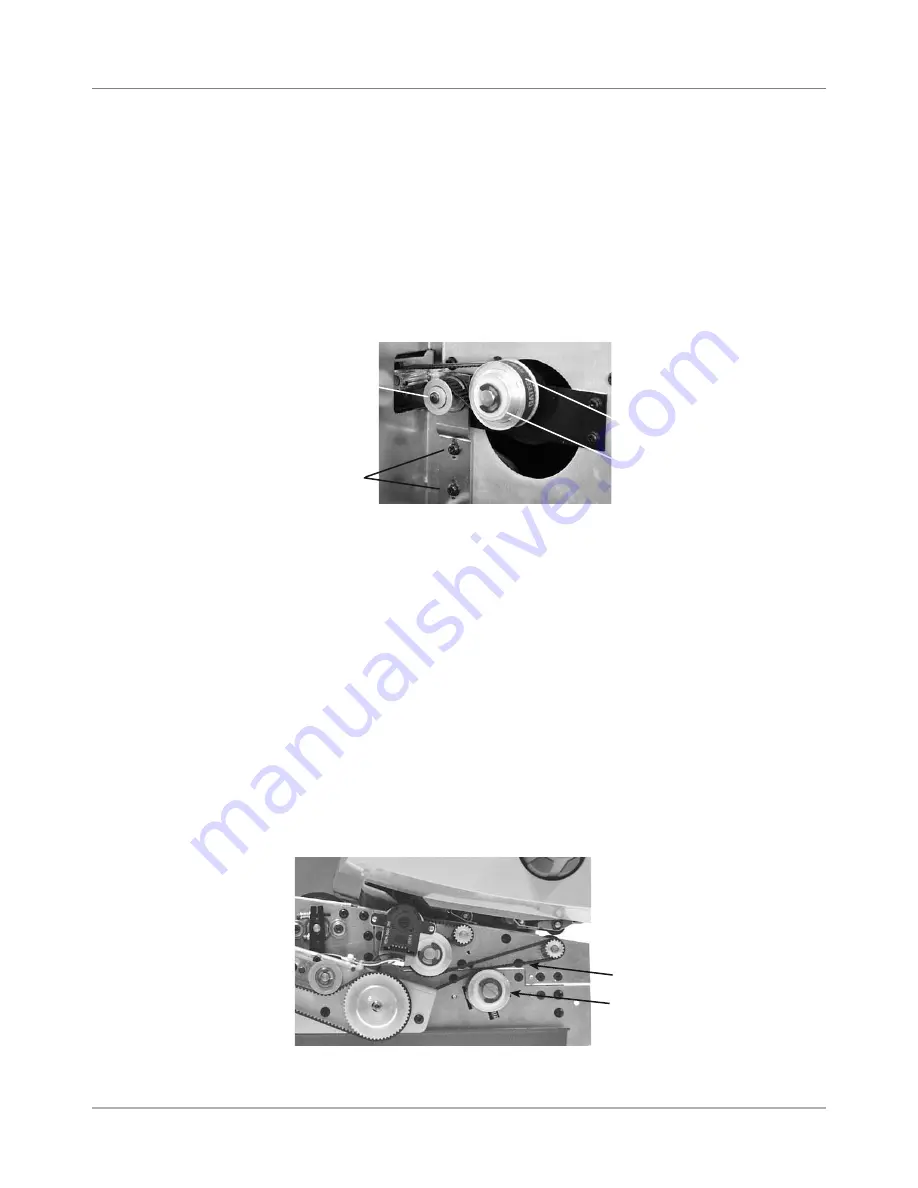
The Timing Belt for the feed roller and pulley assemblies is firmly set utiliz-
ing the adjustable Idler Pulley Assembly. Use a Force Dial Gauge with a “L”
shaped hook when resetting the tension.
1. Loosen the two screws to the Idler Pulley with a screwdriver.
2. Pull on the belt at the midpoint of the longest span between two pulleys.
With the Force Dial Gauge, obtain a 2 pound force (± 4 oz) (when the
belt is deflected a distance of 1/4”).
3. Secure the Idler Pulley in place.
The Drive Belt for the feed roller and pulley assemblies are firmly set utilizing
the adjustable pulley assembly. The tension is automatically set by the
springs pressing up on the adjustable pulley assembly.
NOTE: To check the belt tension use a Force Dial Gauge with a “L” shaped
hook. Pull on the belt at the midpoint of the longest span between two pul-
leys. With the Force Dial Gauge, pull until a measure of 2.75 pounds of force
(± 4 oz) is obtained (when the belt is deflected a distance of 1/4”).
1. Loosen the drive belt adjustment pulley with a flat blade screwdriver. DO
NOT FULLY UNDO.
2. Pull up on the pulley and release it. This removes slack in the belt. The
spring beneath the pulley holds it in place with the proper tension.
3. Tighten the adjustable pulley.
Figure 6-11 DA70S/DA75S Timing Belt
Figure 6-12 DA70S/DA75S Drive Belt
Adjustable Pulley
Drive Belt
Timing Pulley
Timing Belt
Screws
Adjustable
Idler Pulley
Assembly
6.13 Drive Belt
Содержание AddressRight DA50S
Страница 6: ...Table of Contents vi SV61831 Rev A DA50S DA55S DA70S DA75S AddressRight Printers Service Manual ...
Страница 20: ...2 10 SV61831 Rev A DA50S DA55S DA70S DA75S AddressRight Printers Service Manual 2 Specifications ...
Страница 42: ...4 16 SV61831 Rev A DA50S DA55S DA70S DA75S AddressRight Printers Service Manual 4 Troubleshooting Diagnostics ...


