6-4
SV61831 Rev. A DA50S/DA55S/DA70S/DA75S AddressRight™ Printers Service Manual
6 • Adjustments
DA50S/DA55S (WS51/WS56) Adjustments
6.5 Print head
Clearance
The gap between the surface of the print head and the floor of the printer is
nominally 0.040” across the entire length of print head travel with the media
thickness lever all the way down. Once set, it should not be necessary to re-
adjust. Follow the procedure below:
1. Open the top cover.
2. Move the print head to its extreme left position—close to the media thick-
ness lever—as seen from the output end of the machine.
3. Push the media thickness lever all the way down.
4. Insert a 0.040” feeler gage between the bottom of the print head and the
floor of the printer. CAUTION: Use care when using the gage. You can
easily damage the print head.
5. Check for proper clearance. The tolerance is 0.010”. A 0.035” gage
should fit between the print head and the floor; a 0.045” gage should not.
6. To adjust:
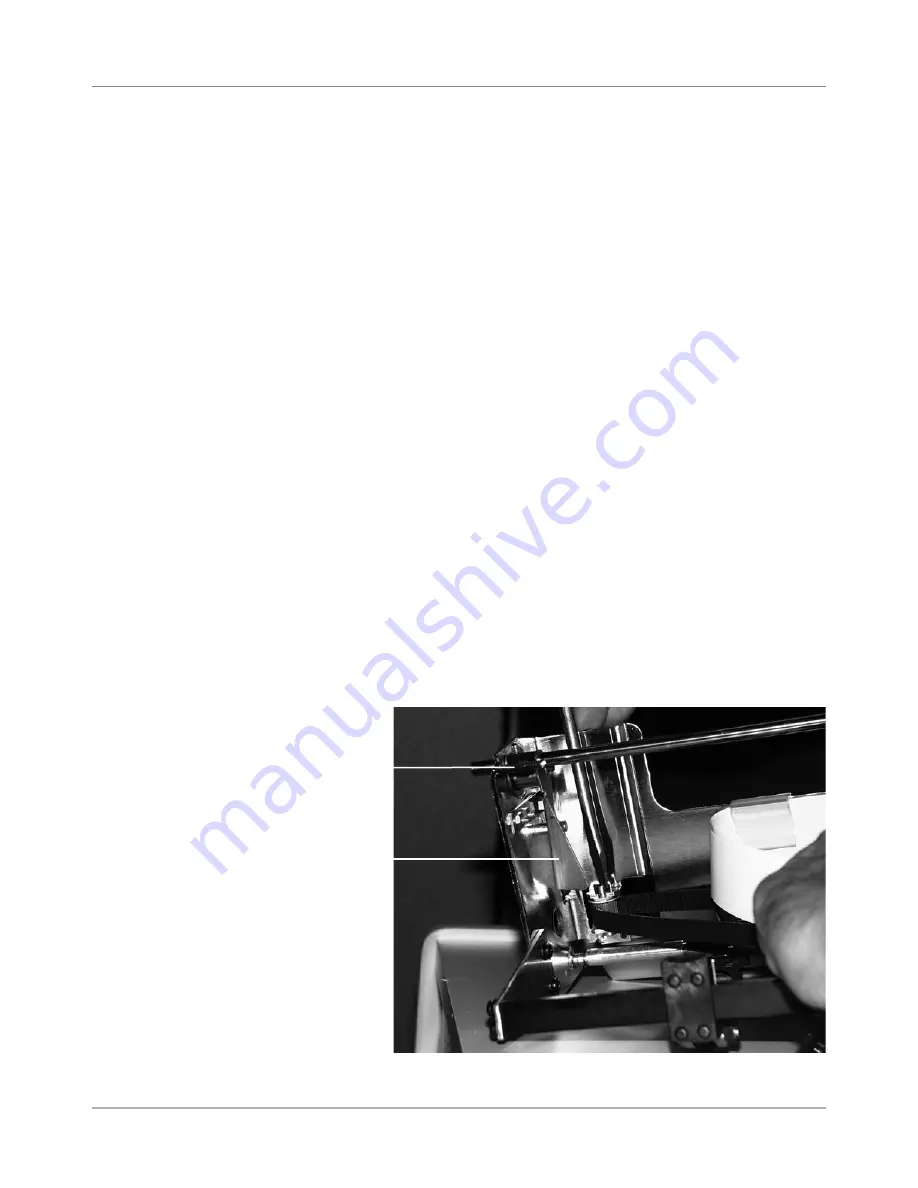
A. Loosen the set screw on the media thickness lever’s collar. See Fig-
ure 6-3.
B. Check for the proper clearance as described above.
C. Once the clearance is established, hold the upper rail firmly in posi-
tion
D. Tighten the setscrew loosened in step a.
7. Check the adjustment at several points along the print head’s travel. Test
the printer for proper operation.
Figure 6-3 DA50S/DA55S Shuttle Mechanism
Collar
Media
Thickness
Lever
Содержание AddressRight DA50S
Страница 6: ...Table of Contents vi SV61831 Rev A DA50S DA55S DA70S DA75S AddressRight Printers Service Manual ...
Страница 20: ...2 10 SV61831 Rev A DA50S DA55S DA70S DA75S AddressRight Printers Service Manual 2 Specifications ...
Страница 42: ...4 16 SV61831 Rev A DA50S DA55S DA70S DA75S AddressRight Printers Service Manual 4 Troubleshooting Diagnostics ...


