


46
KEY LOCK
FUNCTION
Setting key lock
The settings can be locked to prevent them from being incorrectly changed. If setting lock is set to ON, the
settings can not be changed even be operating the keys on the control panel.
■
Setting values: ON or OFF
■
Default setting (factory setting): OFF
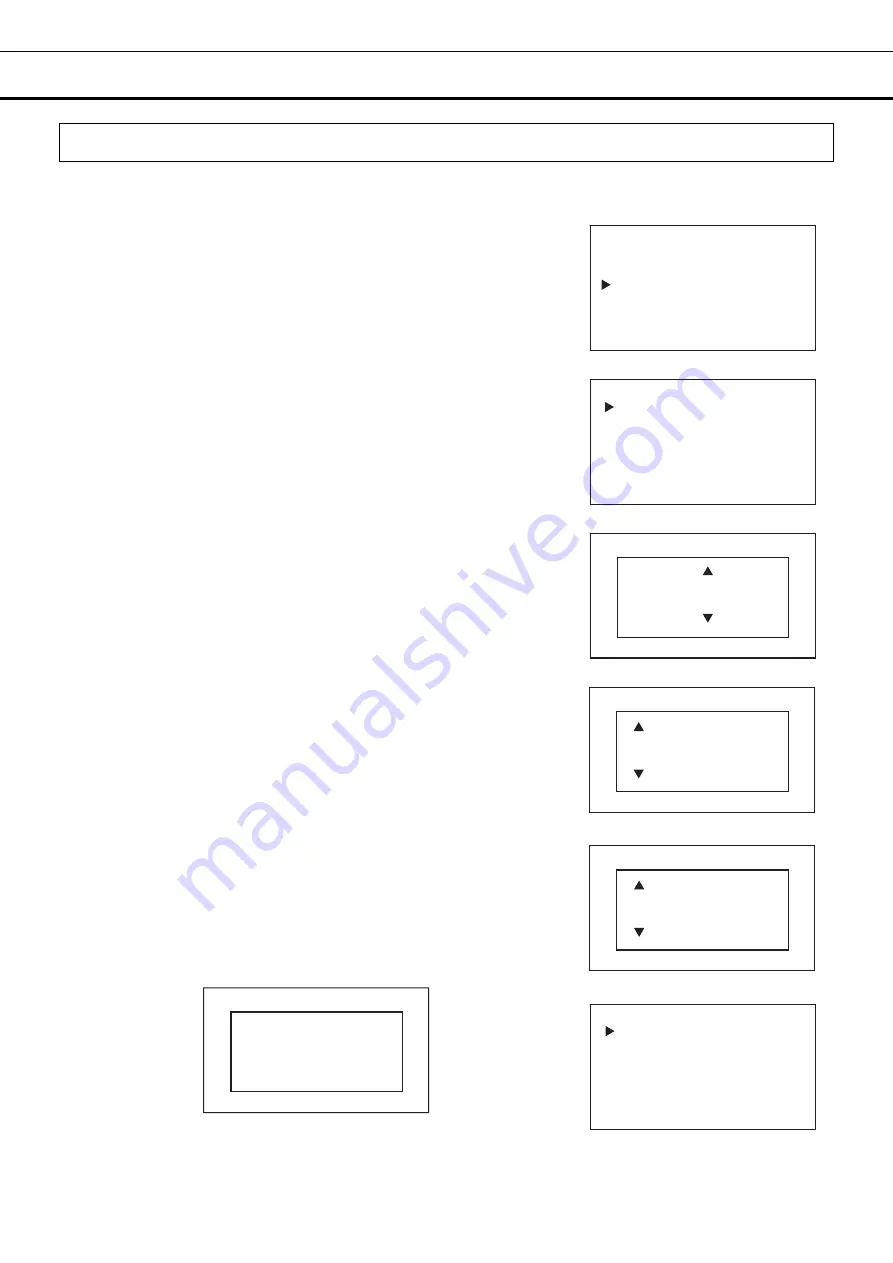
1. On the home screen, press the menu key (MENU/HOME).
▶
The left side of the display will change to the Menu screen.
2. Move the cursor on the Menu screen to Lock [Fig. 1] using the
up/down keys (
△▽
), and press the enter key (ENTER).
▶
The display will change to the Lock screen [Fig. 2].
3. When the cursor on the lock screen is on Keypad Lock [Fig. 2], press
the enter key (ENTER).
▶
The left side of the display will change to the Keypad Lock ON/OFF
setting screen, and the current setting value (OFF) will be displayed [Fig.
3].
4. Press the up/down keys (
△▽
) to change it to ON.
Each time the up/down key is pressed the input value will change
between ON and OFF.
5. Press the enter key (ENTER).
▶
The Keypad Lock PW screen will be displayed [Fig. 4].
6. Use the left/right keys (
◁▷
) to move the cursor around to the digit to
be changed on the password (6 digits), use the up/down keys (
△▽
) to
set the numerical value, and press the enter key (ENTER).
▶
The Confirm Password screen will be displayed [Fig. 5].
7. Use the left/right keys (
◁▷
) to move the cursor around to the digit to
be changed on the password (6 digits), use the up/down keys (
△▽
) to
set the numerical value, and press the enter key (ENTER).
▶
You will be returned to the Lock screen and LOCK will be displayed
on the upper right of the screen [Fig. 6].
*If the password does not match the initially entered password, the
following screen will be displayed on the right side of the display.
Pressing any of the directional keys (
△▽◁▷
) will return you to the
Lock screen, so please rest from Step 3.
Note:
To prevent abuse of the release password of Keylock, manage
properly by limited administrators.
Lock
Keypad Lock
<Left side of the display> [Fig. 2]
Lock LOCK
Keypad Lock
<Left side of the display> [Fig. 6]
<Left side of the display> [Fig. 1]
Menu
Set Value
Data Log
Lock
Alarms & Controls
Confirm Password
Incorrect PW
Press Any Key
<Right side of the display>
<Right side of the display> [Fig. 5]
Confirm Password
0
*****
<Right side of the display> [Fig. 3]
Keypad Lock
OFF
ON / OFF
<Right side of the display> [Fig. 4]
Password
0
*****


