Installa on and Ini al Start
‐
Up Instruc ons
30
Once the swim spa is in its
fi
nal loca on perform the following steps to begin the start
‐
up procedure.
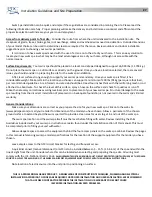
1. Locate white lines painted on the outside of the swim spa base. There are as few as 8 and as many as 14 depending
on the model and series. Insert provided composite shim below the painted line, between
the swim spa base and founda on. Push shim in by hand un l it stops, then gently tap shim
with hammer un l it stops. Score shim with u lity knife and break o
ff
fl
ush with swim spa
base. Photo top right.
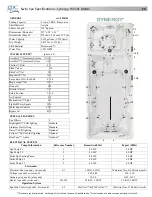
2. Consult the speci
fi
ca on sheet for your speci
fi
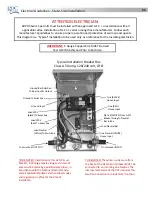
c swim spa model to locate the electrical
spa pack. Remove the cabinet panel exposing pack to complete electric connec on.
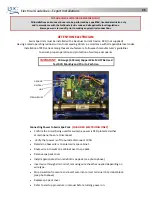
3. Consult the speci
fi
ca on sheet to locate all the pumps for your speci
fi
c model, then
remove appropriate cabinet panels. Be sure all pump and heater unions are secure. Each
pump has 2 unions, the heater has 2 unions. The unions of a newly delivered swim spa may
have loosened during transporta on. While checking the unions also check the slide valves
are in the up posi on and the lock is installed. Photo bo om right.
4. Inspect the swim spa for any dirt or par cles that may have go en on the surface a er
the plas c was removed from the swim spa. Wipe the swim spa with a so damp sponge.
5. Ensure your water source is safe for hot tub use. Water may contain minerals that may
cause stains or deposits. Water with high mineral count may discolor the water once a sani zer is added.
6. Let the water run out of your garden hose for several minutes before
fi
lling the swim spa. This will
fl
ush out stagnant
water in the line that may cause bacteria.
7.
Begin
fi
lling the swim spa. We recommend
fi
lling the swim spa to the top line on side wall. During the
fi
lling process
periodically check the unions to ensure they are ght and no water is leaking out. The dual zone models are separate
zones each with their own pack, heater, control. Follow the connec on,
fi
lling instruc ons for each zone.
8. Once the swim spa is
fi
lled turn the circuit breaker on. The spa will turn on and start the circula on pump.
9. It may be necessary to bleed air from the pump or pumps on your swim spa, if a er start up your swim spa pumps
do not operate. Due to the nature of water
fl
ow and hydrotherapy pumps, please be advised that air locking of
pumps may occur. PDC Spas has taken measures to reduce the possibility of this, but it s ll may occur, especially
a er re
fi
lling a swim spa. This is not a service covered under warranty. To relieve an airlock situa on, loosen the
pump union on the discharge side of the pump. You may possibly hear air come out when union is loosened, a er a
few seconds ghten the union. Turn the pump on to see if proper jet
fl
ow has been achieved. If proper jet
fl
ow has not
been achieved repeat process.
10. Open air regulators allowing maximum
fl
ow through jets assuring pump opera on.
11. Refer to Control sec on for hea ng,
fi
ltra on cycles and system opera on.
Swim
Spa
Base
White
Line
Composite
Founda on
Slide
Valve
Pump
Union
Содержание Summit Series
Страница 1: ...S S F S O M R 2020 01 1 800 451 1420 pdcspas com support pdcspas com ...
Страница 2: ......


