User Manual – ePX 200
OptiPro Systems, LLC.
Page 51 of 60
Last Modified: 7/30/2014
10.1
Tramming
When running any automated tram programs, be sure to:
Turn off
SLURRY AUTO
from the jog panel.
Position the indicator and indicator mounting hardware in such a way to avoid collisions,
including with the load door.
USE CAUTION WHEN RUNNING ALL TRAM COMMANDS AND WHEN MANUALLY JOGGING.
10.1.1
Tramming Tips
Move in small amounts in relation to your error to avoid overshooting.
Work on one axis at a time. Very often there is a combination error. Adjust the axis with
the greatest error first. With practice, this method will speed up the entire process.
Remember that the right side of the zero on the indicator is positive and the left side is
negative.
If there are any issues with tramming, OptiPro is happy to help. See Section 2 for contact
information.
10.1.2
Checking Hydraulic Chuck Runouts
Before beginning the tram process, check the runouts of the hydraulic chucks.
1.
Insert a gauge pin from the tram kit into the upper chuck (not quite bottomed out) and
tighten the lock screw.
2.
Thread the indicator base into the side of the tool spindle. You may have to remove one or
both slurry hoses to get the indicator to the tram pin.
3.
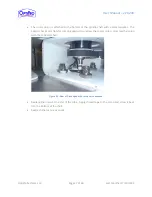
Place the indicator tip on the side of the pin within approximately 1 inch of the chuck face.
Adjust the indicator until it is set up in the middle of its range.
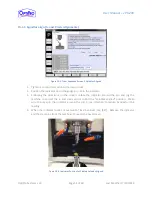
Figure 10-1: Checking Upper Hydraulic Chuck Runout

