41
Editing Servo Parameters
Section 5-2
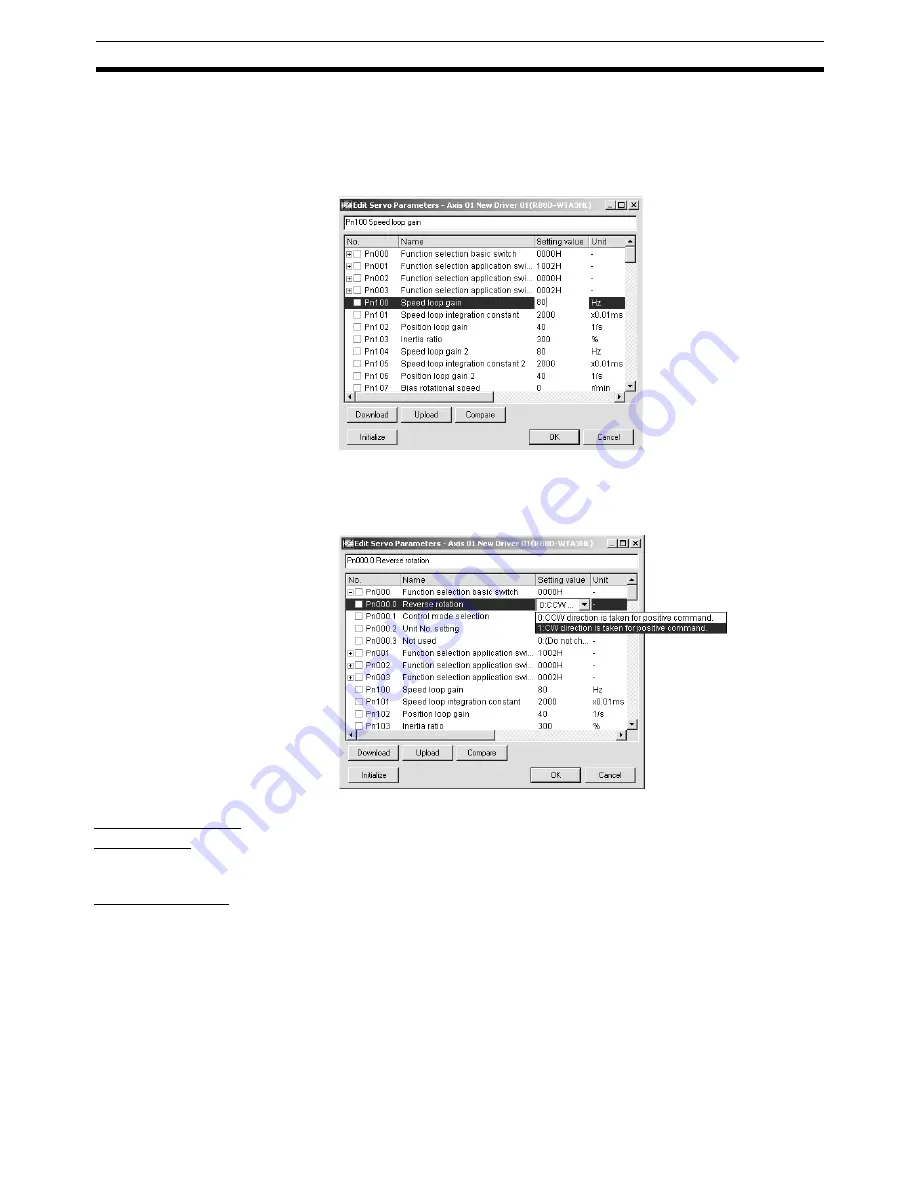
Entering Value Directly for Parameter
Either enter a value after double-clicking the Setting Value Column or enter
a value directly. After entering a value, press the
Enter
Key to save the set-
ting. Once the setting value is changed, the check box of the parameter will
show a check.
Selecting Value from Drop-down List for Each Bit of Parameter
Select a value from the drop-down list. Once the setting value is changed,
the check box of the parameter and each bit will show a check.
Initializing Servo
Parameters
Click the
Initialize
Button. A confirmation dialog box will be displayed.
Click the
OK
Button. All the parameters will be set back to their default set-
tings. Once initialization is completed, checks in the check box will be cleared.
Quitting Editing
Click the
OK
Button. Once all the editing is completed, click the
OK
Button to
save the edited data.
To cancel the edited data, click the
Cancel
Button.
Содержание CX-MOTION-NCF - V1.8
Страница 2: ...CXONE AL C V3 CXONE AL D V3 CX Motion NCF Ver 1 8 Operation Manual Revised October 2008...
Страница 3: ...iv...
Страница 5: ...vi...
Страница 21: ...xxii Application Precautions 5...
Страница 33: ...12 Connecting to PLC Section 2 2...
Страница 36: ...15 Screen Name Section 3 1 Edit Parameter Windows...
Страница 37: ...16 Screen Name Section 3 1 Monitor Windows Axis Monitor Window Unit Monitor Window...
Страница 63: ...42 Editing Servo Parameters Section 5 2...
Страница 68: ...47 Print Section 6 5 Print Samples An example of printed Unit Parameters is shown below...
Страница 89: ...68 Writing to Flash Memory Section 7 6...
Страница 95: ...74 Axis Monitor Section 8 2 2 Click the OK Button to start communications i e establish connection...
Страница 103: ...82 Axis Monitor Section 8 2...
Страница 104: ...83 SECTION 9 Test Run Operation This section describes the test run operations for each axis 9 1 Test Run 84...
Страница 109: ...88 Test Run Section 9 1...
Страница 133: ...112 Index...
Страница 137: ...116 Revision History...


