


- 97 -
3. Scan
• If a computer for WSD Scan recognizes this machine and the IP address of this machine is changed, you must
register from the beginning. Uninstall this machine, and then install it again.
• Before starting this installation, check that Network Search is enabled.
From [Control Panel], click [Network and Internet] > [Network and Sharing Center] > [Change advanced sharing
settings], select [Turn on network discovery] for [Network discovery], and then click [Save Changes].
You can register up to 50 computers in this machine.
1
Select [Network] from the [Start] menu.
2
Right-click the [OKI MC573] icon under [Multifunction Devices], and then
select [Install].
If the [User Account Control] dialog box is displayed, click [Yes].
3
When a balloon message is displayed to inform you that the installation is
complete on the task bar, click the balloon to check the details, and then click
[x (Close)].
4
Press [Scan] or the
(SCAN) button on the machine.
5
Press [Scan To Computer].
6
Press [Select A Connecting PC].
7
Press [From WSD Scan].
8
Check that a computer is displayed on this machine as a connection
destination of WSD Scan.
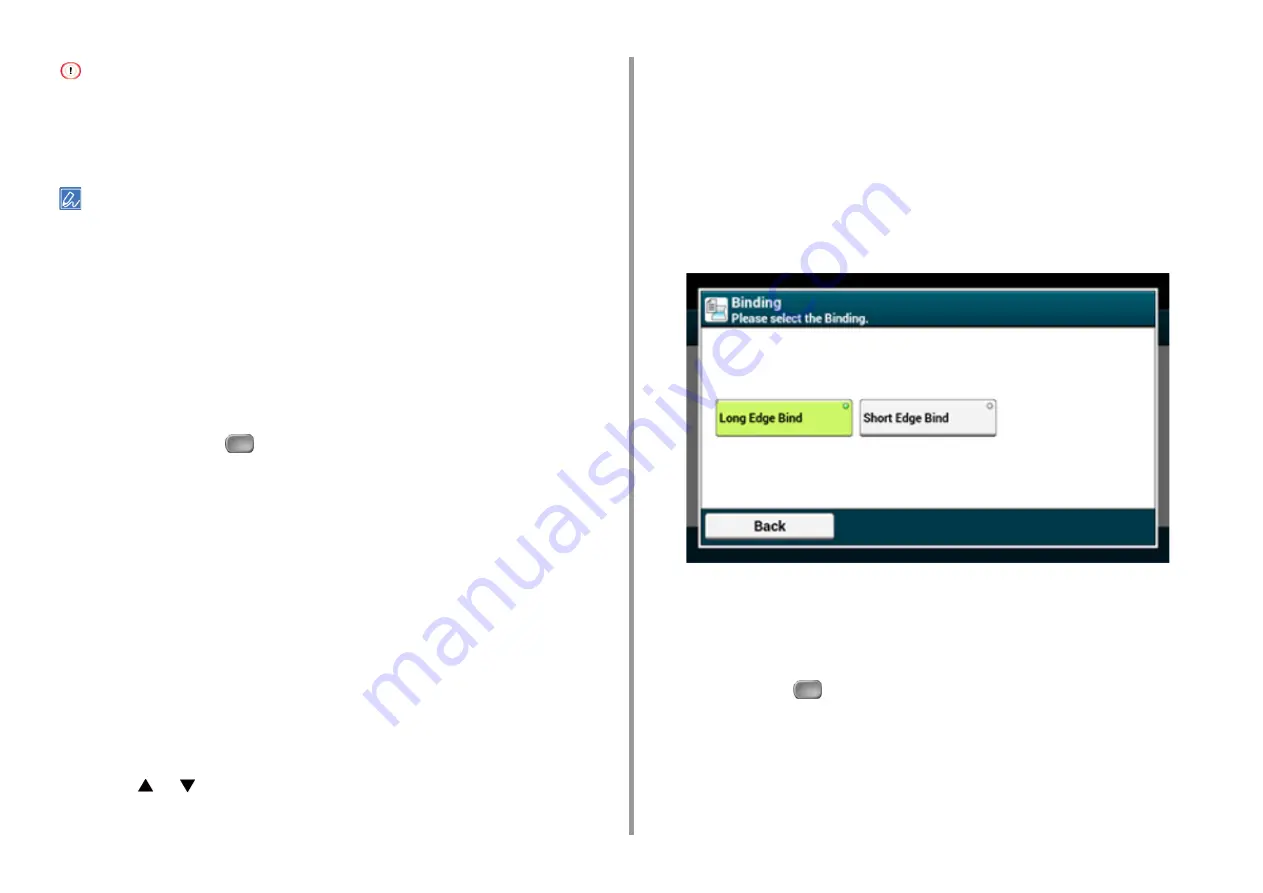
Setting a Binding Position for Duplex Scanning (WSD)
To set a binding position for duplex scanning with Scan To Computer and Remote Scan via
WSD Scan, follow the procedure below.
1
Press [Device Settings] on the touch panel.
2
Press
or
several times to select [Admin Setup].
3
Enter the administrator name and password and press [OK].
The factory default administrator name and password are "admin" and "999999"
respectively.
4
Press [Scanner Setup].
5
Press [WSD Scan Setup].
6
Press [Binding].
7
Select a binding position.
8
Press [Back] until the home screen is displayed.
Starting Scanning from a Device (WSD)
1
Press [Scan] or
(Scan).
2
Set a document in the ADF or on the document glass.
3
Press [Scan To Computer].
4
Press [Select A Connecting PC].
Содержание MC573
Страница 1: ...MC573 ES5473 MFP Advanced Manual...
Страница 18: ...18 1 Basic Operations 7 Select a volume level...
Страница 31: ...2 Copy Useful Functions For a Better Finish Color Settings Advanced Copy Settings...
Страница 141: ...141 4 Print 5 Press Color Menu 6 Press Adjust Registration 7 Press Yes...
Страница 144: ...144 4 Print Color Correct Utility Color Swatch Utility PS Gamma Adjuster Utility Adjusting Color with Software...
Страница 489: ...489 11 Utility Software Storage Manager plug in Create or edit a file to download to a device...
Страница 507: ...46532802EE Rev2...


