


- 78 -
3. Scan
4
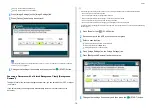
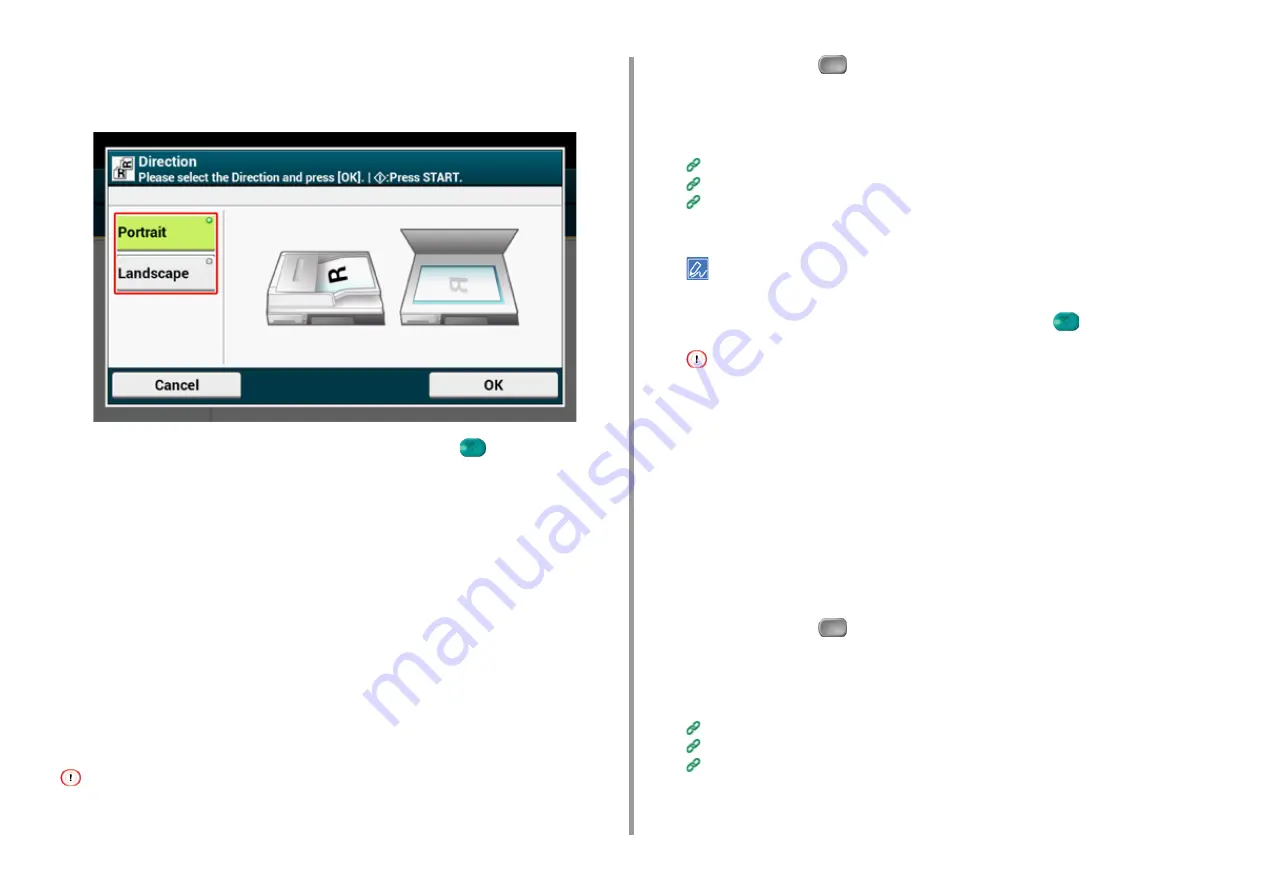
Press [Direction] on the [Image Settings] tab, [Advanced] tab, or [Basic] tab.
5
Select a direction.
6
Change other settings if necessary, and then press the
(START) button.
Scanning Documents of Different Sizes (Mixed Size)
You can set multiple documents having the same width but different lengths in the ADF and
scan them in their respective paper sizes.
Documents can be set at the same time are as follows.
Specify the size of the larger document (size with *mark) for the document size.
• A4 and Folio*
• Letter and Legal 13*
• Letter and Legal 13.5*
• Letter and Legal 14*
For the Scan To Computer, Remote Scan, and WSD Scan function, Mixed Size is not available.
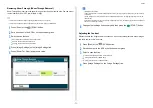
1
Press [Scan] or the
(SCAN) button.
2
Set a document in the ADF.
3
Select a scan function.
Sending Scanned Data as an E-mail Attachment
Saving Scanned Data in USB Memory
Saving Scanned Data in a Shared Folder
4
Press [Mixed Size] in the [Advanced] tab or [Basic] tab to set it to [ON].
Pressing [Mixed Size] switches between [ON] and [OFF].
5
Change other settings if necessary, and then press the
(START) button.
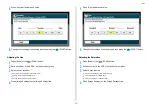
When using the Mixed Size function, be careful about the binding position of duplex documents.
When scanning mixed-size duplex documents, specify the binding position for the bigger documents and bind
smaller documents in the same direction as the bigger ones. (Their binding positions may not be the same.)
• For Legal/Letter
- For Legal documents with long-edge binding, set Letter documents with long-edge binding. (When loading
in the ADF, set the documents so that their binding positions align to the top or bottom of the ADF.)
- For Legal documents with short-edge binding, set Letter documents with short-edge binding. (When loading
in the ADF, set the documents so that their binding positions align to the left or right of the ADF.)
Specifying a File Name
You can specify a name of a scanned data file.
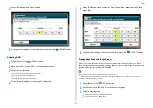
1
Press [Scan] or the
(SCAN) button.
2
Set a document in the ADF or on the document glass.
3
Select a scan function.
Sending Scanned Data as an E-mail Attachment
Saving Scanned Data in USB Memory
Saving Scanned Data in a Shared Folder
4
Press [File Name] on the [Advanced] tab.
Содержание MC573
Страница 1: ...MC573 ES5473 MFP Advanced Manual...
Страница 18: ...18 1 Basic Operations 7 Select a volume level...
Страница 31: ...2 Copy Useful Functions For a Better Finish Color Settings Advanced Copy Settings...
Страница 141: ...141 4 Print 5 Press Color Menu 6 Press Adjust Registration 7 Press Yes...
Страница 144: ...144 4 Print Color Correct Utility Color Swatch Utility PS Gamma Adjuster Utility Adjusting Color with Software...
Страница 489: ...489 11 Utility Software Storage Manager plug in Create or edit a file to download to a device...
Страница 507: ...46532802EE Rev2...


