


- 101 -
3. Scan
3
Click [New Scan].
4
Select [OKI Universal WIA] for the USB connection or select [OKI-XXXXX] for
the WSD scan, and then click [OK].
5
Set the setting if necessary.
6
Click [Scan].
7
Exit [Windows FAX and Scan].
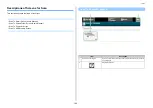
This section describes how to add or delete destination computers for Scan To Computer
when the machine is connected via network.
The computer with the scanner driver installed is registered to the device when it was installed.
1
Press [Device Settings] on the touch panel.
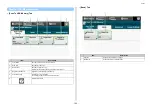
2
Press
or
several times to select [Network Scan Destination].
3
Press [Register] of a registration location.
To edit a registered computer name, select [Edit].
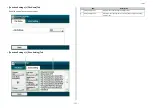
4
Enter a destination in [Destination].
5
Enter a destination.
You can enter up to 16 characters.
6
Press [OK].
7
Press [Destination Address].
8
Enter an IP address, host name, or computer name.
You can enter up to 64 characters.
9
Press [OK].
10
Press [Port No.].
11
Enter a port number, and then press [OK].
12
Press [Close] on a confirmation screen.
13
Press [Back] until the home screen is displayed.
Adding Destination for Scan To Computer
Содержание MC573
Страница 1: ...MC573 ES5473 MFP Advanced Manual...
Страница 18: ...18 1 Basic Operations 7 Select a volume level...
Страница 31: ...2 Copy Useful Functions For a Better Finish Color Settings Advanced Copy Settings...
Страница 141: ...141 4 Print 5 Press Color Menu 6 Press Adjust Registration 7 Press Yes...
Страница 144: ...144 4 Print Color Correct Utility Color Swatch Utility PS Gamma Adjuster Utility Adjusting Color with Software...
Страница 489: ...489 11 Utility Software Storage Manager plug in Create or edit a file to download to a device...
Страница 507: ...46532802EE Rev2...


