


Copyright © 2019 Nortek Security & Control LLC
47
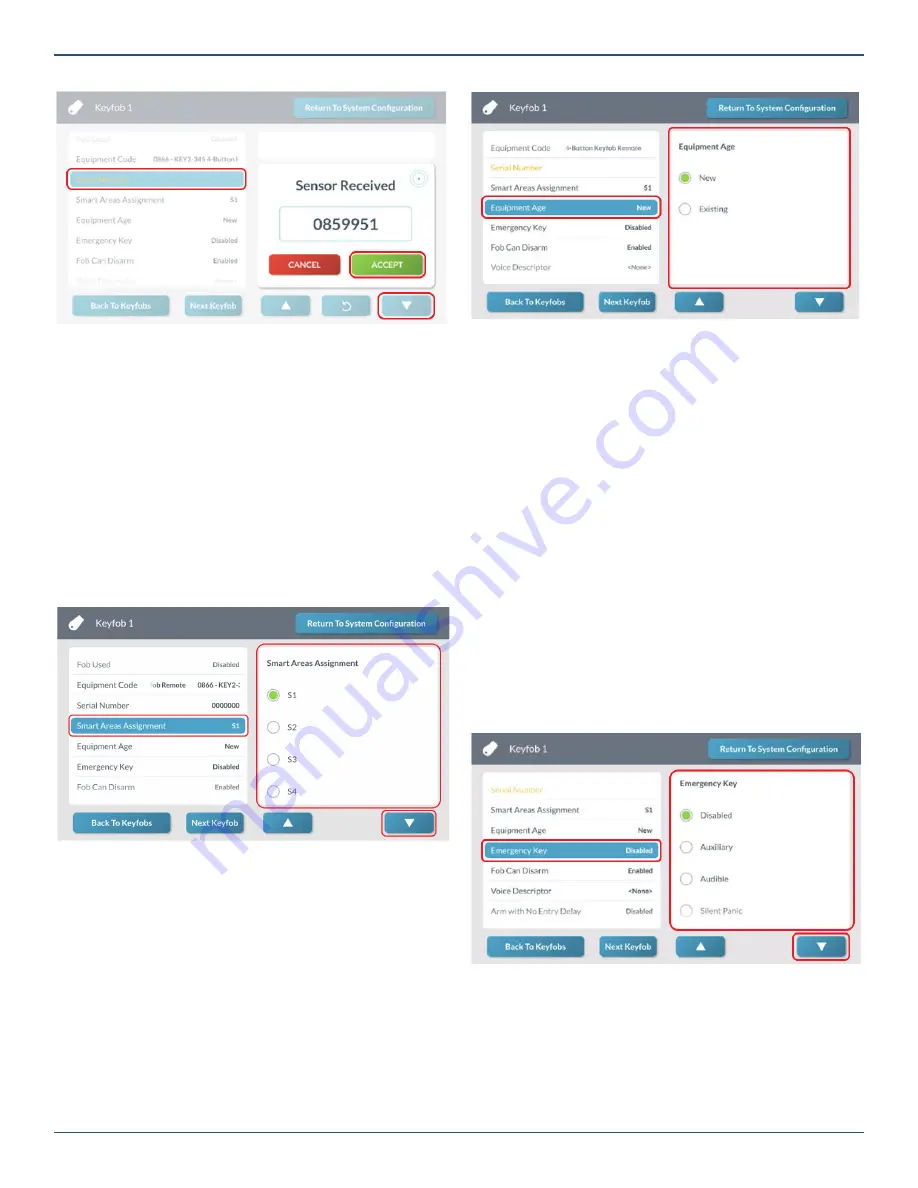
Keyfob <###> Screen—Accept Serial Number
Tip:
Instead of placing the GC3 Panel into Learning
Mode, you can manually enter the 7-digit TX ID on
the keyfob.
5. Tap
▼
.
Step 5: Selecting the Smart Area Assignment
Select a Smart Area Assignment.
1. At the
Wireless Zone<###>
screen, highlight
Smart
Areas Assignment
.
2. Under
Smart Areas Assignment
, choose a Smart
Area (Partition) for the zone.
3. Tap
▼
.
Keyfob <###> Screen—Choose Smart Area
NOTE:
If Smart Areas option is enabled (Q69),
keyfob can be assigned to a single Smart Area and
will arm/disarm and initiate alarms (if programmed)
on the assigned Smart Area only.
Step 6: Choose the Equipment Age
Next, choose the equipment age.
1. At the
Keyfob <###>
screen, highlight
Equipment
Age
.
2. Under
Equipment Age
, choose
New
or
Existing
.
Keyfob <###> Screen—Equipment Age
3. Tap
▼
.
Step 7: Enable the Emergency Key
Next, choose whether simultaneously pressing the
Arm
Away
and
Disarm
buttons on the keyfob triggers an
emergency alarm.
1. At the Keyfob <###> screen, highlight Emergency
Key.
2. Under Emergency Key, choose one of these
options:
»
Disabled:
This turns the emergency key function
OFF on the keyfob.
»
Auxiliary:
This setting triggers a 24-hour auxiliary
alarm on the system.
»
Audible:
This setting triggers a 24-hour audible
alarm on the system.
»
Silent Panic:
This setting triggers a 24-hour silent
alarm on the system.
Keyfob <###> Screen—Emergency Key
3. Tap
▼
.
Step 8: Enable or Disable Fob Can Disarm
Next, choose whether the keyfob can be used to disarm the
system. When enabled, the keyfob has the ability to disarm
the system. When disabled, the keyfob does not have the
ability to disarm the system.


