


Copyright © 2019 Nortek Security & Control LLC
38
Note:
A zone is available for programming when it
appears in gray text. A zone that has already been
programmed appears in black text.
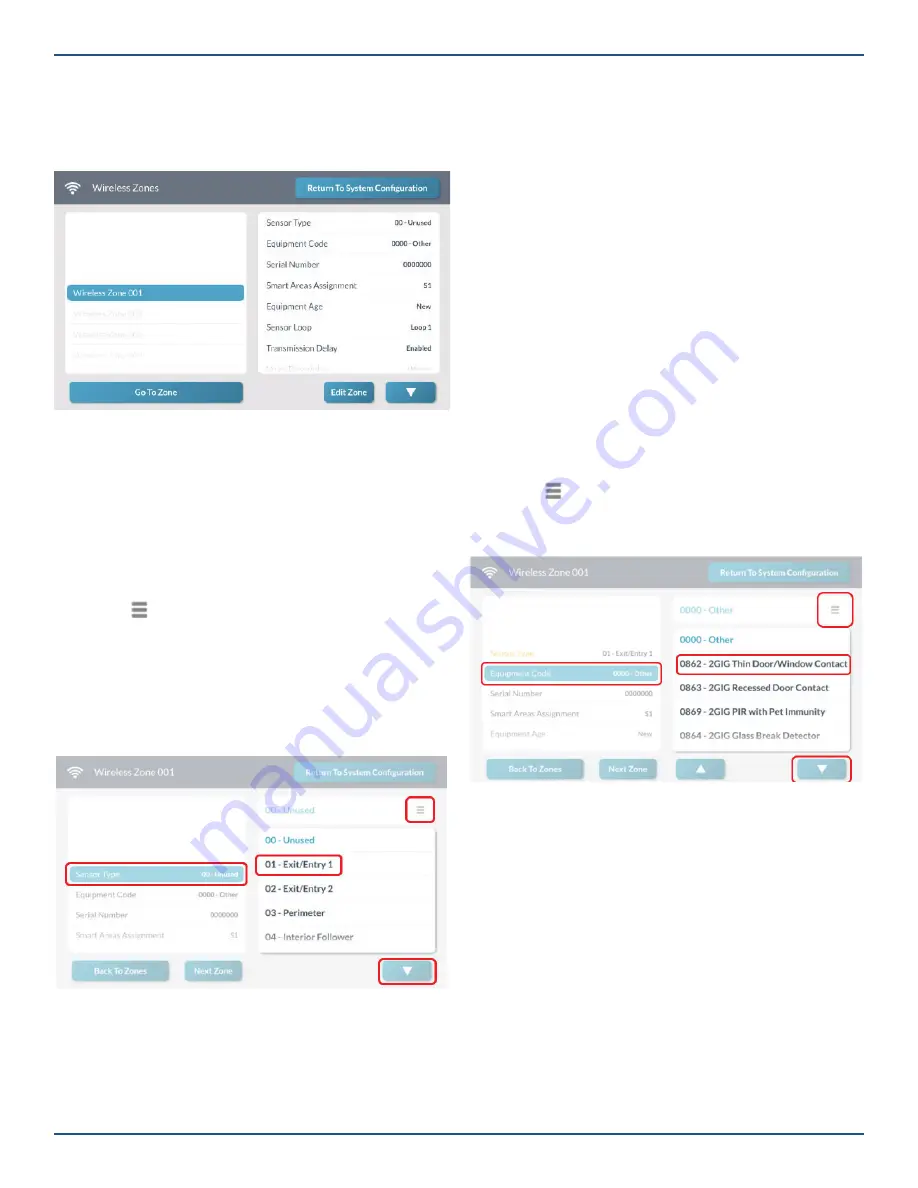
3. Tap
Edit Zone
.
Wireless Zones Screen
This reveals the
Wireless Zones <###>
screen.
NOTE:
S1 is the pirmary Smart Area (partition) and
default.
Step 2: Select a Sensor Type
Next, select the appropriate sensor type for the sensor or
peripheral being programmed.
1. At the
Wireless Zone <###>
screen, highlight
Sensor Type
.
2. Tap to expand the list.
3. Tap to select the appropriate sensor type from the
list.
For example, if you are programming a
Thin Door/Window
Contact for a Front Door
, you might select
01-Exit/Entry
as
the sensor type.
Wireless Zone <###> Screen—Sensor Type
Tip:
You can alternatively use the touchscreen
keypad to enter the two-digit code to select the
Sensor Type
.
4. Tap
▼
.
Step 3: Select the Sensor Equipment Type
Note:
If you selected
04-Interior Follower, 06-24-
Hour Silent Alarm, 07- 24-Hour Audible Alarm, 08-
24-Hour Auxiliary Alarm, 10-Interior with Delay
, or
23-No Response Type
in “Step 2: Select a Sensor
Type” above, you must also select the
Sensor
Equipment Type
. If you selected a different
Sensor
Type
, skip this step and continue with “Step 4:
Select the Equipment Code” below.
1. At the Wireless Zone <###> screen, highlight
Sensor Equipment Type.
2. Under Sensor Equipment Type, choose Contact
or Emergency or Motion. Available options vary
depending on the selected Sensor Type.
3. Tap
▼
.
Step 4: Select the Equipment Code
Next, select the four-digit equipment code. For a list of
codes, see “Equipment Code.”
1. At the
Wireless Zone <###>
screen, highlight
Equipment Code
.
2. Tap to expand the list.
3. Tap to select the desired equipment code from list.
Wireless Zone Screen—Equipment Code
Tip:
You can alternatively use the touchscreen
keypad to enter the four-digit
Equipment Code
.
See “Equipment Code.”
4. Tap
▼
.
Step 5: Enter the Serial Number (TX ID)
Next, enter the 7-digit TX ID (this is product’s serial
number) for the sensor or peripheral. This is typically
af
fi
xed to the product and/or its packaging. To enter the
number, choose one of these options:
»
Touchscreen Keypad Entry:
Use the touchscreen
keypad to type the TX ID into the system.
OR
»
Learning Mode Entry:
Place the GC3 Panel into
Learning Mode and then trigger the sensor twice
to transmit the TX ID from the sensor to the GC3
Panel.


