System Overview
1-25
Replicator Port
An 80-pin replicator port is provided on the rear panel of the A770. This port
expends two SIO, two USB2.0, PIO and a VGA port. Use the replicator port
to connect your A770 into docking station. The docking station controls the
power and provides connections to all of the external devices for your A770 in
one easy hook-up.
Power Port
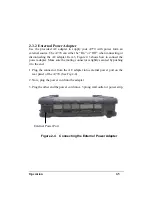
If the A770 is to be in use for an long continuous period, connect the external
power adater into the power port. Then plug the power cord into a 3-prong
grounded wall socket to provide external power to the A770. The power port
is located on the rear panel of the A770.
IEEE 1394 Port
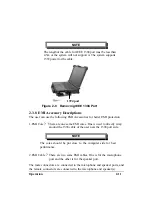
The A770 provides a standard IEEE 1394 port for high speed connections.
The “High Speed Serial Bus” is located on the right side panel, next to the audio
jacks.
Audio Connecitons
The A770 comes standard with two speakers and two audio hook-up jacks.
The jacks are located on the right side of the A770, adjacent to the PCMCIA
slots.
1-5.5 Battery Pack
The primary battery is Li-Ion type. The capacity of each cell is 2200mAH or
more. 3.7V, 12 cells are used in one pack. The output voltage of the battery
pack is 11.1VDC, so the battery pack provides 97 watts or more to the
notebook computer.
The battery pack connector board provides the interface between the battery
cells and DC/DC board.
Содержание A770
Страница 1: ...A770 ENHANCE SERIES NOTEBOOK OPERATOR S MANUAL MITAC Technology Corporation P N 799001180012 R00 ...
Страница 2: ......
Страница 11: ...i Open Size With Rubber Bumper 315mm W 70mm H 260mm D Weight 14 3 lbs 6 5 kg ...
Страница 15: ...iii 2 4 5 Wireless LAN Utility Installation PROSET 2 18 ...
Страница 17: ...v 4 4 Cleaning 4 2 ...
Страница 19: ...vii List of Tables Table 1 1 Standard A770 Notebook Computer 1 2 ...
Страница 20: ...viii ...
Страница 26: ...1 6 System Overview 9 Carring Handle 10 Opening Latch 11 LCD Rubber Bumpers Figure 1 2 Features of the A770 ...
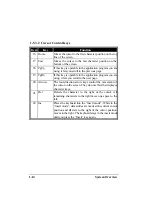
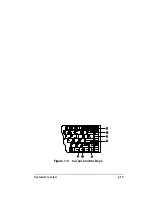
Страница 35: ...System Overview 1 15 Figure 1 6 Cursor Control Keys ...
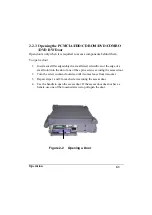
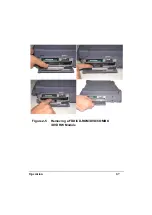
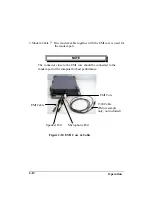
Страница 54: ...Operation 2 7 Figure 2 5 Removing a FDD CD ROM DVD COMBO DVD RW Module ...
Страница 66: ...Operation 2 19 2 When the TSRC XP htm file appear then select START Control Panel button ...
Страница 67: ...Operation 2 20 3 When the Control Panel screen appear then click on performance and Maintenance button ...
Страница 68: ...Operation 2 21 4 When the Performance and Maintenance screen appear and then click on System button ...
Страница 69: ...Operation 2 22 5 When the System Properties screen appear and then click on Hardware and Device Manager button ...
Страница 71: ...Operation 2 24 7 When the Unknown Device Properties screen appear and then click on Reinstall Driver button ...
Страница 73: ...Operation 2 26 10 When the Hardware Update Wizard screen appears click on Finish button ...
Страница 101: ...SetupConfiguration Utility 3 20 4 Use IRQ5 as below ...

