Operation
2-8
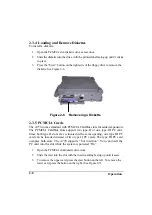
2-3.4 Loading and Remove Diskettes
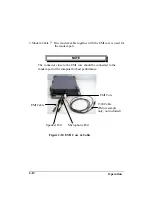
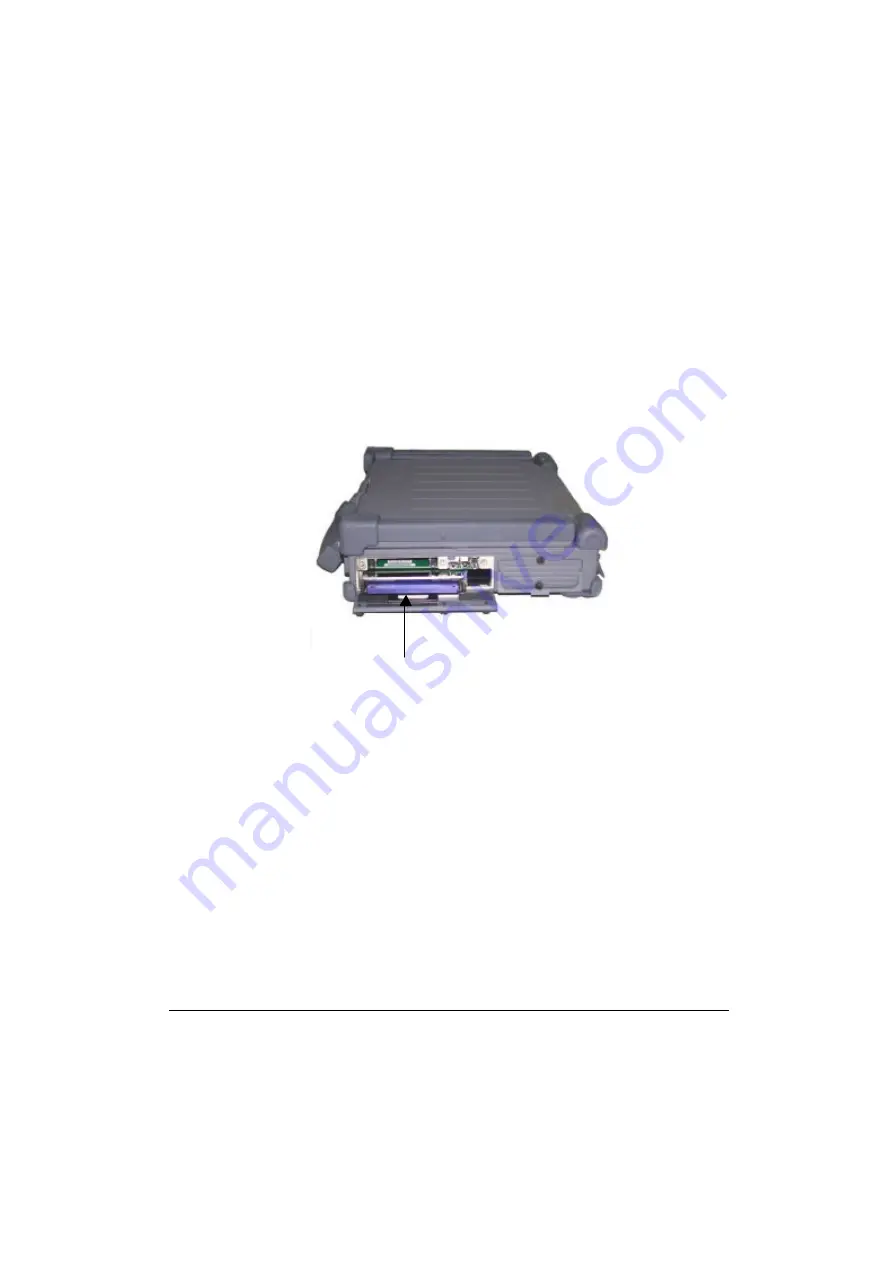
To install a diskette,
1. Open the PCMCIA slot/ diskette drive access door.
2. Slide the diskette into the drive with the printed label facing up until it clicks
in place.
3. Press the “Eject” button, on the right side of the floppy drive to remove the
diskette. See Figure 2-6.
2-3.5 PCMCIA Cards
The A770 comes standard with PCMCIA CardBus slots for added expansion.
The PCMCIA CardBus slots support two type-II or one type-III PC card.
Since both type II slots are co- located in the same opening, one type III PC
card can be inserted instead of two type II PC cards. The type III PC card
occupies both slots. The A770 supports “ hot insertion”. You can insert the
PC card into the slot while the system is powered “On”.
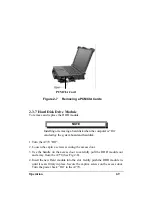
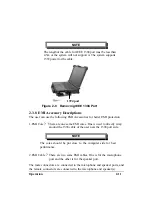
1. Open the PCMCIA slot/diskette drive door.
2. Slide the card into the slot with the insert marking facing up until it seats.
3. To remove the upper card, press the eject button on the left. To remove the
lower card, press the button on the right. (See Figure 2-7).
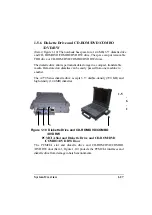
Figure 2-6 Removeing a Diskette
Содержание A770
Страница 1: ...A770 ENHANCE SERIES NOTEBOOK OPERATOR S MANUAL MITAC Technology Corporation P N 799001180012 R00 ...
Страница 2: ......
Страница 11: ...i Open Size With Rubber Bumper 315mm W 70mm H 260mm D Weight 14 3 lbs 6 5 kg ...
Страница 15: ...iii 2 4 5 Wireless LAN Utility Installation PROSET 2 18 ...
Страница 17: ...v 4 4 Cleaning 4 2 ...
Страница 19: ...vii List of Tables Table 1 1 Standard A770 Notebook Computer 1 2 ...
Страница 20: ...viii ...
Страница 26: ...1 6 System Overview 9 Carring Handle 10 Opening Latch 11 LCD Rubber Bumpers Figure 1 2 Features of the A770 ...
Страница 35: ...System Overview 1 15 Figure 1 6 Cursor Control Keys ...
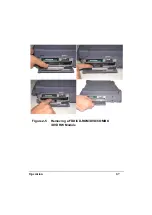
Страница 54: ...Operation 2 7 Figure 2 5 Removing a FDD CD ROM DVD COMBO DVD RW Module ...
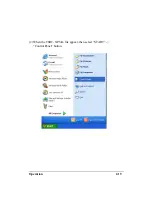
Страница 66: ...Operation 2 19 2 When the TSRC XP htm file appear then select START Control Panel button ...
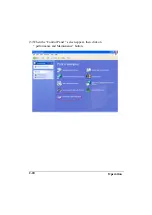
Страница 67: ...Operation 2 20 3 When the Control Panel screen appear then click on performance and Maintenance button ...
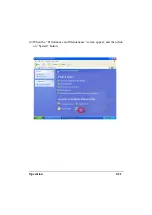
Страница 68: ...Operation 2 21 4 When the Performance and Maintenance screen appear and then click on System button ...
Страница 69: ...Operation 2 22 5 When the System Properties screen appear and then click on Hardware and Device Manager button ...
Страница 71: ...Operation 2 24 7 When the Unknown Device Properties screen appear and then click on Reinstall Driver button ...
Страница 73: ...Operation 2 26 10 When the Hardware Update Wizard screen appears click on Finish button ...
Страница 101: ...SetupConfiguration Utility 3 20 4 Use IRQ5 as below ...

