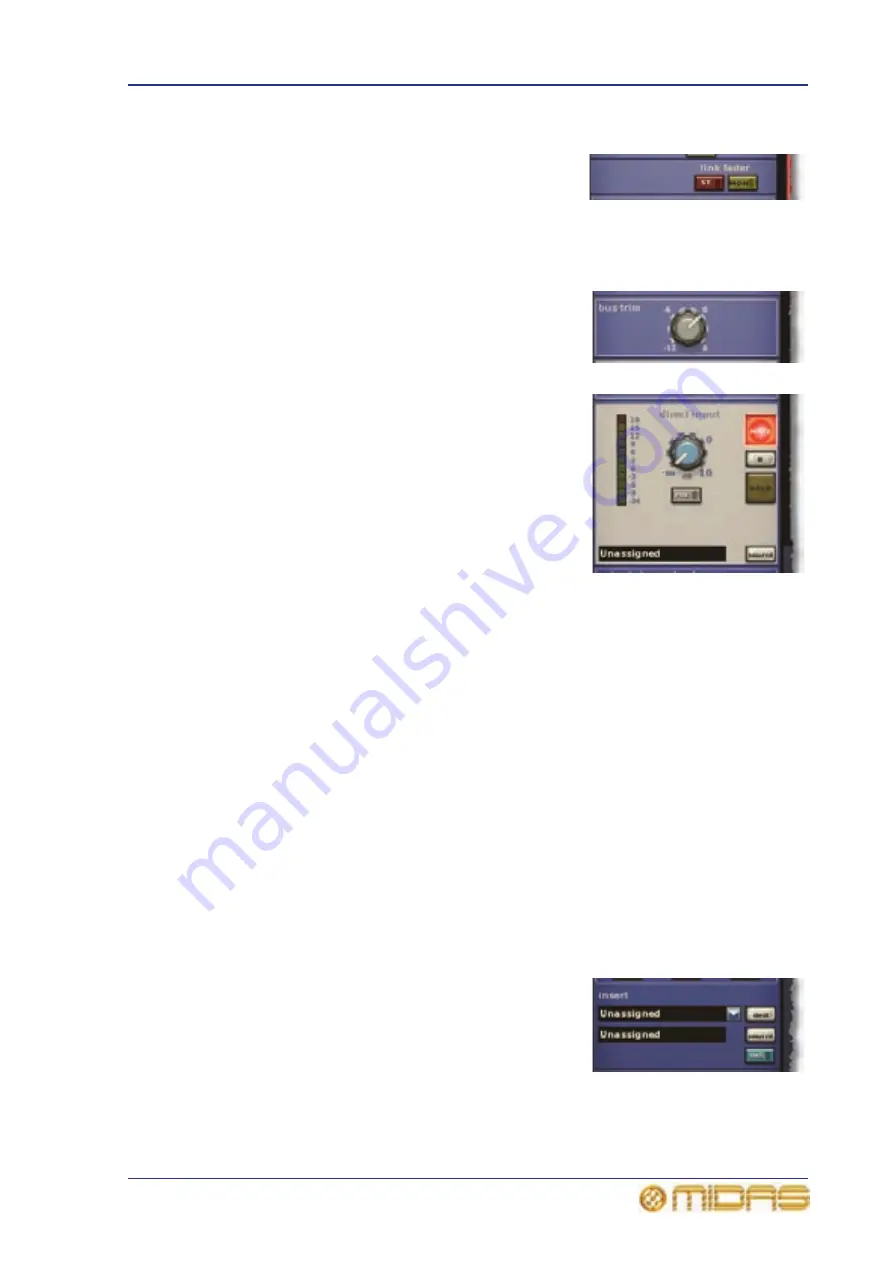
Output channel configuration controls
303
PRO6 Live Audio System
Owner’s Manual
Fader linking (GUI only)
The link fader section (matrix only), has an ST and
a MON button for linking the matrix channel fader
to the stereo or mono master faders, respectively.
Control of the stereo master faders reverts to the
highest fader.
Bus trim (GUI only)
The bus trim section (all output channels except
return) has a control for fine adjustment of the
gain, in the range -12 dB to +6 dB.
Direct input (GUI only)
The direct input section (all output channels
except return) provides an internal connection to
effects etc. or an external input into the output
from an effect or line I/O unit. It allows you to take
a signal directly out of a defined point in the input
channel’s signal path and route it to either an
internal assignable effect or to one of the physical
outputs (a physical connection at one of the line I/O
boxes). This function is optional and assigned on a
channel-by-channel basis.
This section is deliberately distanced from main
channel panel controls because it is a limited resource and unused on many channels.
Selection of signal path source can only be carried out via the GUI.
This section has similar functionality to the direct output section on each input
channel, see “Direct input (GUI only)” on page 303.
For routing information, see Table 22 “Navigating to the Patching screen” on page 376.
Safes
Each output channel (except return) has six types of output channel safes that each
each protects a specific control/area from the automation system.
The safes on the return channel are input channel types, of which there are only five
available (there is no dynamics).
You can only operate the safe switches via the channel strips (control surface and GUI),
which also provide on/off status information. The status of some of the safes is
displayed via LEDs in the output fast strips and master strips on the control surface.
For more information on what areas are protected by each safe, see Table 35 “Channel
and group safe areas” on page 415.
Insert (GUI only)
You can configure the send and return points of the
aux, matrix and master outputs in the insert
section of the configuration processing area. The
returns have a separate insert processing area,
which has the same function.
For routing information, see Table 22 “Navigating to
the Patching screen” on page 376.
Содержание PRO6
Страница 2: ......
Страница 4: ......
Страница 6: ......
Страница 10: ......
Страница 14: ...xvi Precautions PRO6 Live Audio System Owner s Manual...
Страница 24: ...xxvi Contents PRO6 Live Audio System Owner s Manual...
Страница 25: ...PRO6 Live Audio System Owner s Manual Volume 1 Overview...
Страница 26: ......
Страница 30: ...4 Chapter 1 Introduction PRO6 Live Audio System Owner s Manual...
Страница 42: ...16 Chapter 2 PRO6 Live Audio System PRO6 Live Audio System Owner s Manual...
Страница 50: ...24 Chapter 3 About The PRO6 Control Centre PRO6 Live Audio System Owner s Manual...
Страница 51: ...PRO6 Live Audio System Owner s Manual Volume 1 Getting Started...
Страница 52: ......
Страница 59: ...PRO6 Live Audio System Owner s Manual Volume 2 Basic Operation Of The PRO6...
Страница 60: ......
Страница 64: ...38 Chapter 5 Before You Start PRO6 Live Audio System Owner s Manual...
Страница 104: ...78 Chapter 8 Patching PRO6 Live Audio System Owner s Manual...
Страница 131: ...PRO6 Live Audio System Owner s Manual Volume 3 Advanced Operation And Features...
Страница 132: ......
Страница 136: ...110 Chapter 10 Stereo Linking PRO6 Live Audio System Owner s Manual...
Страница 144: ...118 Chapter 11 Panning PRO6 Live Audio System Owner s Manual...
Страница 148: ...122 Chapter 12 Soloing PRO6 Live Audio System Owner s Manual...
Страница 150: ...124 Chapter 13 Muting PRO6 Live Audio System Owner s Manual...
Страница 192: ...166 Chapter 18 Copy And Paste PRO6 Live Audio System Owner s Manual...
Страница 242: ...216 Chapter 24 User Libraries Presets PRO6 Live Audio System Owner s Manual...
Страница 246: ...220 Chapter 25 File Management PRO6 Live Audio System Owner s Manual...
Страница 250: ...224 Chapter 26 Using Other Devices With The PRO6 PRO6 Live Audio System Owner s Manual...
Страница 267: ...PRO6 Live Audio System Owner s Manual Volume 4 Description...
Страница 268: ......
Страница 335: ...PRO6 Live Audio System Owner s Manual Volume 5 Appendices...
Страница 336: ......
Страница 365: ...Audio signal path 339 PRO6 Live Audio System Owner s Manual Audio signal path...
Страница 366: ...340 Appendix C Klark Teknik DN370 GEQ PRO6 Live Audio System Owner s Manual...
Страница 372: ...346 Appendix D Klark Teknik DN780 Reverb PRO6 Live Audio System Owner s Manual...
Страница 376: ...350 Appendix E I O Modules PRO6 Live Audio System Owner s Manual...
Страница 400: ...374 Appendix I Documentation PRO6 Live Audio System Owner s Manual...
Страница 511: ...Return 485 XL8 Live Performance System Owner s Manual Gate Not applicable EQ Not applicable...
Страница 524: ...498 Appendix N Parameters Affected By Copy And Paste XL8 Live Performance System Owner s Manual...
Страница 568: ...542 Appendix O Parameters Affected By Stereo Linking XL8 Live Performance System Owner s Manual...
Страница 612: ...586 Glossary PRO6 Live Audio System Owner s Manual...


